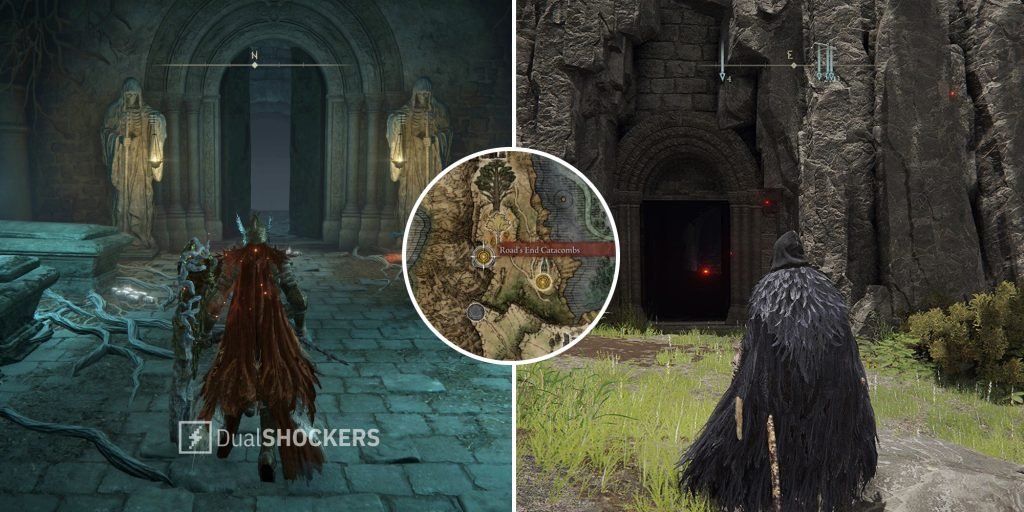
Road’s End Catacombs is one of those hidden dungeons dotting the world of Elden Ring. Specifically, this minor dungeon can be found along the western edge of Liurnia of the Lakes. While appearing straightforward at first, Road’s End Catacombs has quite a few illusory walls to contend with.
Plus, it contains some great Spirit Ashes and a strong Strength weapon in the Watchdog’s Staff. Read on to uncover all of the secrets Road’s End Catacombs has to offer.
How To Reach Road’s End Catacombs
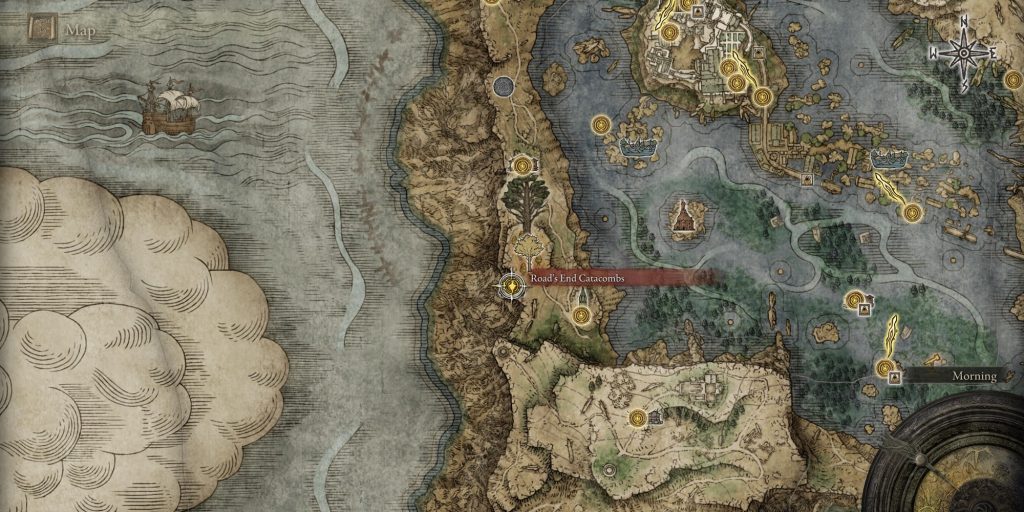
While it appears just to the west of the Converted Tower on the map, it’s a little more complicated to reach.
- Head north from the Converted Tower and take the fork down the eastern path that runs just beside/below the minor Erdtree hill—rather than the path that leads right to it.
- Follow this eastern path up and then veer off the path and head west once you’ve cleared the hill.
- If you’ve reached Revenger’s Shack, you’ve gone a little bit too far.
- You’re looking for a path that runs below the western side of the minor Erdtree hill, running along the very western edge of the map.
- Follow this path south, riding past some Giant Bats along the way, and you will find the catacombs entrance in the mountainside.
Exploring Road’s End Catacombs
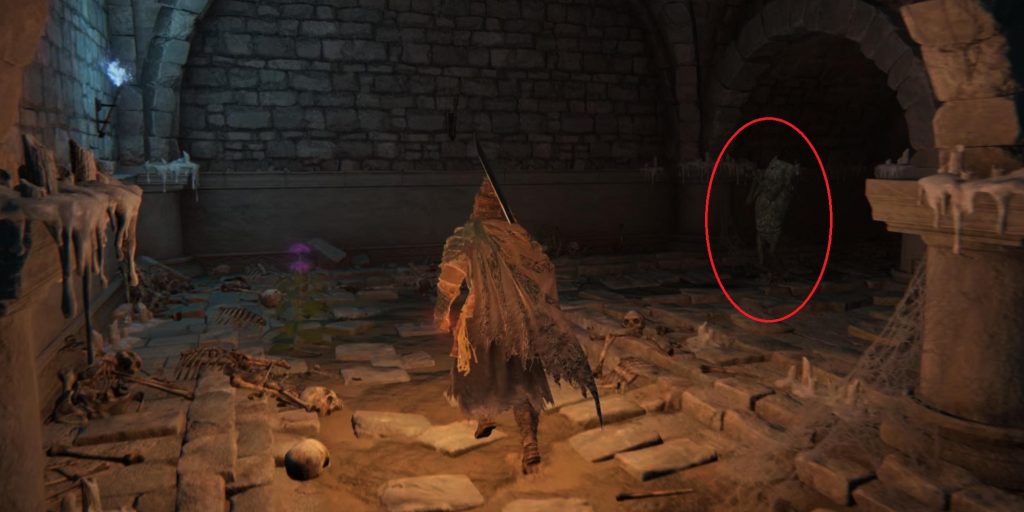
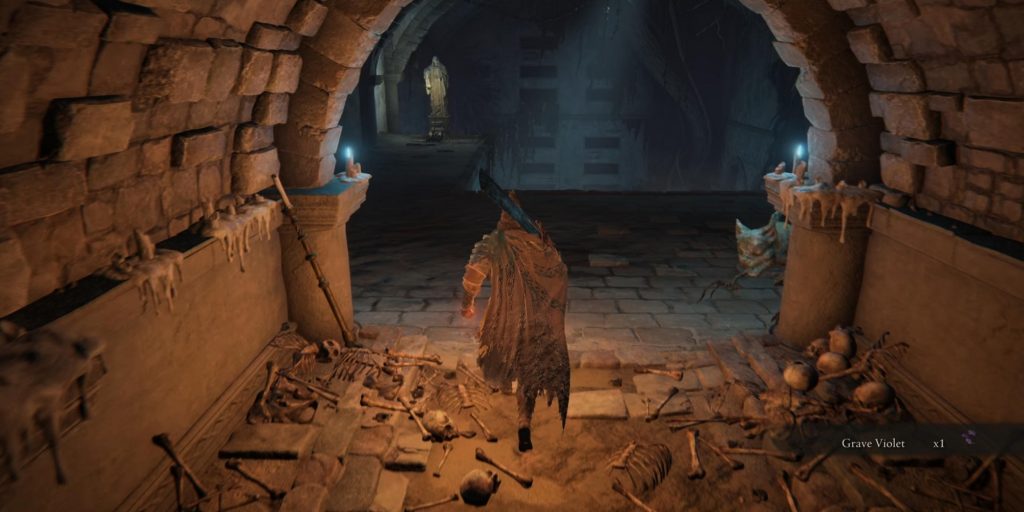
From the Road’s End Catacombs site of grace, continue down, deeper into the catacombs. Make sure you are carrying a torch or have a lantern equipped at your belt—Road’s End Catacombs is crawling with sneaky Imps who like to leap out of the shadows. Case in point, when you first reach the corner junction, watch out for an aggressive Imp leaping toward you. Dispatch the foe and loot the Grave Violet, then continue onward.
Another Imp waits for you in the next room, attacking from just behind the right of the doorway. Ahead, you will spot the dungeon lever. Pull the lever, and you will be rewarded with the familiar message “Somewhere, a heavy door has opened” and the sound of the boss door opening somewhere in the dungeon—now you just need to find it.
From this level, head down the stairs to the floor below and collect the Grave Glovewort [2] and two Grave Glovewort [3]. Take the next stairs down and defeat the Imp hurling knives at you from below.
Beware of the next hall. An Imp ambusher waits in the alcove on the left, and a pressure plate trap sits at the hall intersection. Stepping on the plate will send three arrows shooting toward you from down the hall. Defeat the Imp and loot the Grave Glovewort [2] in the alcove.
Proceed into the next room and loot the Grave Glovewort [2] just to the right as you enter. Continue around the room’s central pillar to the far side and loot the Grave Glovewort [3].
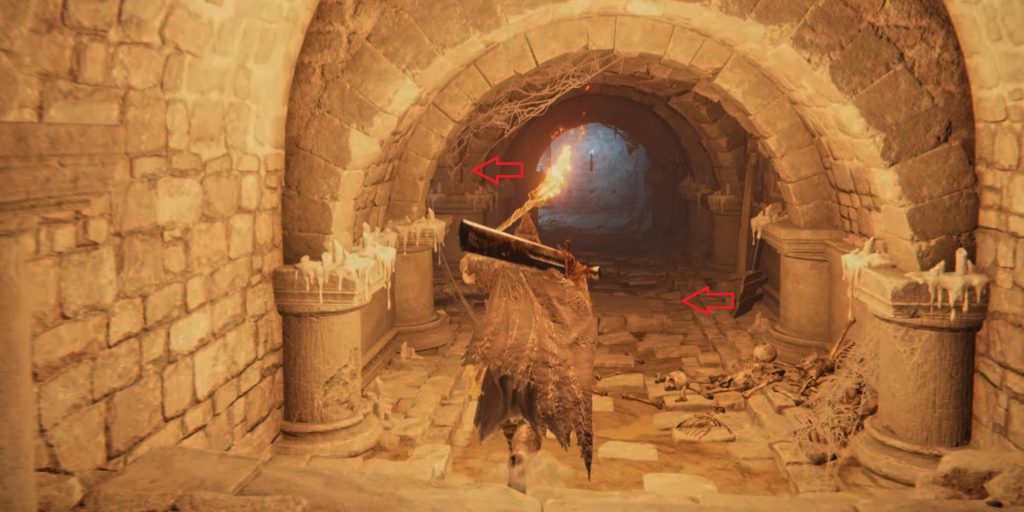
You’ll notice an alcove dead-ending at the far side of this room. This is your first illusory wall of the dungeon. Strike at it to reveal the room beyond—you’ll spot an altar at the far side with a chest waiting for you.
Be wary: you will encounter three Imps in this room. One will drop down from the wall at the far end, pulling your attention, but there are two more Imps acting like statues, flanking either side of the room’s entrance.
After clearing the three Imps, head over to the altar and loot the chest, earning yourself the Raya Lucaria Soldier Ashes.
This path has now reached its end, yet still no boss door. Retrace your steps back the way you came (and be careful of the pressure plate trap in the hallway).
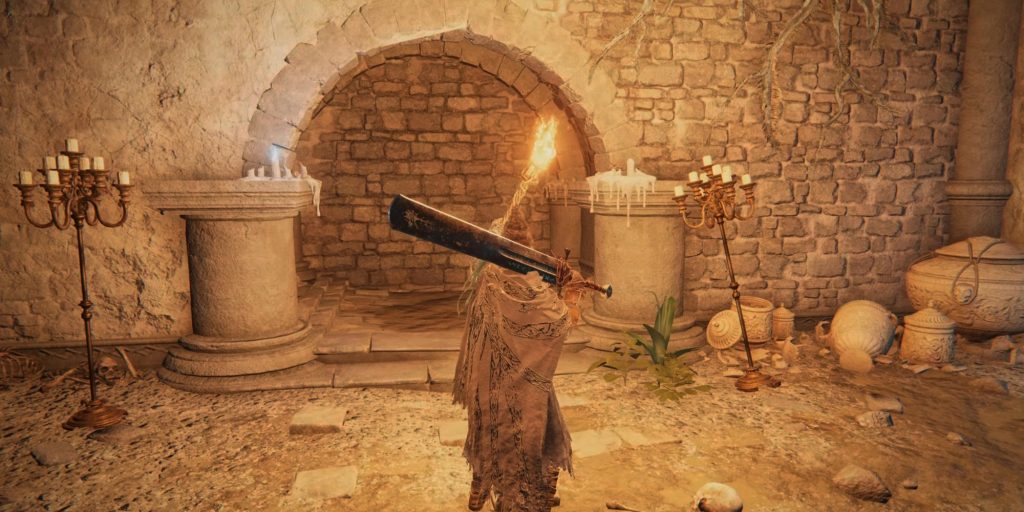
Pause at the bottom of the first set of stairs you come across. You see that glowing blue torch on the wall? The two bricked-over alcoves just to its left are illusory walls. Inside the newly revealed room, you will find two Imps—one on the left and one on the right. They like to jump on your back with a vicious grab attack, so be careful. After defeating the two Imps, you will find one Grave Glovewort [3], one Human Bone Shard, and Watchdog’s Staff.
Despite what the name would imply, Watchdog’s Staff is actually a Strength weapon, and a pretty great one at that.
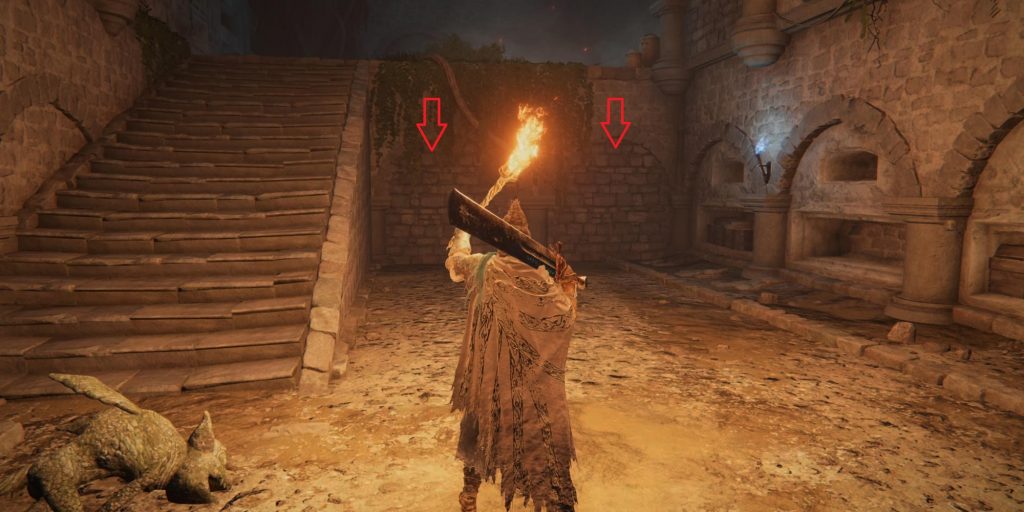
Now that you’ve cleared out this room, head up the next set of stairs and pause at the next landing. Face the corner to the right of the stairs. From left to right, the first and fourth alcoves are illusory walls. Inside, you’ll find a single patrolling Imp, one Ghost Glovewort [2], and one Rune Arc. Facing the 4th alcove, you’ll see the path forward—a thin hallway leading deeper into the catacombs.
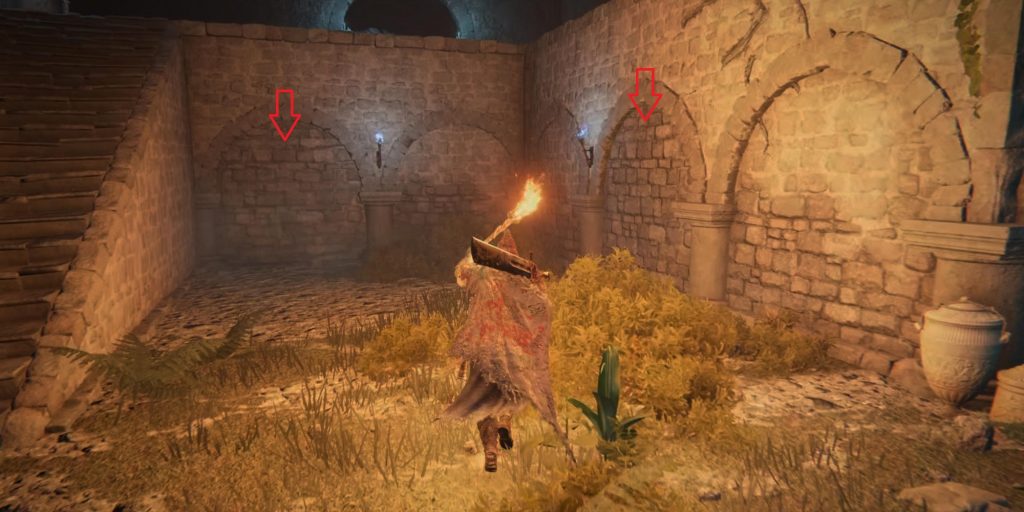
Head down this hallway to where it dead-ends at the bottom. Loot the Root Resin off of the corpse, then swing at yet another illusory wall of the dungeon to reveal the room beyond. Follow the stairs down, around the corner, and a Grave Glovewort [2] at—you guessed it—another illusory wall. Luckily, this is the final one. Beyond, you’ll spy the familiar boss doors, already opened from when you pulled the lever back at the beginning of the dungeon.
Boss: Spirit-Caller Snail
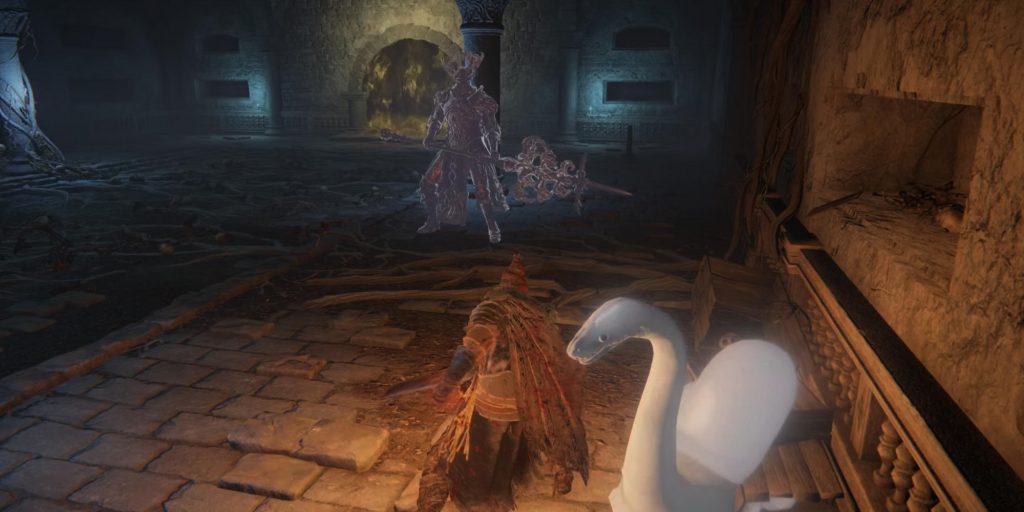
This boss is a bit irregular, but a fairly simple one. When you first enter, you’ll be met with a very aggressive spirit Crucible Knight wielding the Siluria’s Tree spear weapon. Be wary of this enemy—he can do quite a bit of damage—but he is not your primary target. You can attack him and defeat him, but he will simply reappear again. Instead, look around the room for a small spot with a white glow about it. This white glow marks your true target: the Spirit-Caller Snail.
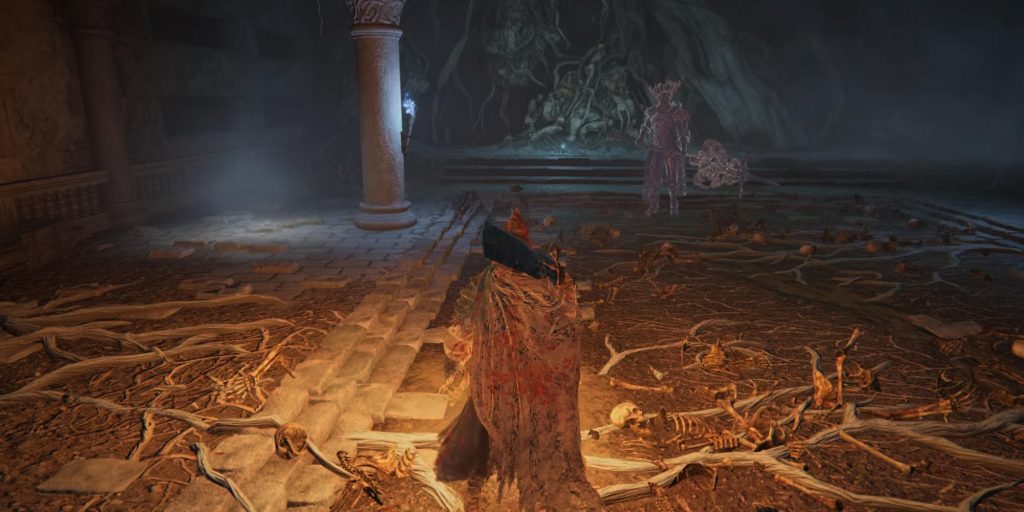
When you strike the Spirit-Caller Snail, it will appear for a short moment before disappearing again and teleporting to a different location in the boss arena. Hunt the white glow down again, avoiding the aggressions of the Crucible Knight, and continue to strike at the Spirit-Caller Snail when you can. The Spirit-Caller Snail is fairly squishy, so as long as you are able to avoid the worst of the Crucible Knight’s attacks and continue to pursue the white glow, you’ll defeat this boss in no time.
Upon defeat, The Spirit-Caller Snail will drop 3,000 Runes and the Glintstone Sorcerer Ashes.
- amazon prime gaming
- axie infinity
- Casino Games
- coingenius
- Dualshokers
- EA Sports
- Elden Ring
- Evil Geniuses
- Gaming
- gaming headset
- gaming pc
- madden nfl
- Nintendo
- Online casino games
- Originals
- pc games
- plato
- plato ai
- plato data intelligence
- plato game
- plato gaming
- platodata
- platogaming
- playstation
- prime gaming
- Team SoloMid
- xbox
- zephyrnet