Collectibles are everywhere in Star Wars Jedi: Survivor and are sure to keep completionists busy for a decent while. Between Chests, Databanks, Priorite Shards, Jedha Scrolls, Seeds, Force Points, Fractures, and hidden bosses, there’s plenty to do. The best way to complete everything is by clearing each named location methodically, so here are all of the collectible locations for Jedi: Survivor at the Loading Gantry outside of the Lucrehulk ship on Koboh.
All Loading Gantry Collectible Locations in Jedi: Survivor
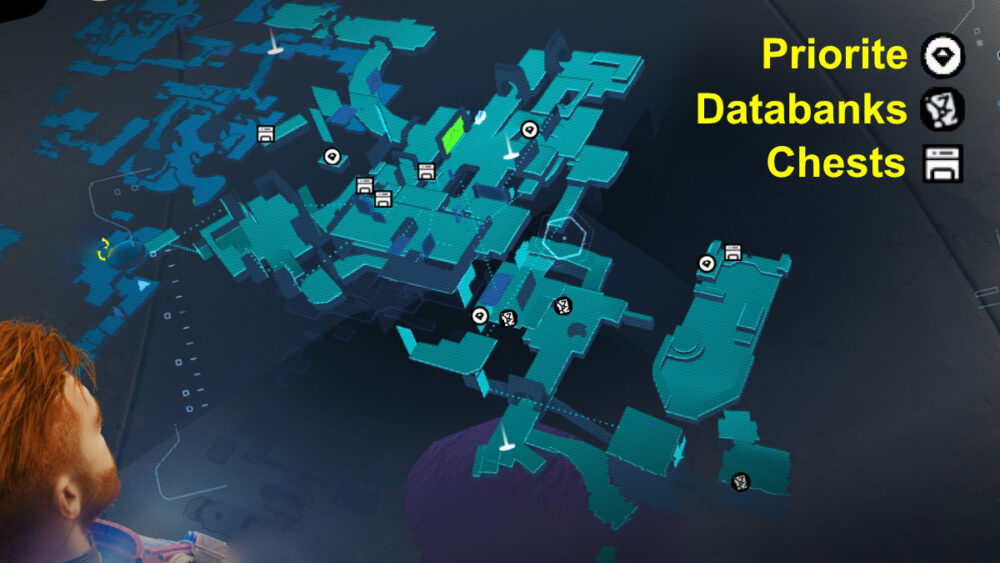
We’ve labeled all of the locations on the Loading Gantry map below and have descriptions for each collectible location to add context. Some of these are more difficult to find though, so you’ll find supplementary screenshots for better clarity.
All Priorite Shards
The first Priorite Shard is on the ground level by on the large platform out by the bog. You’ll need to jump across a sinking block to reach the platform. Climb atop the large cargo containers to find the Priorite Shard.
The second Priorite Shard is nearby on the ground level. Back at the Lucrehulk ship there’s a landing above one of the wrecked AATs with an elevator access point. Go to that landing and carefully pass around the storage tanks on the left-hand side to a hidden nook to find the Priorite Shard.
The third Priorite Shard is up in the Lucrehulk above. If you already have access to the lift, use that to get to an open hanger area where the chest is nearby. If not, you’ll need to work through the level until you get to a large room that looks like a hanger ripped in half. It’s referred to as the Hanger Rafters in-game. Look for a ramp that goes down one level in the main hanger. The Priorite Shard is under the ramp.
The last Priorite Shard is within the Lucrehulk on upper maintenance decks. Recall the Magnaguard fight in the final room past the two Bedlam Raiders. The Priorite Shard is on a small platform on the bottom level in the room where the Bedlam Raiders spawn. Defeat the Bedlam Raiders then look out towards the larger room and you’ll see the twinkle of the Priorite Shard. You can also easily grab this after the last chest mentioned later in this guide.

Image by PC Invasion
All Databank Entries
You can find all three Databank Entries at the following locations for the Loading Gantry in Jedi: Survivor. The first is on the ground level at one of the beige AAT tanks. It’s near the center of the area and difficult to miss.
The next Databank Entry is also accessible from the ground floor. There’s a landing directly above the same tank which you can access via ramp. Approach the storage tanks on the left side and you’ll see the Databank Entry.
You’ll find the last Databank Entry on a platform out towards the direction of the bog. Just follow the same path up from the ground floor that you take during the first playthrough (no shortcuts). You’ll see it on a piece of wreckage that you need to jump to.
All Chests
The chest locations are more spread out across the Loading Gantry than the Databank Entries. The first is on the ground floor past the tanks on the large platform at the edge of the bog. You’ll need to jump onto a sinking block and again to the platform. Take a left around some storage crates and you’ll see the chest at the end out in the open. It contains the Short Goatee hair style for Cal.
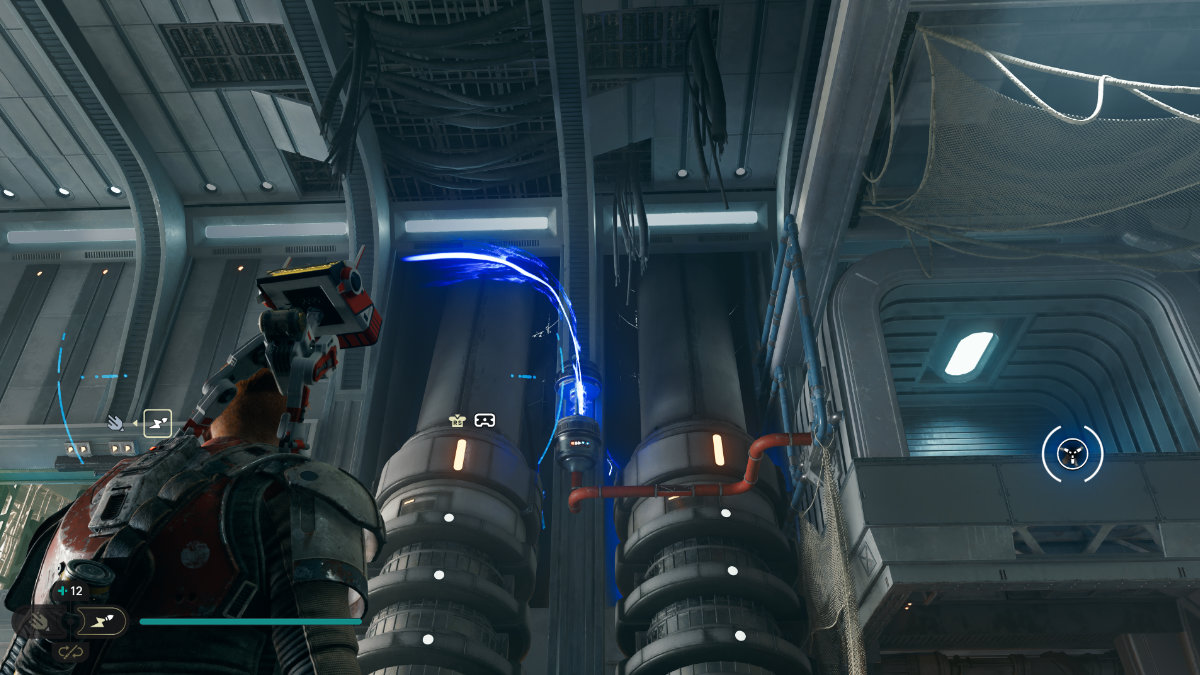
Image by PC Invasion
The next chest is up in the Lucrehulk ship. If you already have access to the lift, use that to get to an open hanger area where the chest is nearby. If not, you’ll need to work through the level until you get to a large room that looks like a hanger ripped in half. It’s referred to as the Hanger Rafters in-game. There is a small room above lift in that room which contains the chest. You’ll need BD-1’s Electro Dart ability to activate a nearby power coupler to open a grappler that gets you to that room. This is where to find the color patterns for the popular Commander outfit pants.
One level above is a hallway that’s by no means OSHA compliant with the electrical currents freely arcing everywhere. The chest is at the far end when facing towards the interior of the ship. You can wall run to the platform on the other side of the electricity and then drop down and air dash into the room where the chest is. This chest contains the Enforcer blaster barrel.
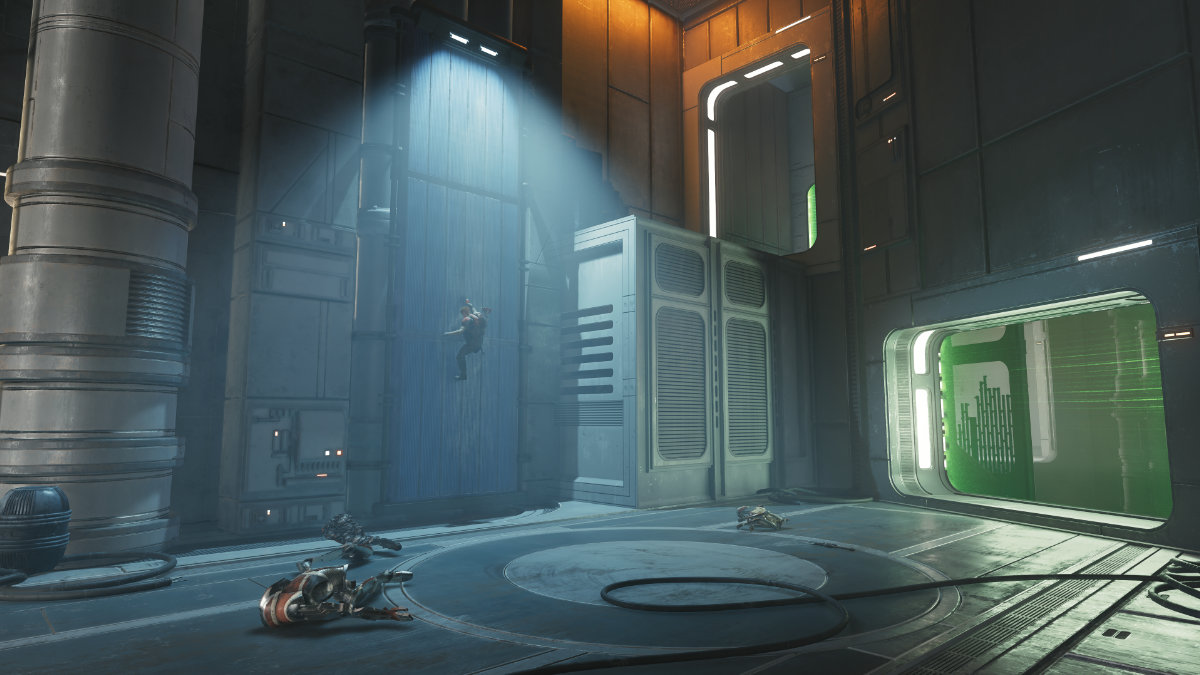
Image by PC Invasion
The last two chests are within the Lucrehulk on upper maintenance decks. Recall the Magnaguard fight in the final room past the two Bedlam Raiders. The room where the Bedlam Raiders spawn has a large vertical maintenance and cargo area above and you can climb up the walls to the maintenance deck.
From there, you need to jump dash through the ray shield and wall-run to the recess which you can mantle back and forth up to the next level. The fourth chest is at the top on that maintenance platform.
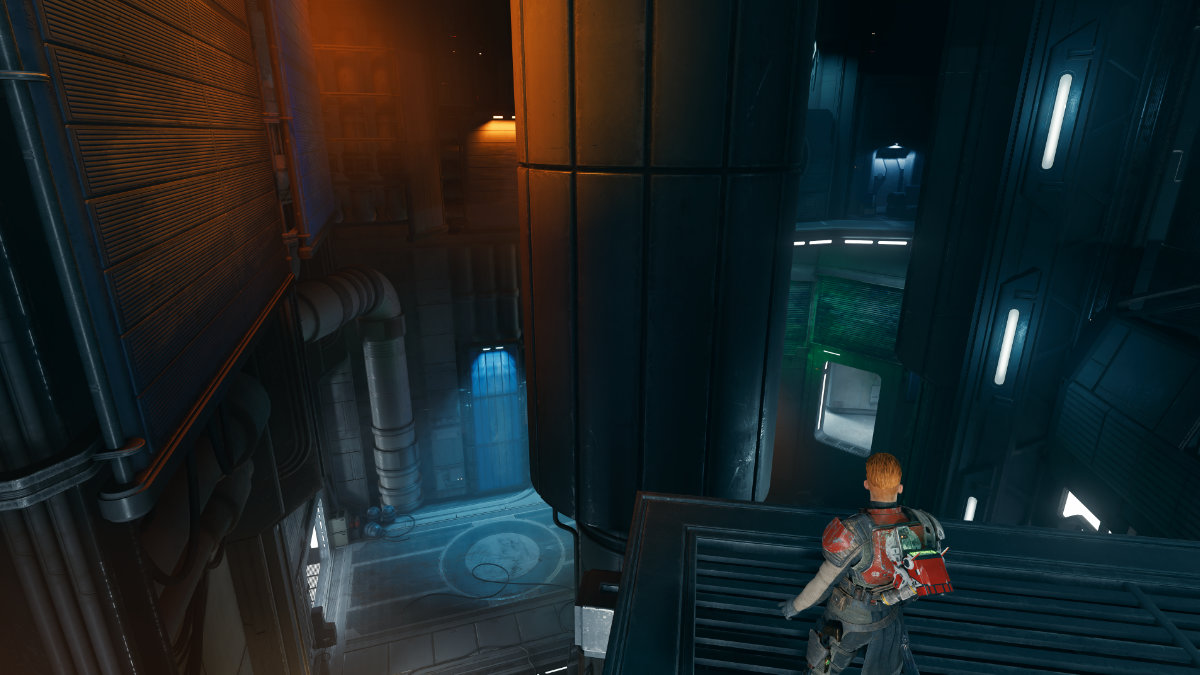
Image by PC Invasion
Continue to the left from that chest to the next platforming section. You should be familiar with these mechanics by now. You’ll need to wall-run then jump to a vertical wall and jump up several feet before transferring left to another wall-run and transferring again to reach the far platform. Don’t forget to destroy the droids in stand-by mode before opening the chest. There’s also a wall you can slide down from that platform to leave this section.
That’s all of the collectible locations throughout the Loading Gantry in Jedi: Survivor. We also have a guide on where to find all of the Priorite Shards at Rambler’s Reach so you can buy more customization styles and where to find all 18 Bounty Puck locations related to bounty hunters.
- SEO Powered Content & PR Distribution. Get Amplified Today.
- EVM Finance. Unified Interface for Decentralized Finance. Access Here.
- Quantum Media Group. IR/PR Amplified. Access Here.
- PlatoAiStream. Web3 Data Intelligence. Knowledge Amplified. Access Here.
- Source: https://www.pcinvasion.com/all-loading-gantry-collectible-locations-in-star-wars-jedi-survivor/
- 1
- a
- ability
- above
- access
- accessible
- across
- add
- after
- again
- All
- already
- also
- an
- and
- Another
- approach
- ARE
- AREA
- around
- as
- At
- back
- BE
- Bedlam
- before
- below
- BEST
- Better
- between
- block
- bottom
- bounty
- buy
- by
- Cal
- CAN
- carefully
- Cargo
- Center
- clarity
- clearing
- Collectible
- collectibles
- complete
- compliant
- Containers
- context
- customization
- Dash
- Database
- destroy
- difficult
- direction
- directly
- do
- down
- Drop
- During
- each
- easily
- Edge
- electrical
- electricity
- end
- entry
- everything
- Everywhere
- facing
- familiar
- far
- Feet
- fight
- Final
- find
- First
- floor
- follow
- Following
- For
- force
- forth
- from
- Get
- go
- goes
- grab
- Ground
- guide
- Hair
- half
- has
- Have
- here
- hidden
- HTTPS
- if
- in
- in-game
- into
- Is
- IT
- Jedi
- jpg
- jump
- just
- Landing
- large
- larger
- last
- later
- leave
- left
- Level
- like
- location
- locations
- Look
- looks
- main
- maintenance
- map
- means
- Mechanics
- mode
- more
- named
- Near
- need
- Next
- no
- not
- now
- of
- on
- One
- open
- opening
- Other
- out
- outside
- pass
- Past
- path
- PC
- piece
- platform
- plato
- plato data intelligence
- platodata
- platogaming
- Plenty
- Point
- Points
- Popular
- power
- Raiders
- Ramp
- ray
- reach
- RELATED
- ripped
- room
- Run
- same
- second
- section
- see
- seeds
- several
- Short
- should
- side
- small
- So
- some
- Spawn
- spread
- Star
- Star Wars
- Star Wars Jedi: Survivor
- storage
- style
- Styles
- Take
- tank
- than
- that
- The
- then
- there
- These
- third
- this
- though
- three
- Through
- Throughout
- to
- To Leave
- top
- towards
- transferring
- two
- under
- until
- up
- upper
- use
- vertical
- via
- Wall
- way
- we
- when
- where
- while
- with
- within
- Work
- you
- zephyrnet