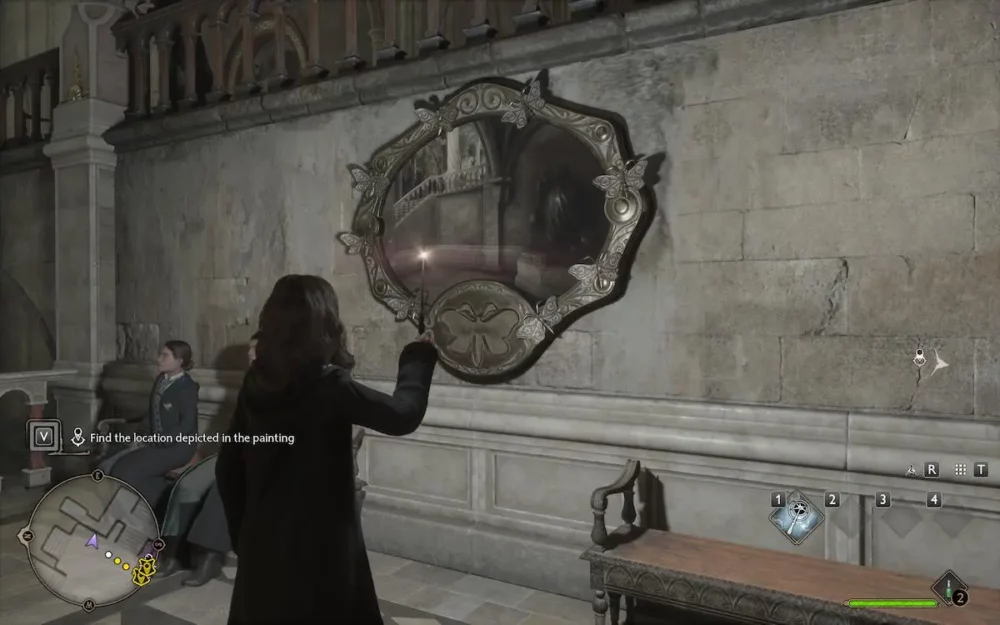
One of the many puzzles scattered across Hogwarts Legacy are the Moth Mirrors. There are 20 in total, but they can be tricky to discover and solve. These mirrors are found in various locations, both hidden and in the open. You must cast Lumos in front of the mirrors to reveal a location close by. Reading this guide can help you find all the Moth Mirror puzzle locations in Hogwarts Legacy.
Once you find that location, a moth should be hidden somewhere nearby. Casting Lumos near the moth gains its attention, as it’s attracted by the light — like most moths. Bring the moth back to the mirror, and you are rewarded with a Field Guide Page, which is one of the best ways to gain XP. Each Field Guide Page earns you 80 XP, so don’t ignore these puzzles.
Note: For more information, check out our Hogwarts Legacy guides and features hub.
Hogwarts Legacy: Where to find the Moth Mirror puzzle locations
The 20 Moth Mirror puzzles are both in the Hogwarts castle and the town of Hogsmeade. There are 15 in the castle and 5 in Hogsmeade. However, the ‘Like a Moth to a Frame’ side quest teaches you how to solve these puzzles. It can be found pretty early on in the game, and it’s hard to miss. Also, keep in mind some of these locations require you to unlock the Alohomora spell, and one location needs needs Depulso.

Screenshot by PC Invasion
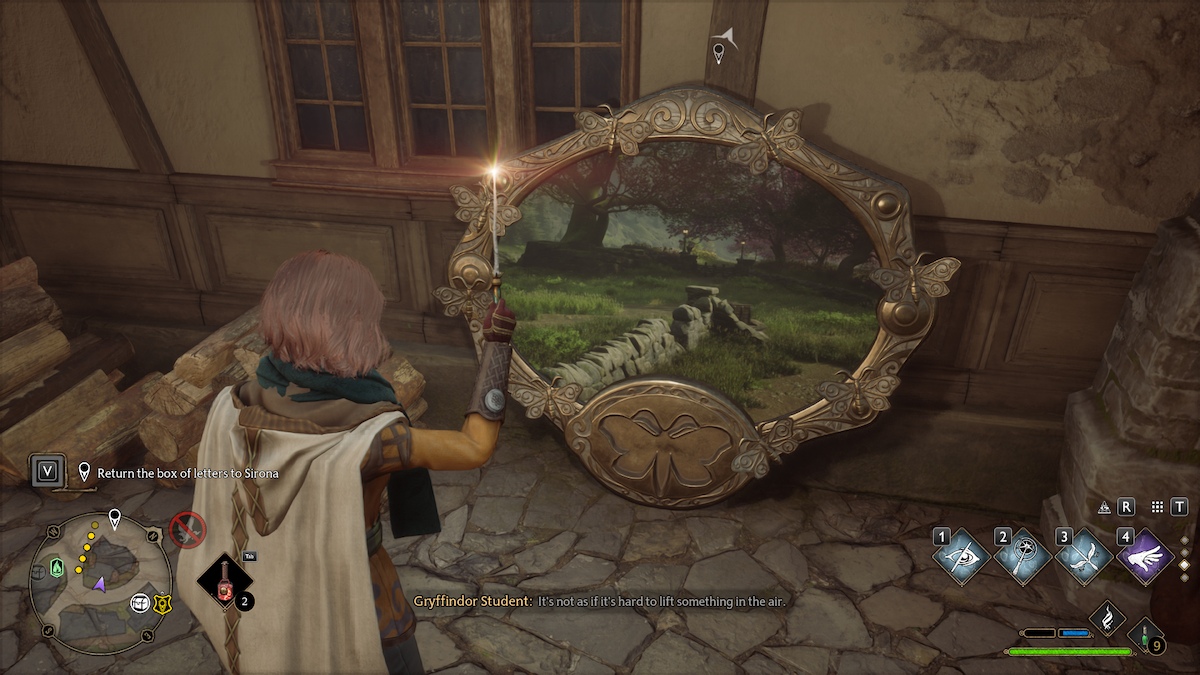
While it’s not necessary to complete this side quest to solve these puzzles, it instructs you on how to solve them properly, and rewards you with an outfit. Follow our guide to solving this first Moth Mirror puzzle, then continue reading this guide to complete the rest of the 19 puzzles.
Hogwarts Legacy: Castle Moth Mirrors puzzle locations
The Great Hall: Great Hall
#gallery-1 { margin: auto; } #gallery-1 .gallery-item { float: left; margin-top: 10px; text-align: center; width: 50%; } #gallery-1 img { border: 2px solid #cfcfcf; } #gallery-1 .gallery-caption { margin-left: 0; } /* see gallery_shortcode() in wp-includes/media.php */
-
- Screenshot by PC Invasion

-

- Screenshot by PC Invasion
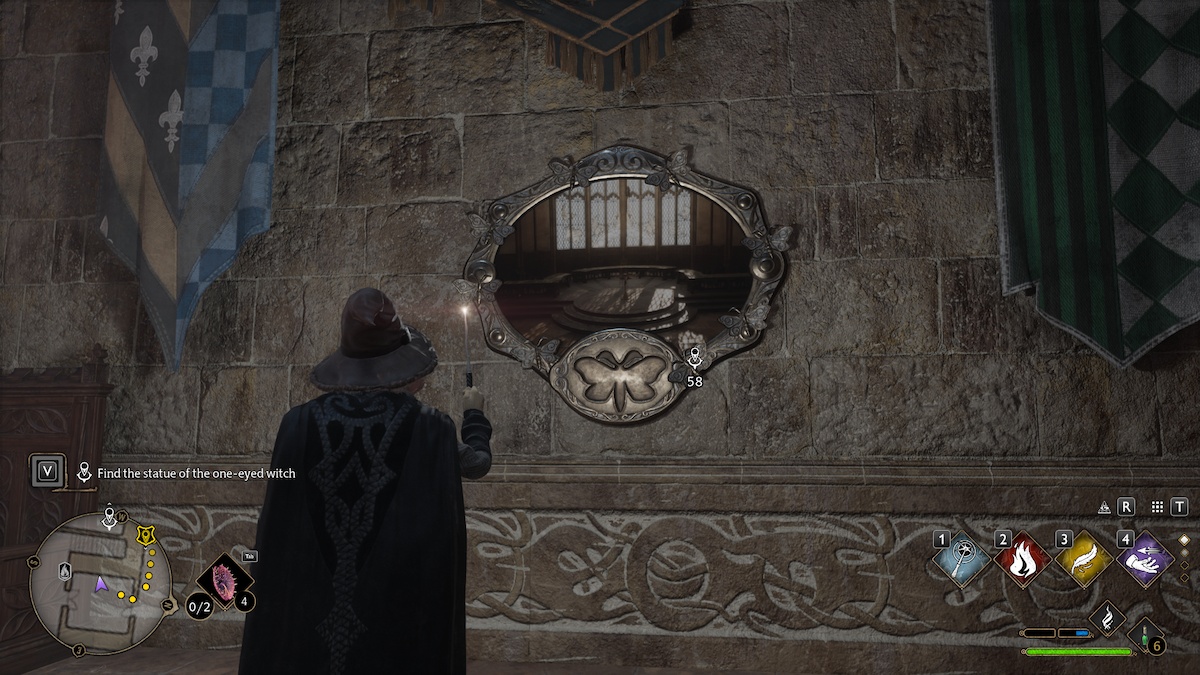
After fast traveling to the Great Hall Floo Flame, head right outside the entrance to the Great Hall. There, hangs a mirror to your left between some banners. It will show a picture of the very front of the Great Hall where the Professors sit.
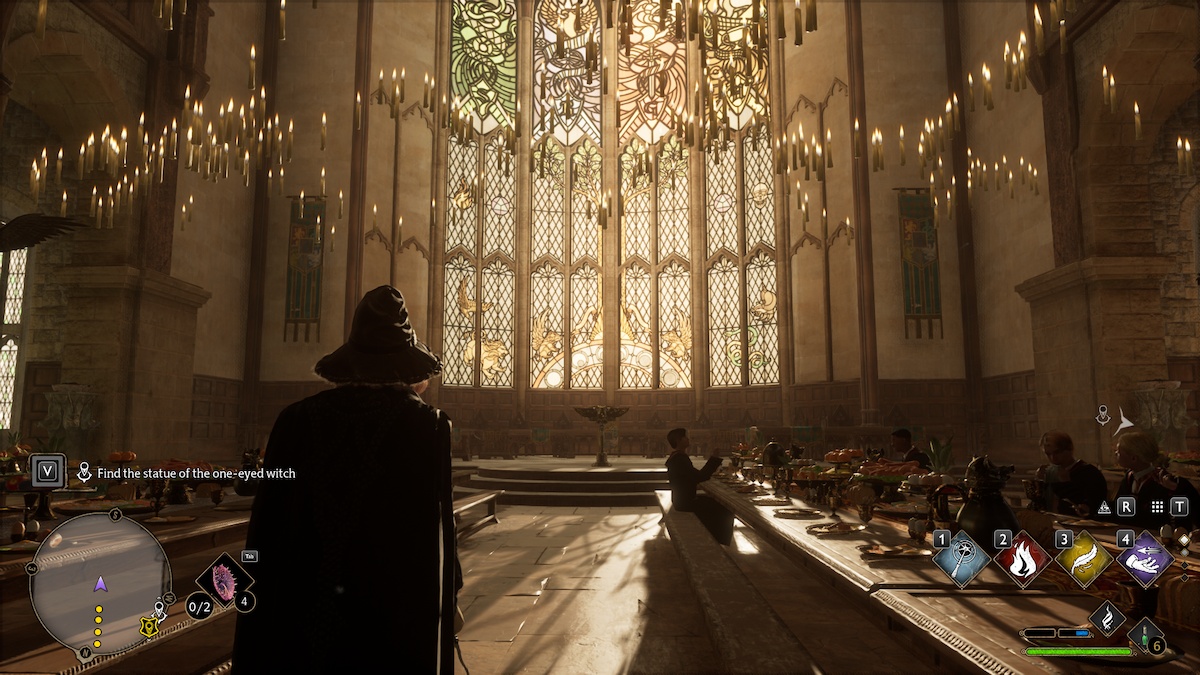
Walk back into the Great Hall, head to the very front, and walk behind the curved row of chairs. On that wall below the stained glass windows sits the moth.
The Great Hall: Viaduct Courtyard
#gallery-2 { margin: auto; } #gallery-2 .gallery-item { float: left; margin-top: 10px; text-align: center; width: 50%; } #gallery-2 img { border: 2px solid #cfcfcf; } #gallery-2 .gallery-caption { margin-left: 0; } /* see gallery_shortcode() in wp-includes/media.php */
-

- Screenshot by PC Invasion
-
- Screenshot by PC Invasion

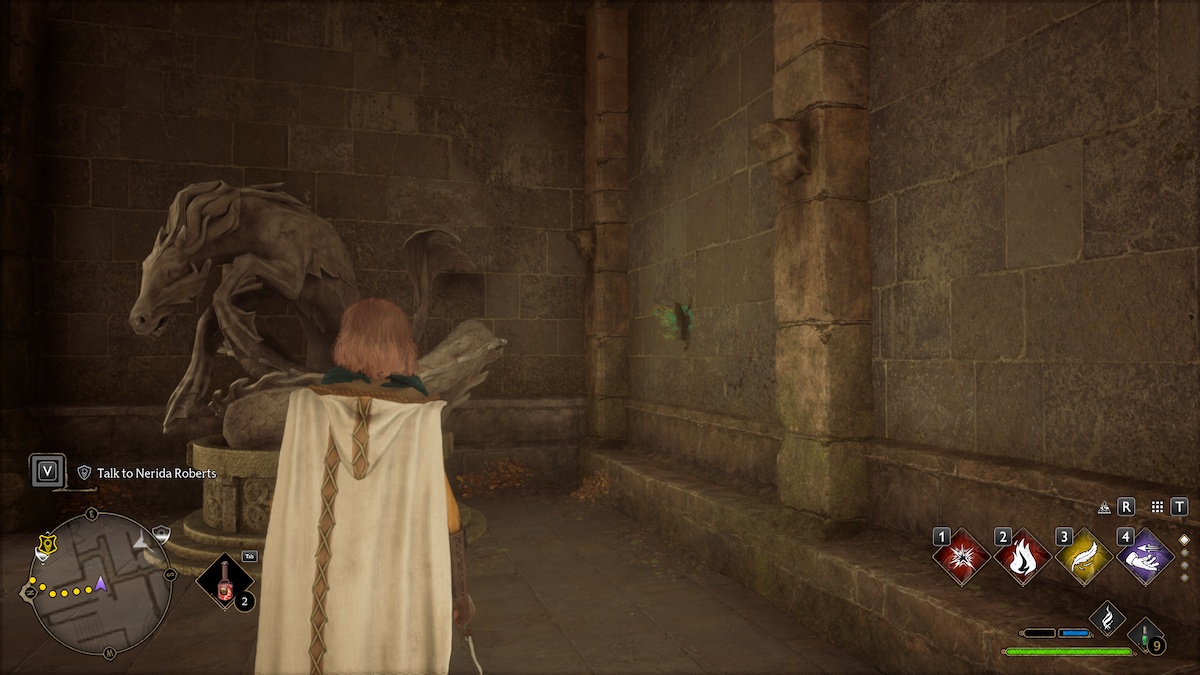
Teleport to the Viaduct Courtyard, and start heading north. Once you reach the statue with the wolf animagus, walk up the stairs beside it. As soon as you climb the first set, there is a Moth Mirror.
This one shows a picture of a statue near the courtyard. Keep heading up the stairs, and run south towards the entrance of the school. In the alleyway of the courtyard to the right of the main door stands a statue of a dragon. The moth is sitting right near it on the wall.
Grand Staircase: Lower Grand Staircase
#gallery-3 { margin: auto; } #gallery-3 .gallery-item { float: left; margin-top: 10px; text-align: center; width: 50%; } #gallery-3 img { border: 2px solid #cfcfcf; } #gallery-3 .gallery-caption { margin-left: 0; } /* see gallery_shortcode() in wp-includes/media.php */
-

- Screenshot by PC Invasion
-

- Screenshot by PC Invasion
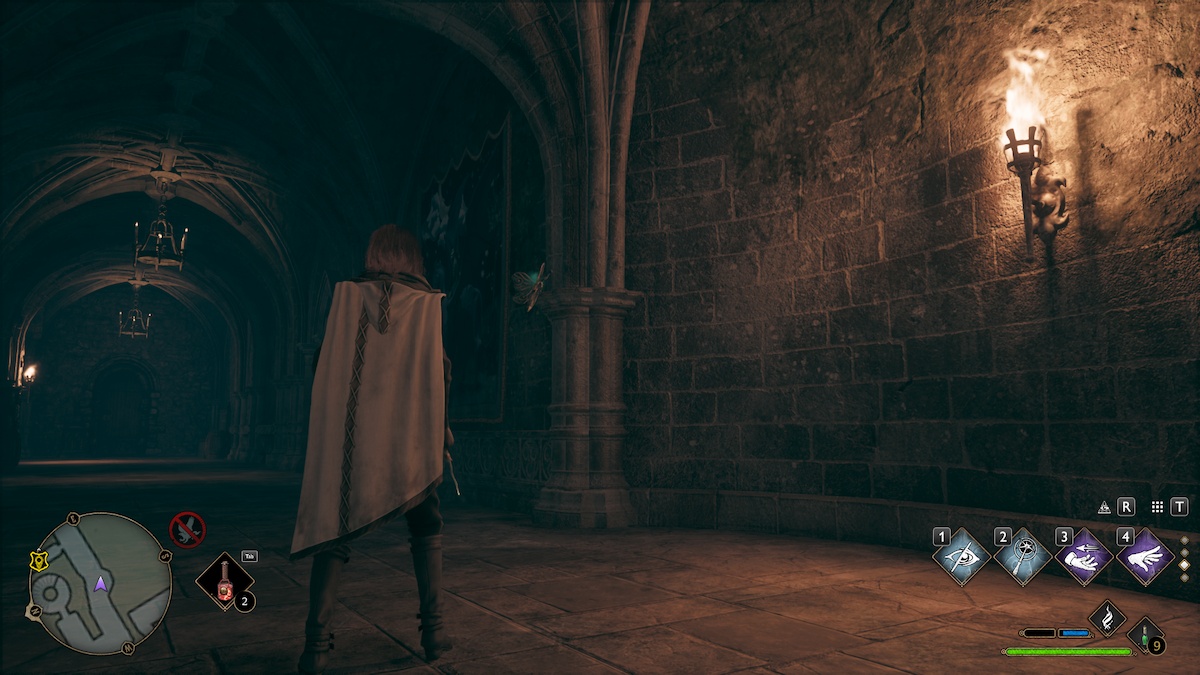
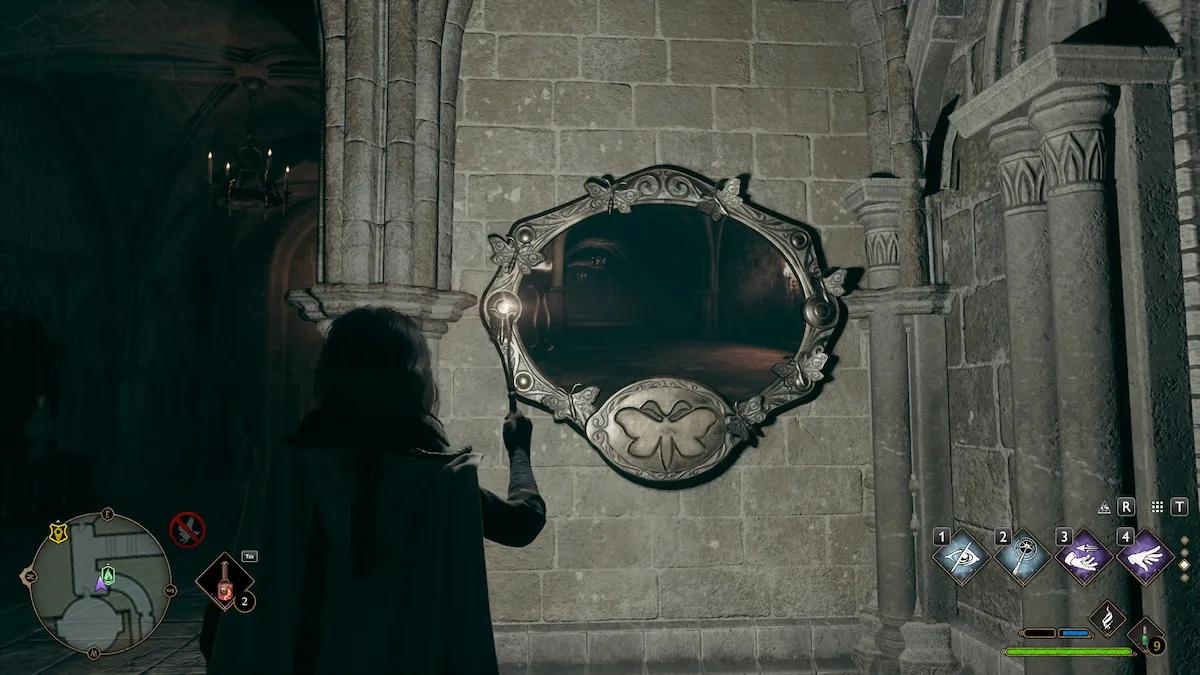
Head to the Lower Grand Staircase Floo Flame. Here in the Slytherin Dungeon, head down the stairs and take a right. Keep going down that hallway till you see a suit of armor and a washroom. To your right on the wall should be a Moth Mirror.
Now, keep walking down that hall, and don’t make the left turn at the staircase. If you keep going forward, you’ll find a hallway with tapestries and more suits of armor, and a little moth sitting on a pillar.
Grand Staircase: Ravenclaw Tower
#gallery-4 { margin: auto; } #gallery-4 .gallery-item { float: left; margin-top: 10px; text-align: center; width: 50%; } #gallery-4 img { border: 2px solid #cfcfcf; } #gallery-4 .gallery-caption { margin-left: 0; } /* see gallery_shortcode() in wp-includes/media.php */
-

- Screenshot by PC Invasion
-
- Screenshot by PC Invasion

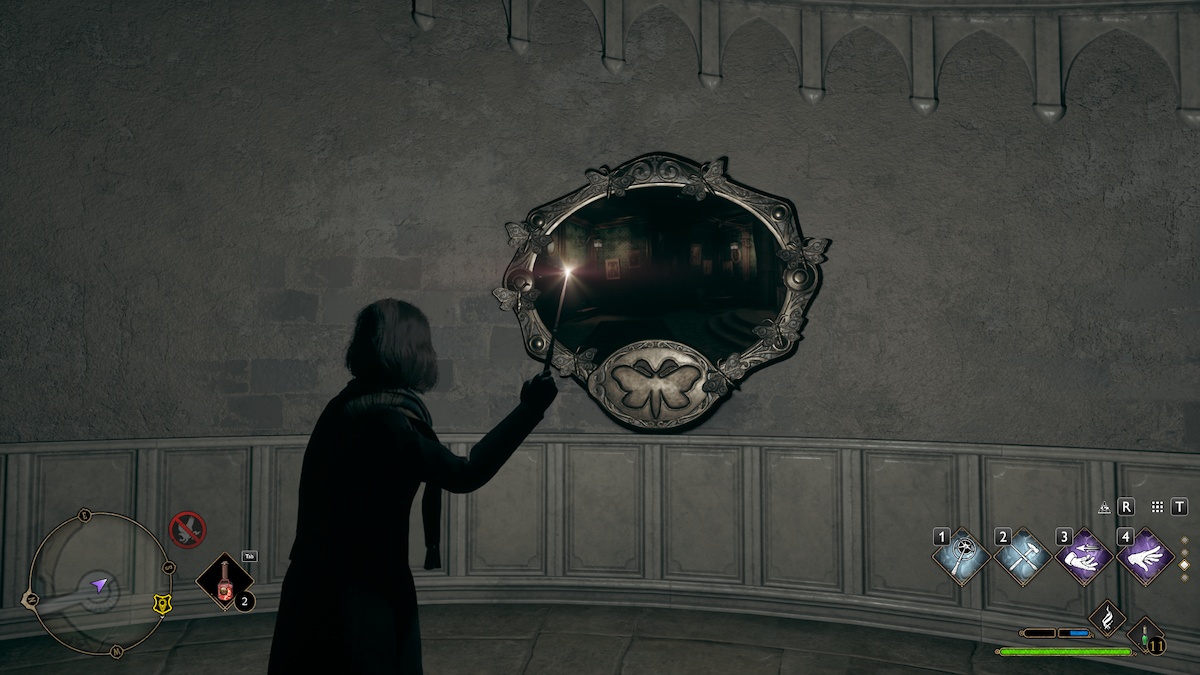
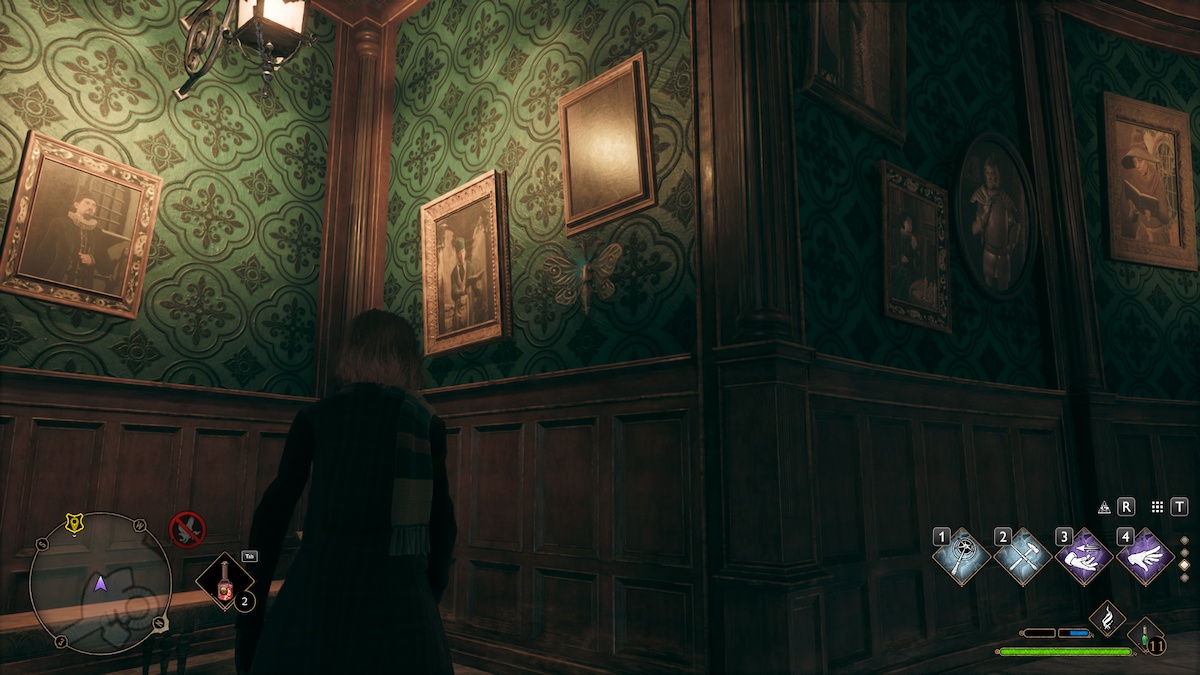
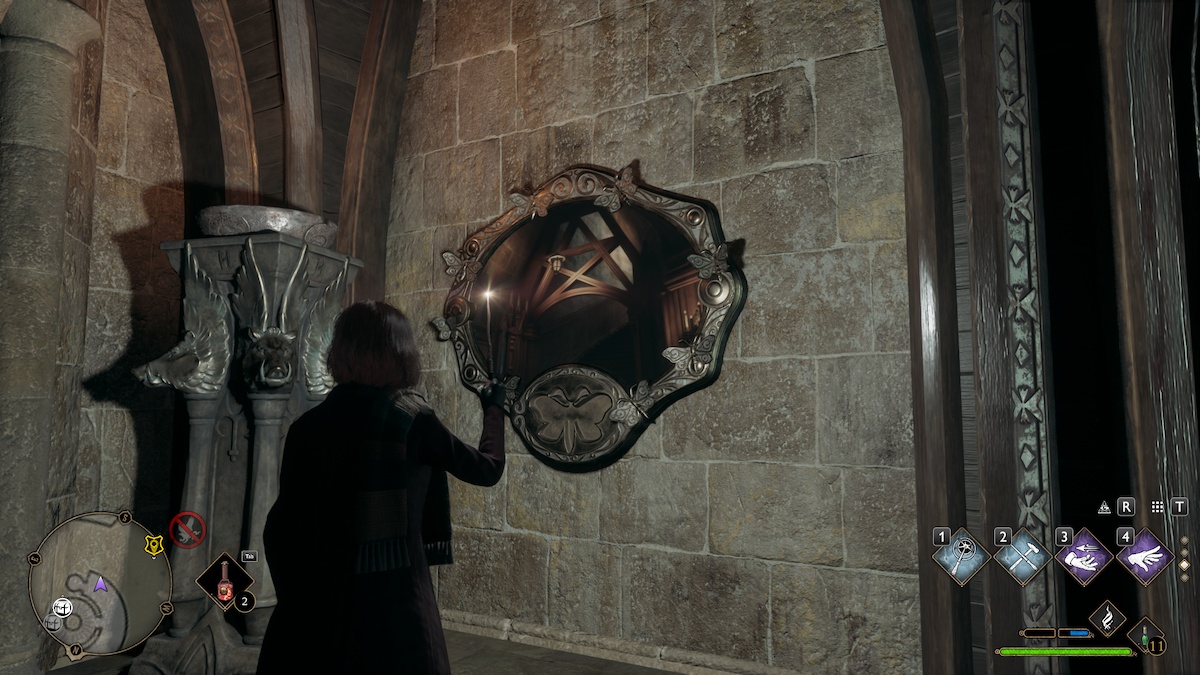
Take the Ravenclaw Tower Floo Flame, and head down the hall towards the spiraling staircase. Go down the stairs, and at the very bottom on the wall in a Moth Mirror.
Make your way back up to where you came from, and in that room with the turquoise wallpaper and assortment of paintings is the Moth, resting on a painting.
Grand Staircase: Trophy Room
#gallery-5 { margin: auto; } #gallery-5 .gallery-item { float: left; margin-top: 10px; text-align: center; width: 50%; } #gallery-5 img { border: 2px solid #cfcfcf; } #gallery-5 .gallery-caption { margin-left: 0; } /* see gallery_shortcode() in wp-includes/media.php */
-
- Screenshot by PC Invasion

-
- Screenshot by PC Invasion

Teleport to the Trophy room and run around the circular room to the right. At the end of the hallway is a locked iron door. Using Alohomora to open the gate, head up the stairs and through another winding hallway. At some point you’ll reach a spiral staircase. Run all the way to the top, and through the door. Turn left, and you should see a Moth Mirror.
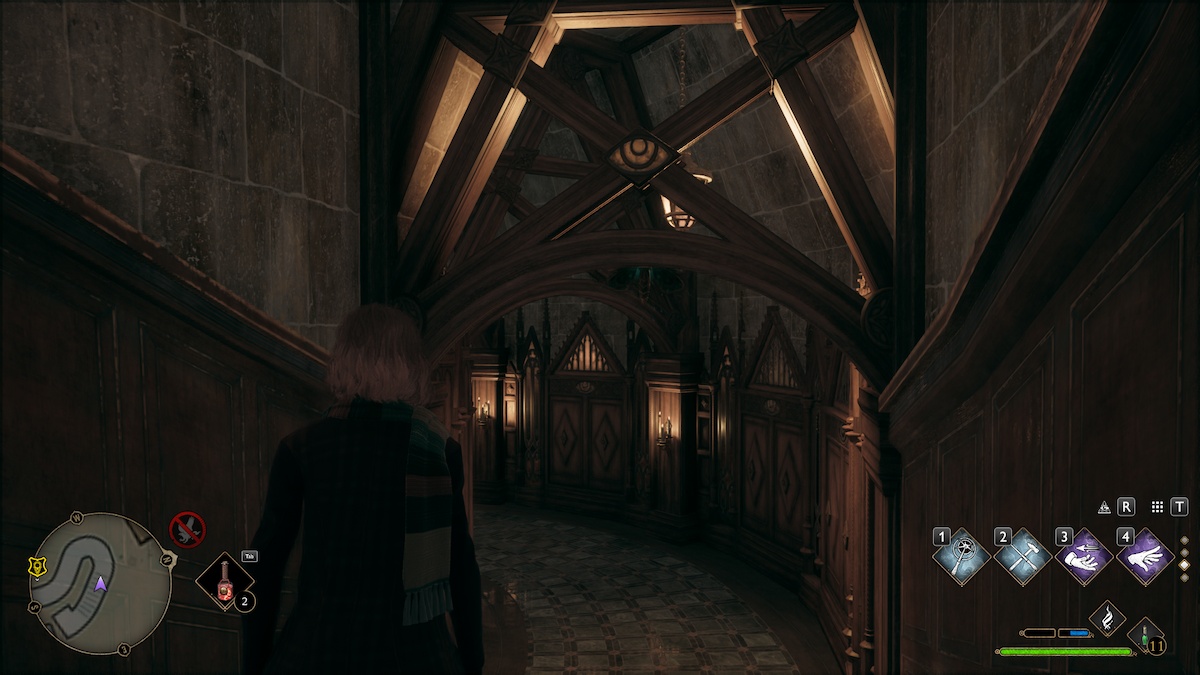
This picture shows an arched wood beam on a ceiling. Go back the way you came, down that spiraling staircase. As soon as you reach the winding Trophy Room hallway, you should see that wooden arch with the moth hanging from it.
Bell Tower Wing: Bell Tower Courtyard
#gallery-6 { margin: auto; } #gallery-6 .gallery-item { float: left; margin-top: 10px; text-align: center; width: 50%; } #gallery-6 img { border: 2px solid #cfcfcf; } #gallery-6 .gallery-caption { margin-left: 0; } /* see gallery_shortcode() in wp-includes/media.php */
-
- Screenshot by PC Invasion

-

- Screenshot by PC Invasion
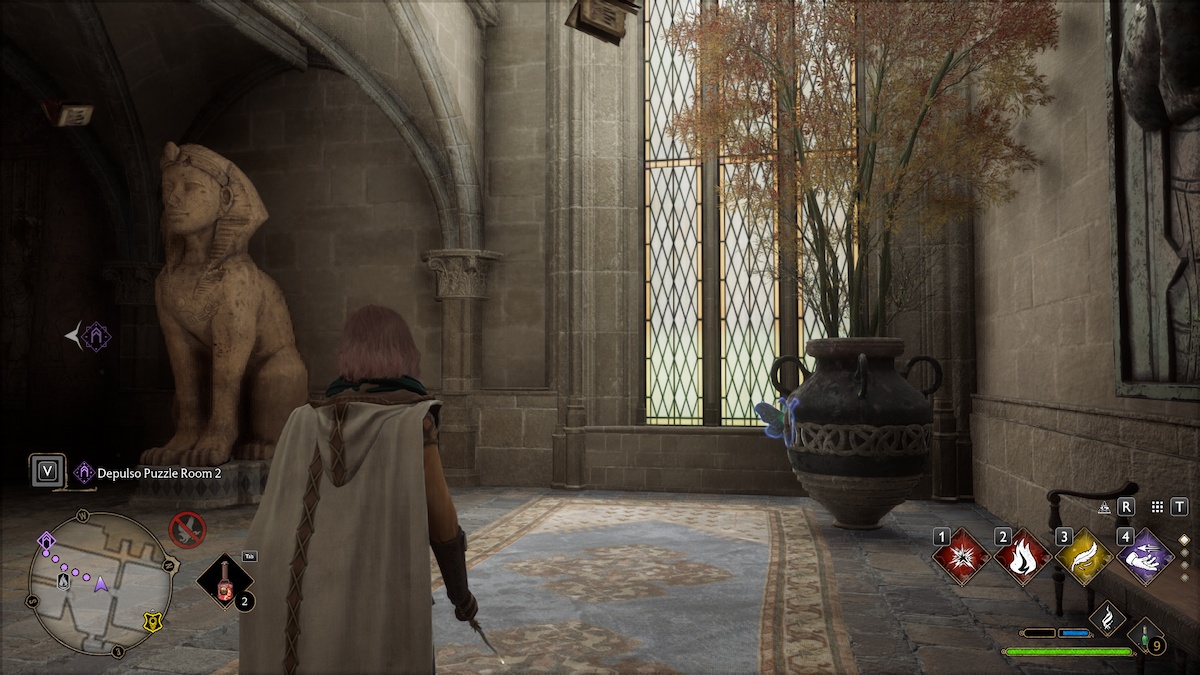
At this Floo Flame, head up the first set of stairs towards south. Head through the wooden door in front of you to enter the North Hall. Run up another two sets of stairs, and on the wall hangs a Moth Mirror.
The image shows a window and a statue of a sphinx. To find this location, head down one set of stairs and through the door ahead to the History of Magic classroom. Then, behind the Professor’s desk is a locked door, so cast Alohomora to unlock it. To your immediate right is the sphinx statue, with the moth sitting on the large potted plant.
Bell Tower Wing: Hogwarts North Exit
#gallery-7 { margin: auto; } #gallery-7 .gallery-item { float: left; margin-top: 10px; text-align: center; width: 50%; } #gallery-7 img { border: 2px solid #cfcfcf; } #gallery-7 .gallery-caption { margin-left: 0; } /* see gallery_shortcode() in wp-includes/media.php */
-
- Screenshot by PC Invasion

-

- Screenshot by PC Invasion
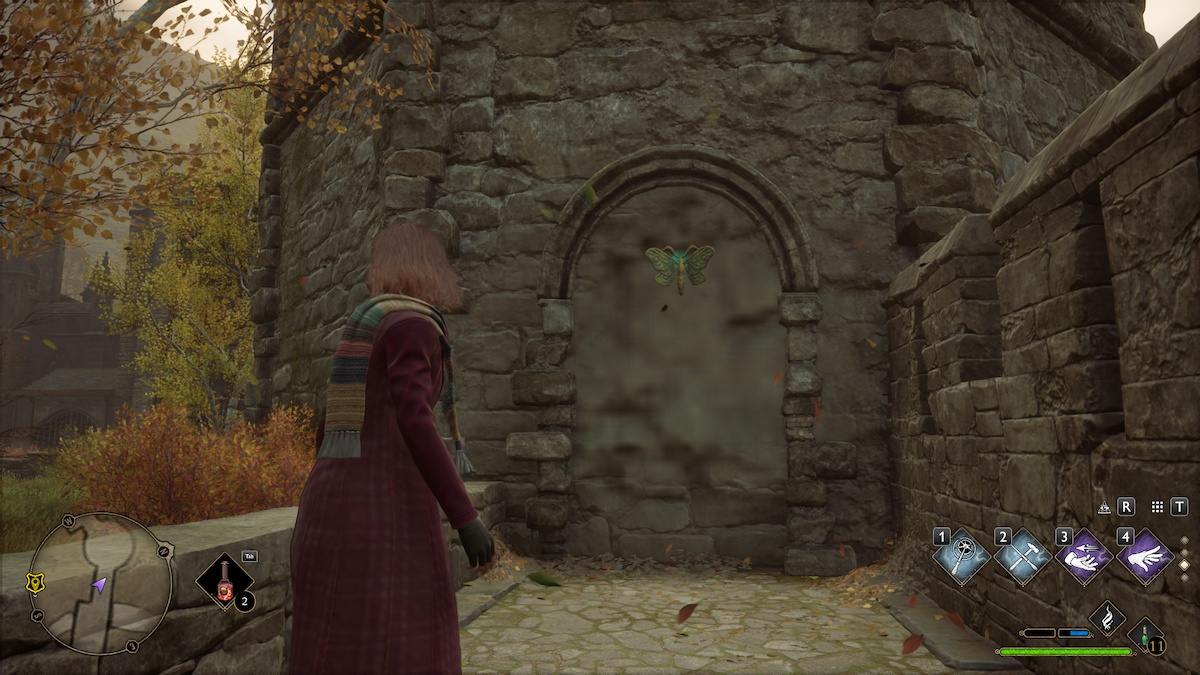
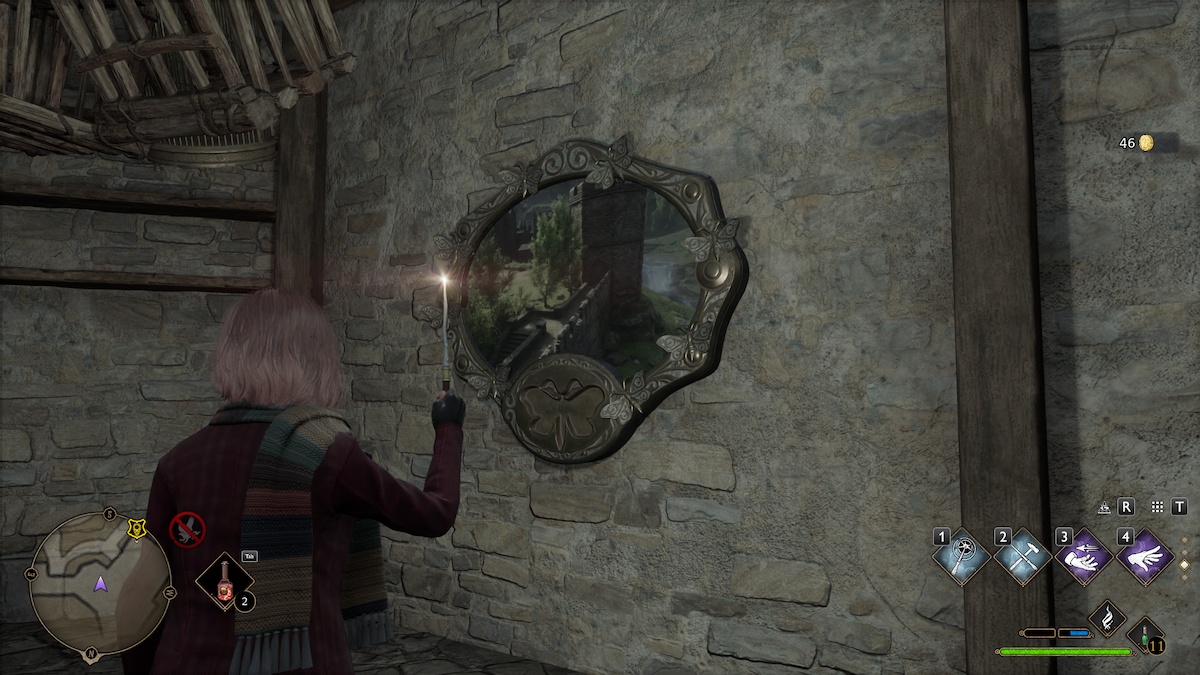
From the Hogwarts North Exit Floo Flame, make your way back towards the castle and take an immediate left. You should see a double door, and inside is a red carriage. There is another locked door, and once you cast Alohomora to unlock, you’ll find a tiny room with the Moth Mirror.
Walk back into the carriage room and take a left out the stable doors. Here, you’ll see a stone staircase, but ignore it and head past it. There will be a walkway with a stone fence, and near the wall to the left is the moth.
Library Annex: Library
#gallery-8 { margin: auto; } #gallery-8 .gallery-item { float: left; margin-top: 10px; text-align: center; width: 50%; } #gallery-8 img { border: 2px solid #cfcfcf; } #gallery-8 .gallery-caption { margin-left: 0; } /* see gallery_shortcode() in wp-includes/media.php */
-

- Screenshot by PC Invasion
-
- Screenshot by PC Invasion

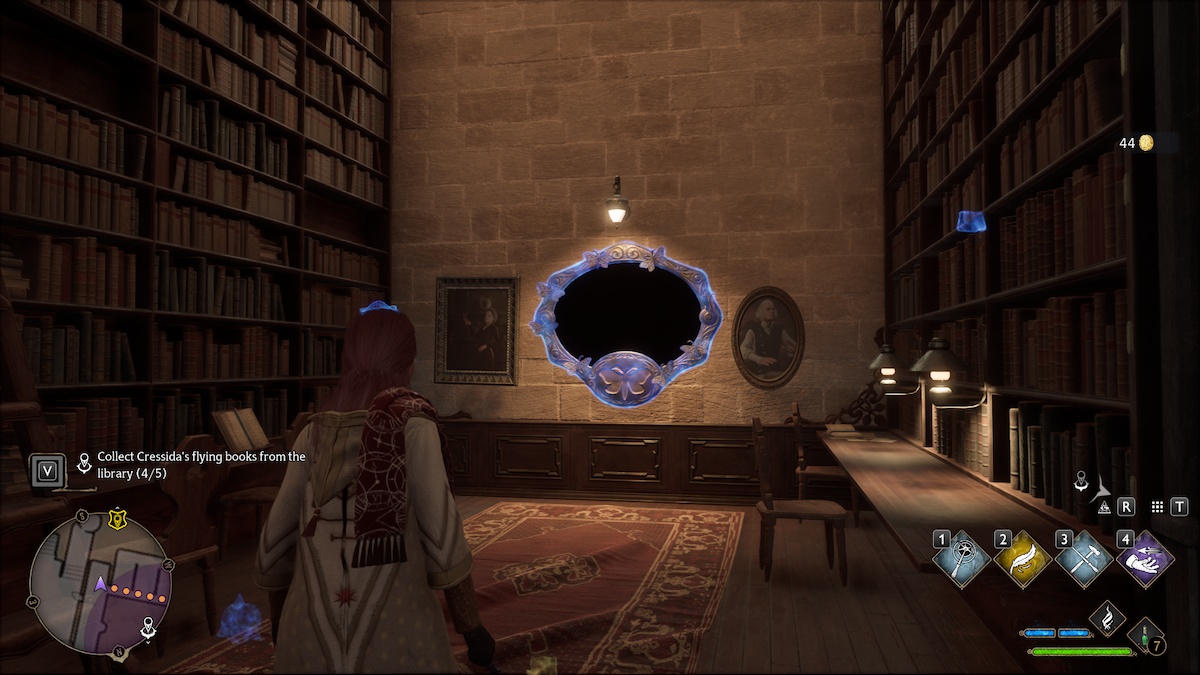
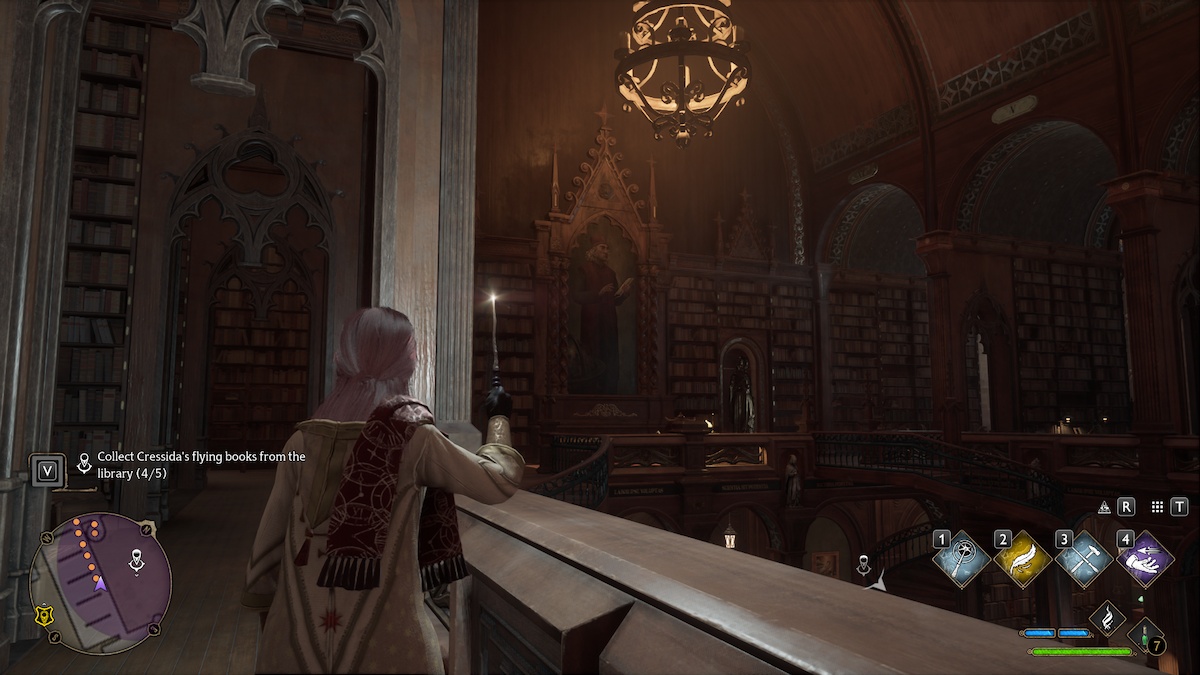
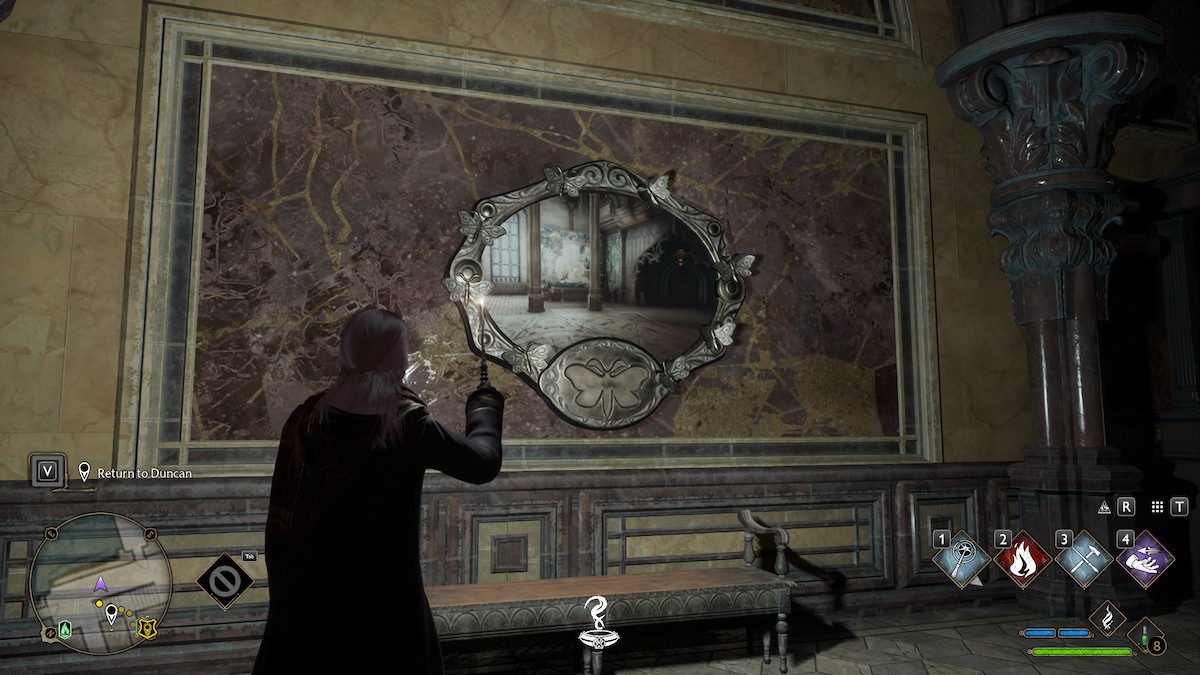
In Hogwarts’ Library, walk up to the second floor, and near the far end to the right is a study area with bookcases. On the wall between two paintings is a Moth Mirror. It shows a location inside the Library.
Simply run back the way you came, and on that wall you’ll see the large painting and podium from the mirror. The moth will be sitting on the podium.
Library Annex: Potions Classroom
#gallery-9 { margin: auto; } #gallery-9 .gallery-item { float: left; margin-top: 10px; text-align: center; width: 50%; } #gallery-9 img { border: 2px solid #cfcfcf; } #gallery-9 .gallery-caption { margin-left: 0; } /* see gallery_shortcode() in wp-includes/media.php */
-

- Screenshot by PC Invasion
-
- Screenshot by PC Invasion

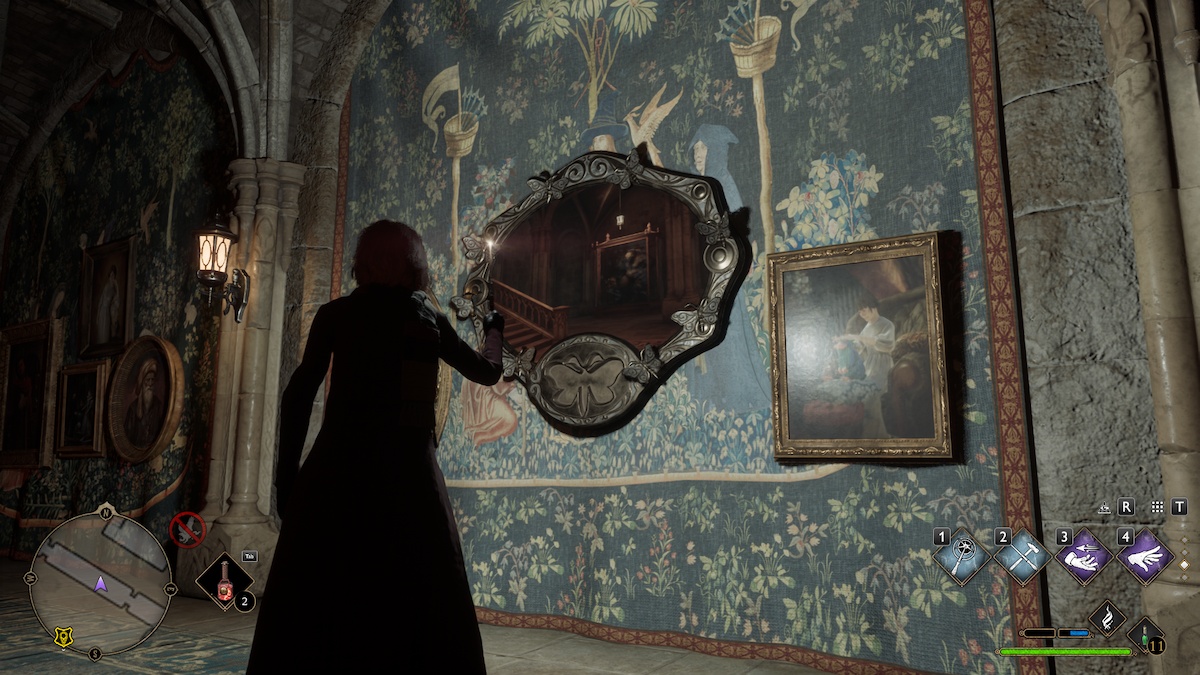
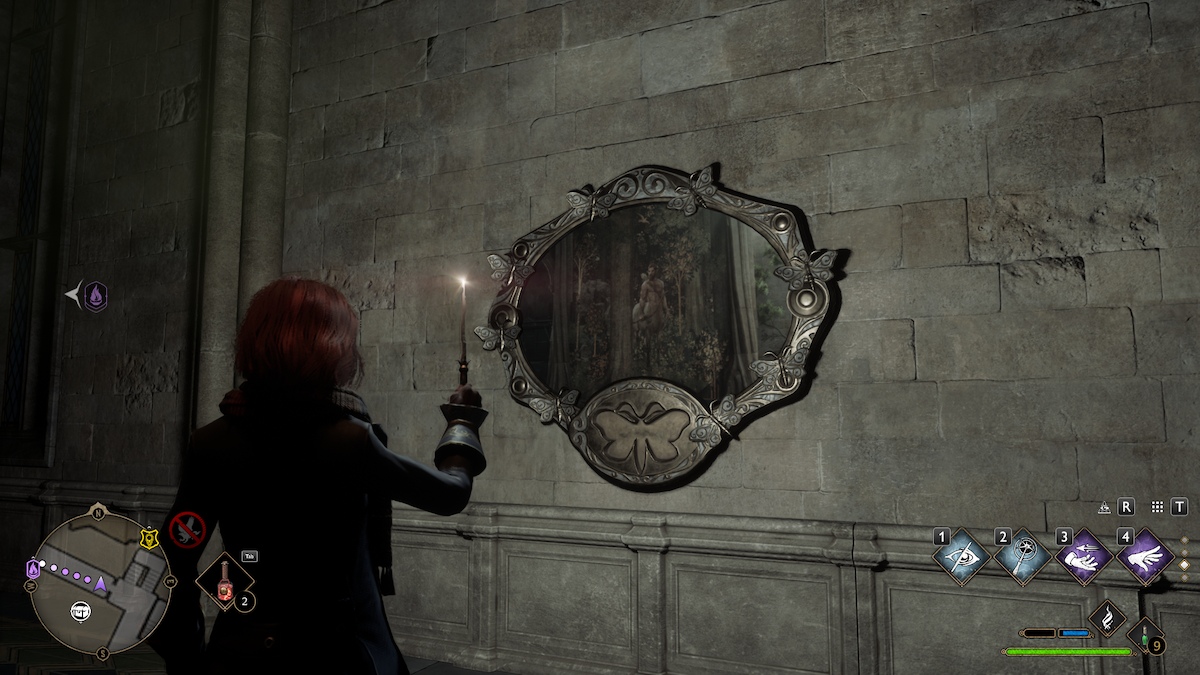
When you arrive at the Potions Classroom, walk down the spiral staircase to the left of the classroom entrance. The end of this hall has a locked door to cast Alohomora on. Once opened, run through the Long Gallery. On the right side of this hallway is a Moth Mirror, in between paintings.
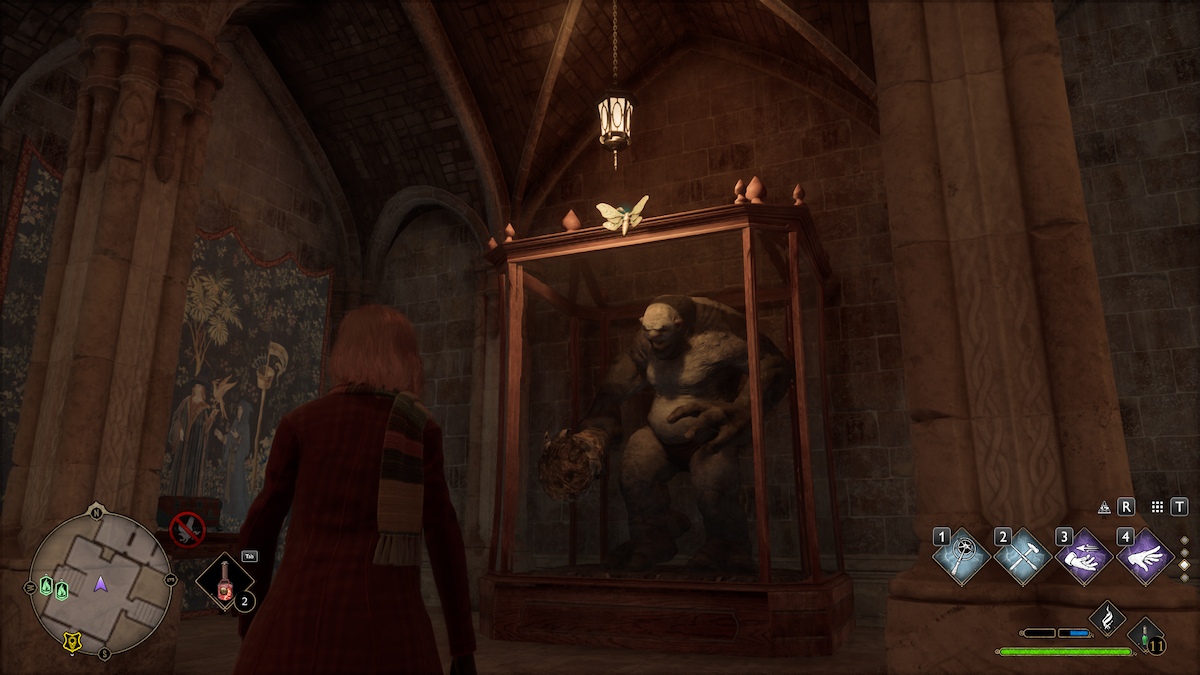
Keep running down that same hall, and you’ll find a room with a large troll statue in a glass case. The moth is sitting on top of this case.
Astronomy Wing: Astronomy Tower
#gallery-10 { margin: auto; } #gallery-10 .gallery-item { float: left; margin-top: 10px; text-align: center; width: 50%; } #gallery-10 img { border: 2px solid #cfcfcf; } #gallery-10 .gallery-caption { margin-left: 0; } /* see gallery_shortcode() in wp-includes/media.php */
-
- Screenshot by PC Invasion

-

- Screenshot by PC Invasion
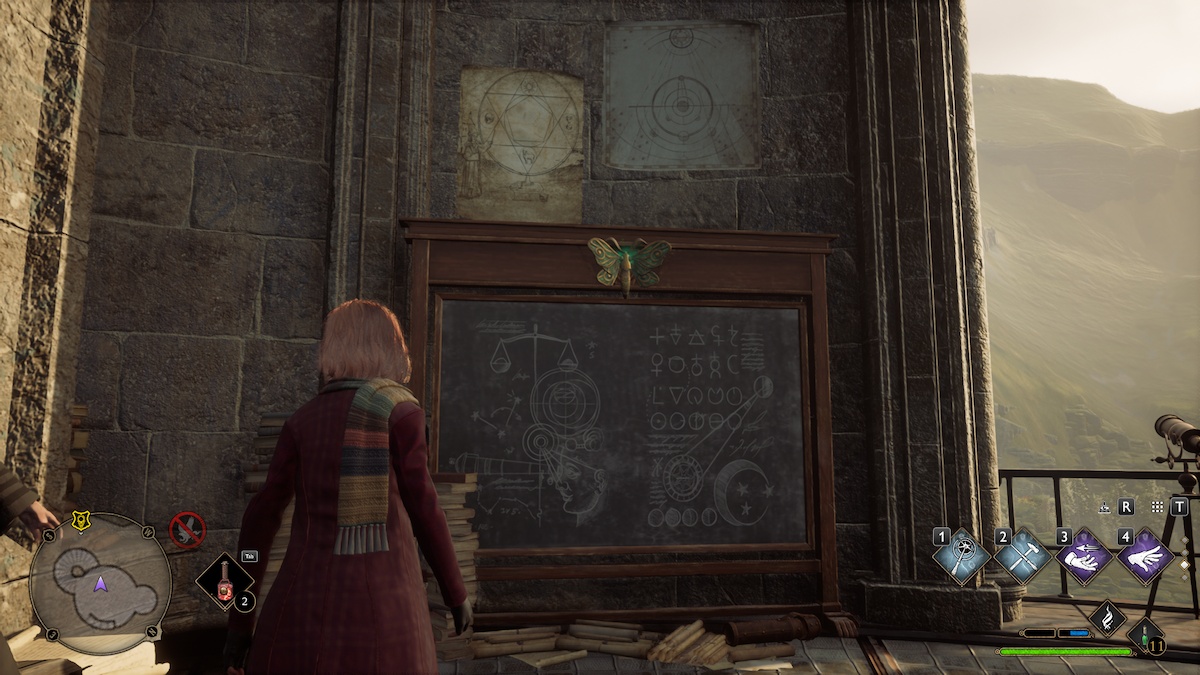
Travel to the Astronomy Tower Floo Flame. Then, head up the long set of stairs into a room with a fireplace. To your immediate left should be a Moth Mirror. This picture shows the top of the tower.
You’ll find this moth by running up the next set of winding stairs, up to the top of the tower with the telescopes. To your left is the black chalkboard, with a moth sitting on top.
Astronomy Wing: Defense Against the Dark Arts Tower
#gallery-11 { margin: auto; } #gallery-11 .gallery-item { float: left; margin-top: 10px; text-align: center; width: 50%; } #gallery-11 img { border: 2px solid #cfcfcf; } #gallery-11 .gallery-caption { margin-left: 0; } /* see gallery_shortcode() in wp-includes/media.php */
-

- Screenshot by PC Invasion
-

- Screenshot by PC Invasion
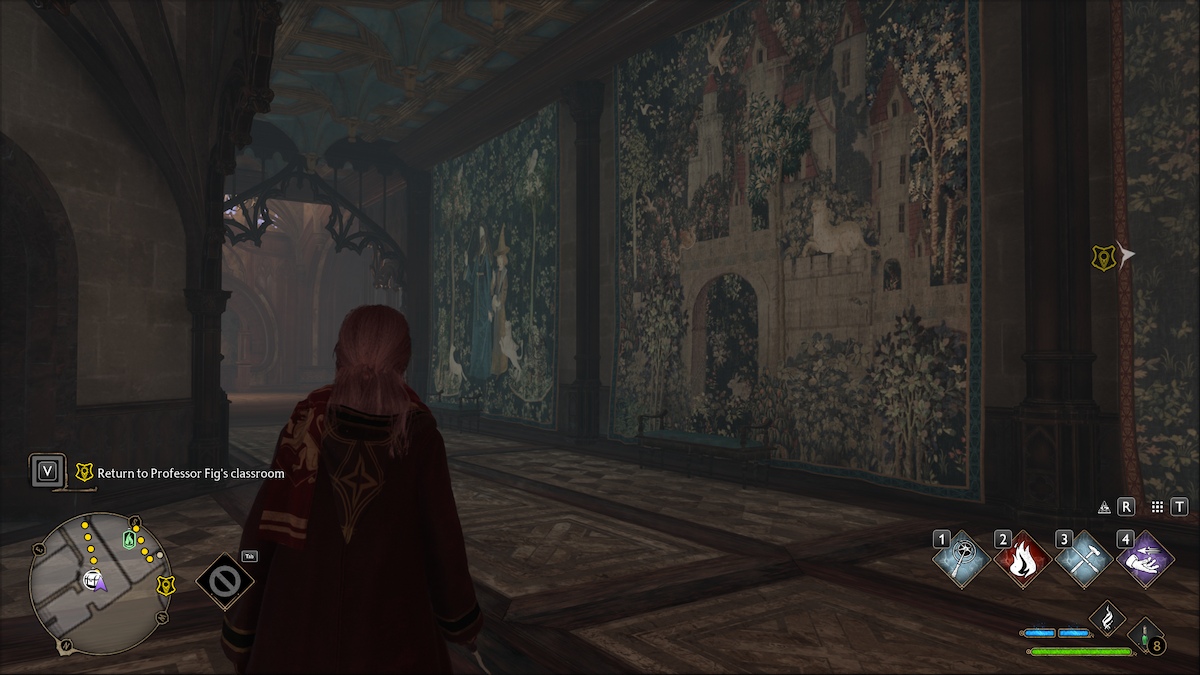
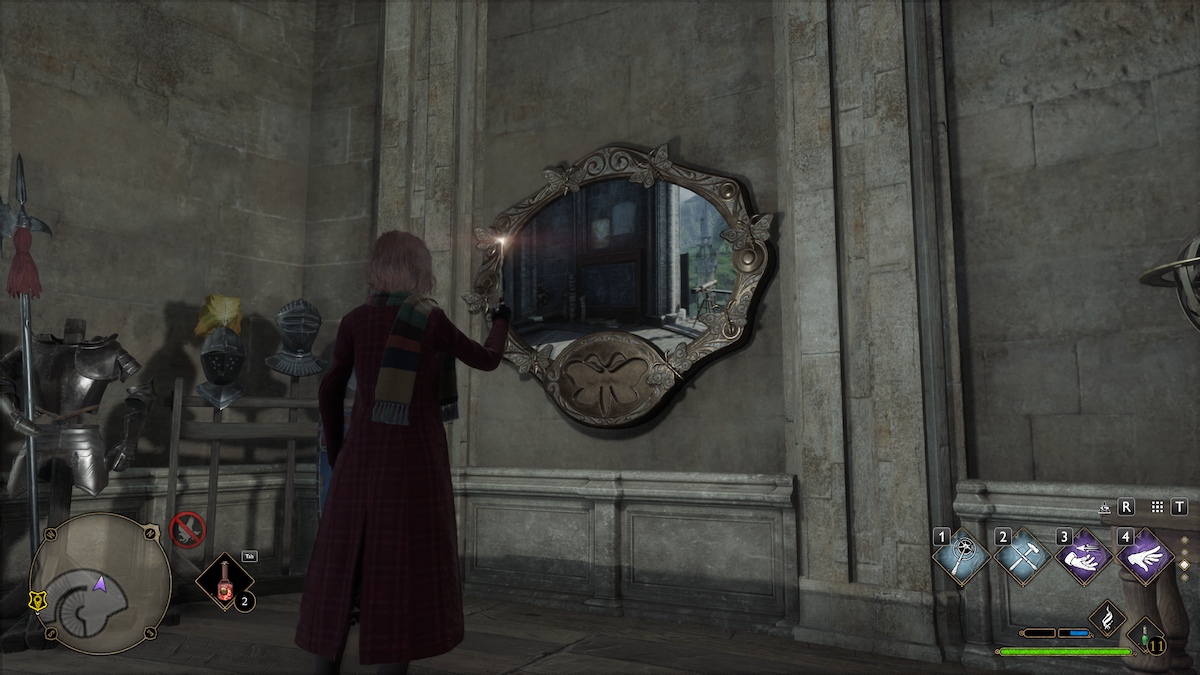
From this Floo Flame, the mirror should be directly in front of where you spawn in. It depicts a picture with a wall covered in a beautiful tapestry.
Run the opposite way, heading through the passage of suits of armor. Walk up the staircase to your right, and you’ll find a floor with walls with hanging tapestries. On the pillar in front of the skeleton model of an animal sits the moth.
Astronomy Wing: Transfiguration Courtyard
#gallery-12 { margin: auto; } #gallery-12 .gallery-item { float: left; margin-top: 10px; text-align: center; width: 50%; } #gallery-12 img { border: 2px solid #cfcfcf; } #gallery-12 .gallery-caption { margin-left: 0; } /* see gallery_shortcode() in wp-includes/media.php */
-
- Screenshot by PC Invasion

-
- Screenshot by PC Invasion

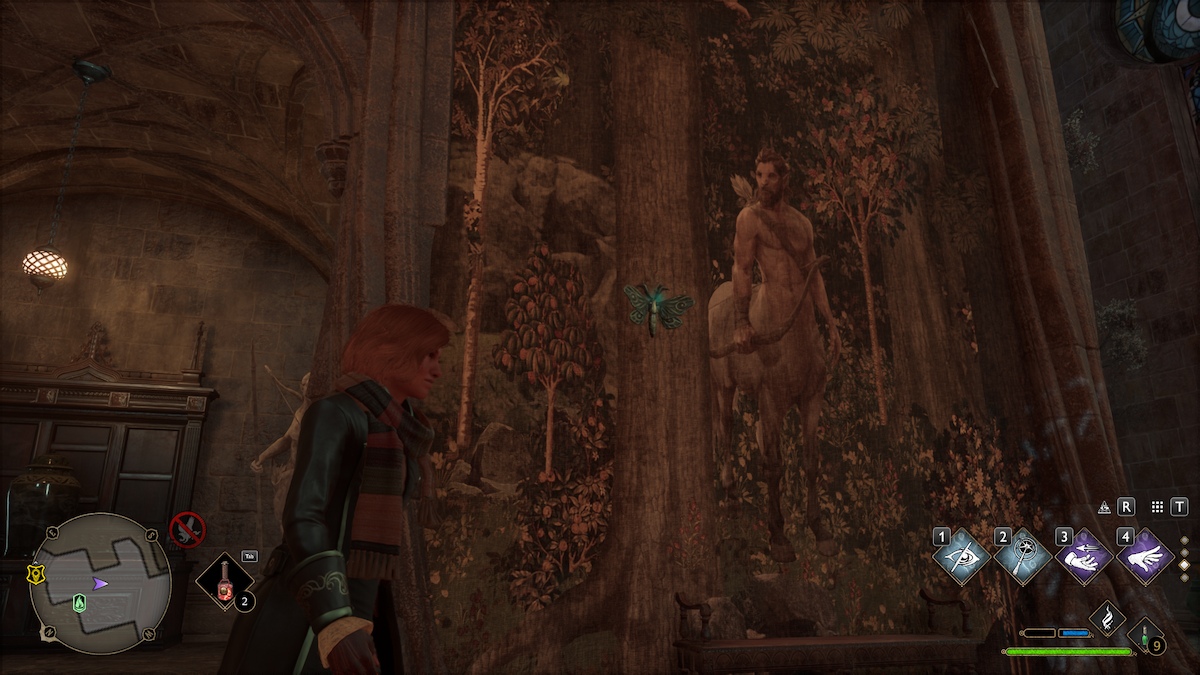
Once you arrive at this Floo Flame, head through the doors to your right. In the DADA Tower, keep to your right and run up the stairs. Once you reach the next floor, take a right through another set of doors and you’ll find the Pungent Passage. The Moth Mirror is to your immediate right.
This moth can be found by running down the passage and up the short set of stairs. To the left is a large tapestry of a centaur. The moth is sitting on the tapestry.
South Wing: Clocktower Courtyard
#gallery-13 { margin: auto; } #gallery-13 .gallery-item { float: left; margin-top: 10px; text-align: center; width: 50%; } #gallery-13 img { border: 2px solid #cfcfcf; } #gallery-13 .gallery-caption { margin-left: 0; } /* see gallery_shortcode() in wp-includes/media.php */
-

- Screenshot by PC Invasion
-

- Screenshot by PC Invasion
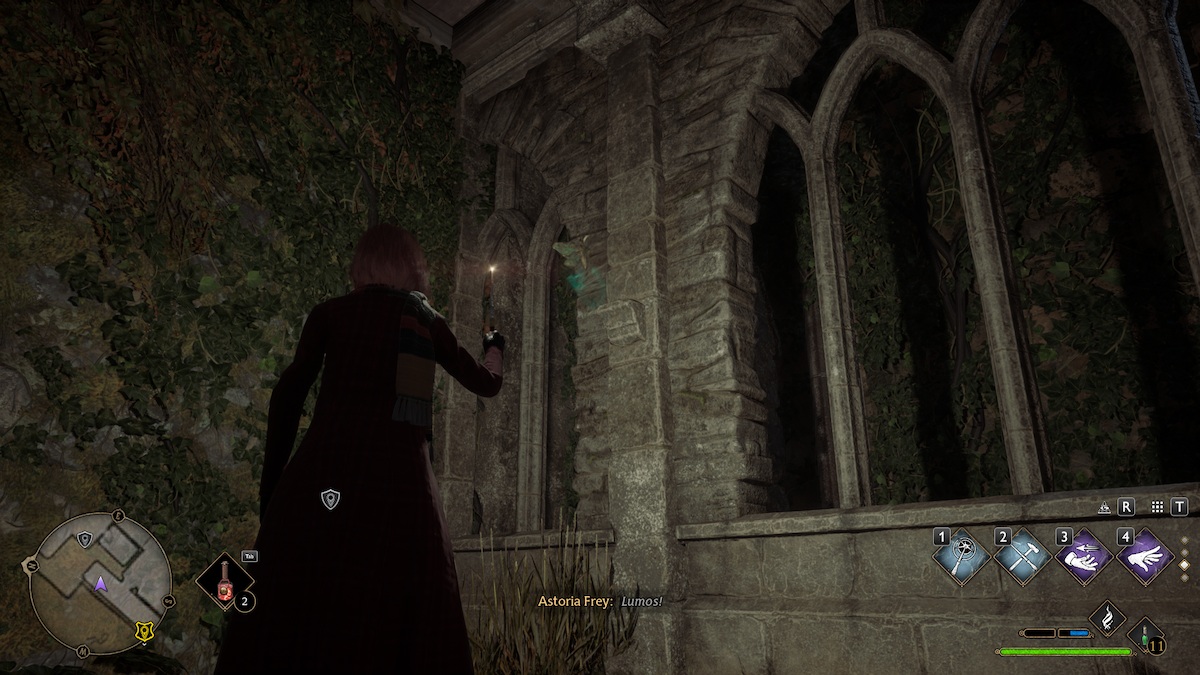
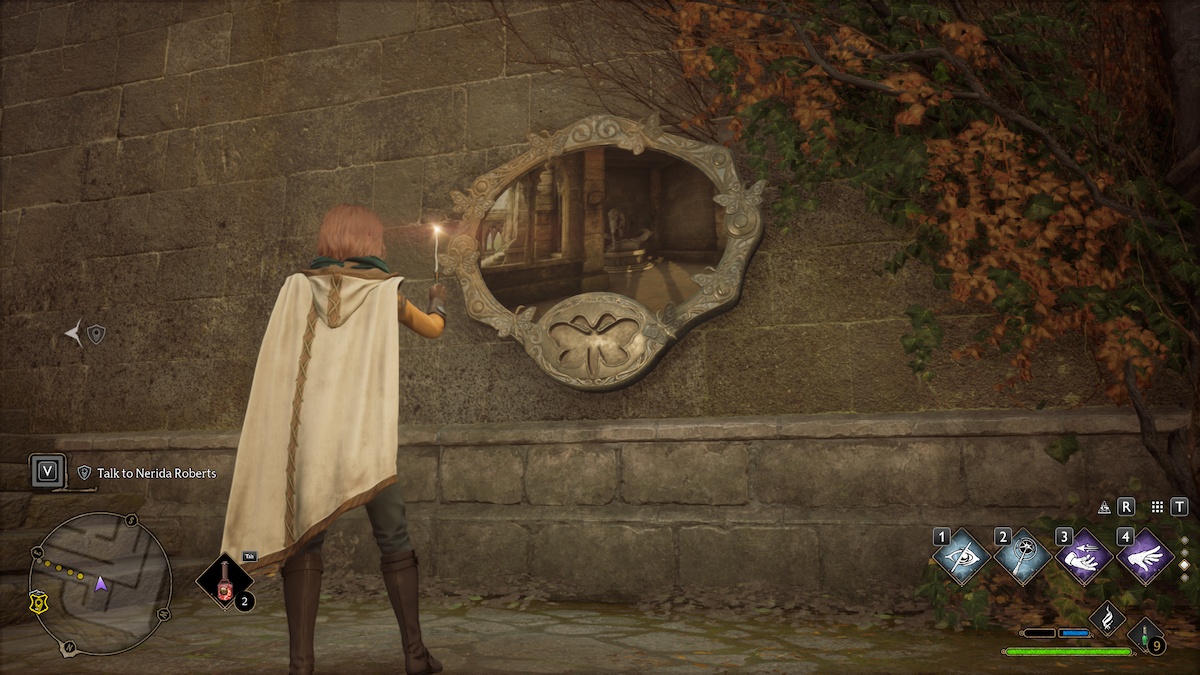
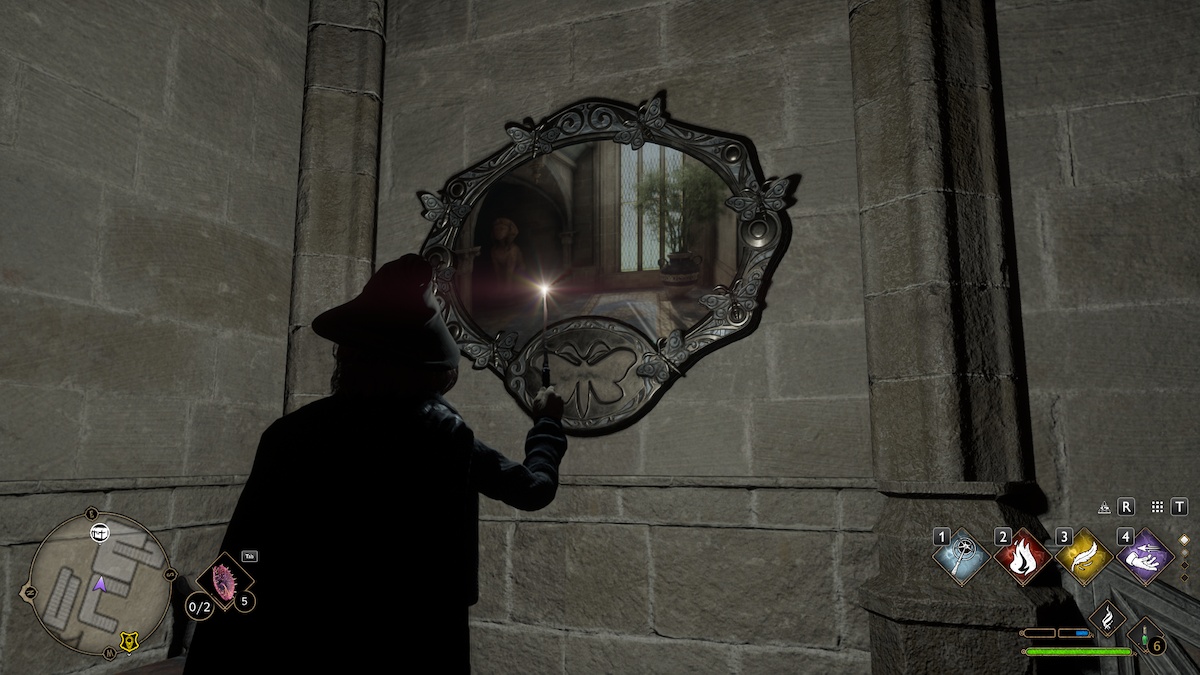
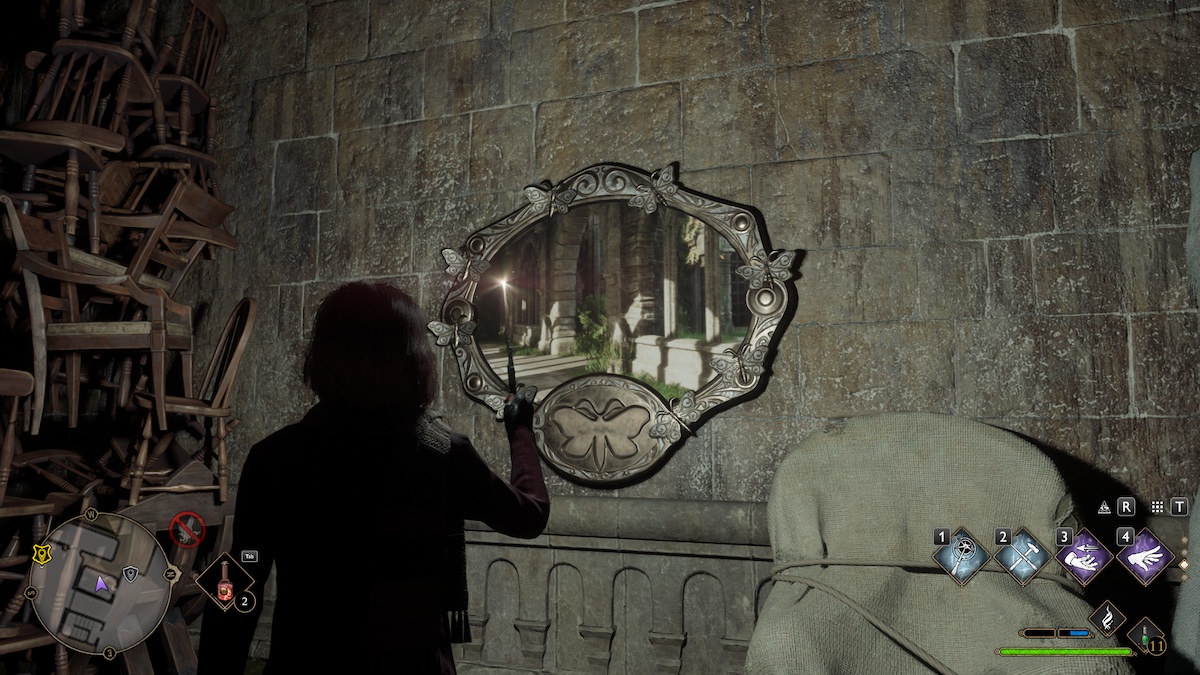
As soon as you arrive at this Floo Flame, walk towards the wooden door between the red and green shields on the wall. This one requires you to cast Alohomora to unlock the door. Once inside, you’ll find the Moth Mirror in this tiny room.
Walk out of the storage room, and into the Clock Tower Courtyard. Take an immediate right, and another once you enter the alley. Near the wall covered in greenery is the moth.
South Wing: Faculty Tower
#gallery-14 { margin: auto; } #gallery-14 .gallery-item { float: left; margin-top: 10px; text-align: center; width: 50%; } #gallery-14 img { border: 2px solid #cfcfcf; } #gallery-14 .gallery-caption { margin-left: 0; } /* see gallery_shortcode() in wp-includes/media.php */
-

- Screenshot by PC Invasion
-
- Screenshot by PC Invasion

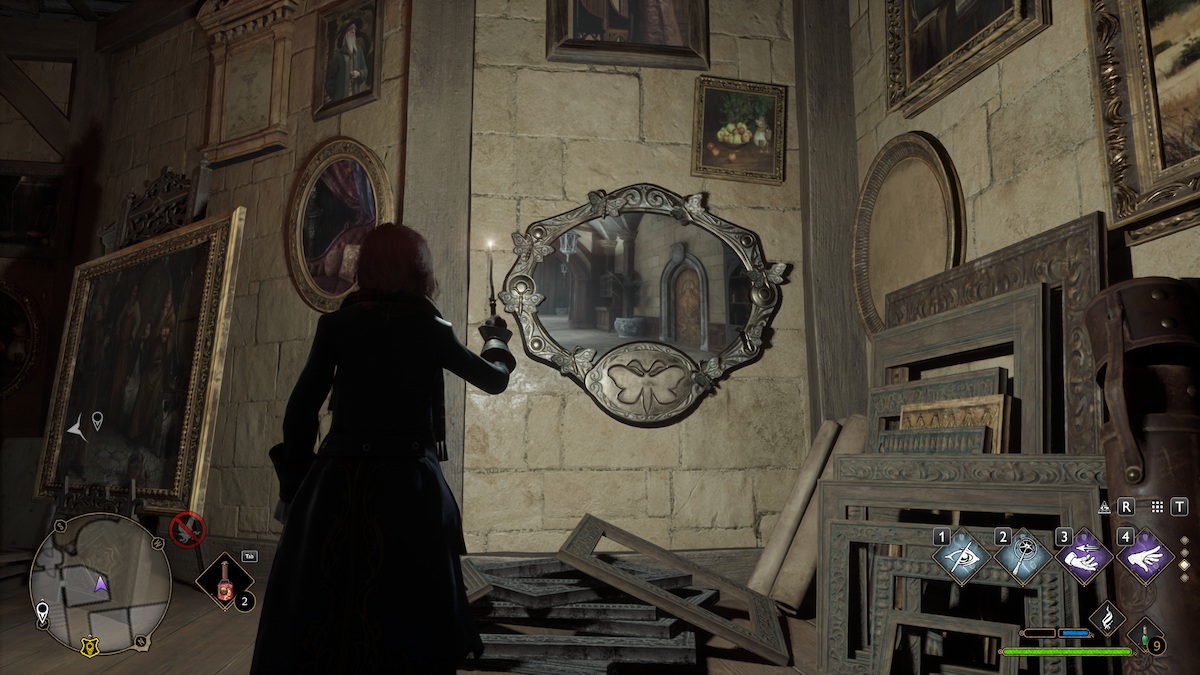
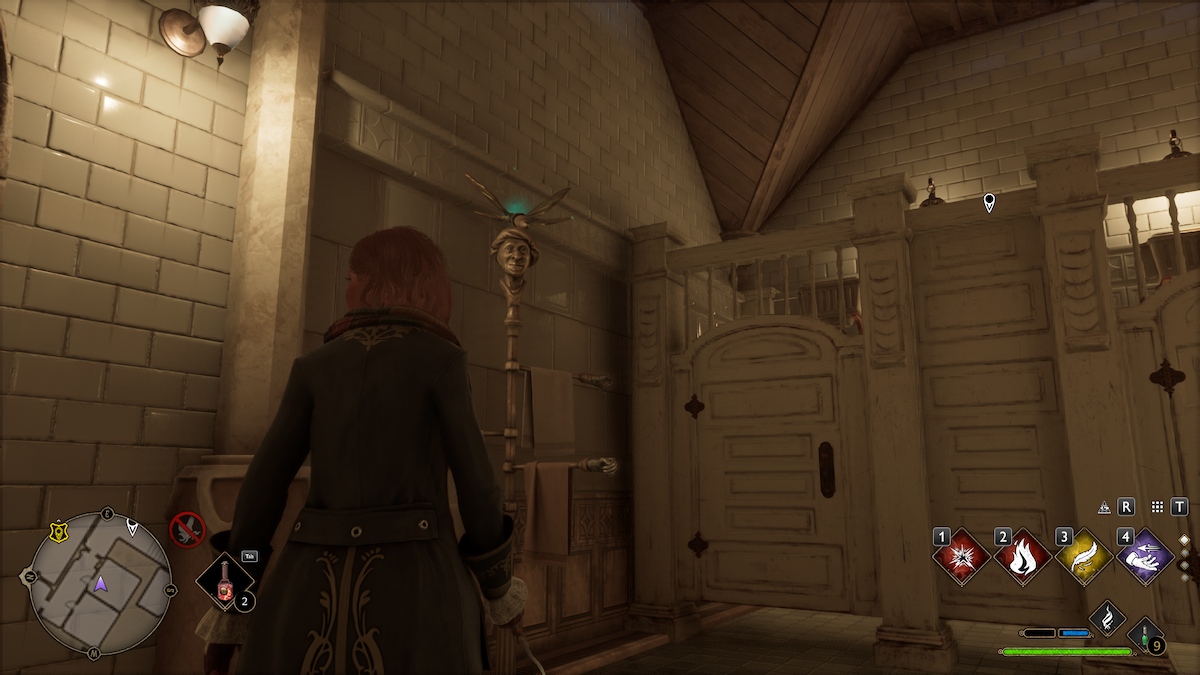
Travel to the Faculty Tower and run down the hall in front of you. Walk down the spiral staircase, and down a set of stairs through a room of paintings. In the next room, you can see a map on the wall with a button on top. You’ll need to cast Depulso to push this button, which opens the secret room. In this room scattered with paintings is a Moth Mirror.
Leave the secret room and head left down the short set of stairs. Take another left down the hall until you spot a washroom. Inside the washroom on a towel rack is the moth.
Hogwarts Legacy: Hogsmeade Moth Mirror puzzle locations
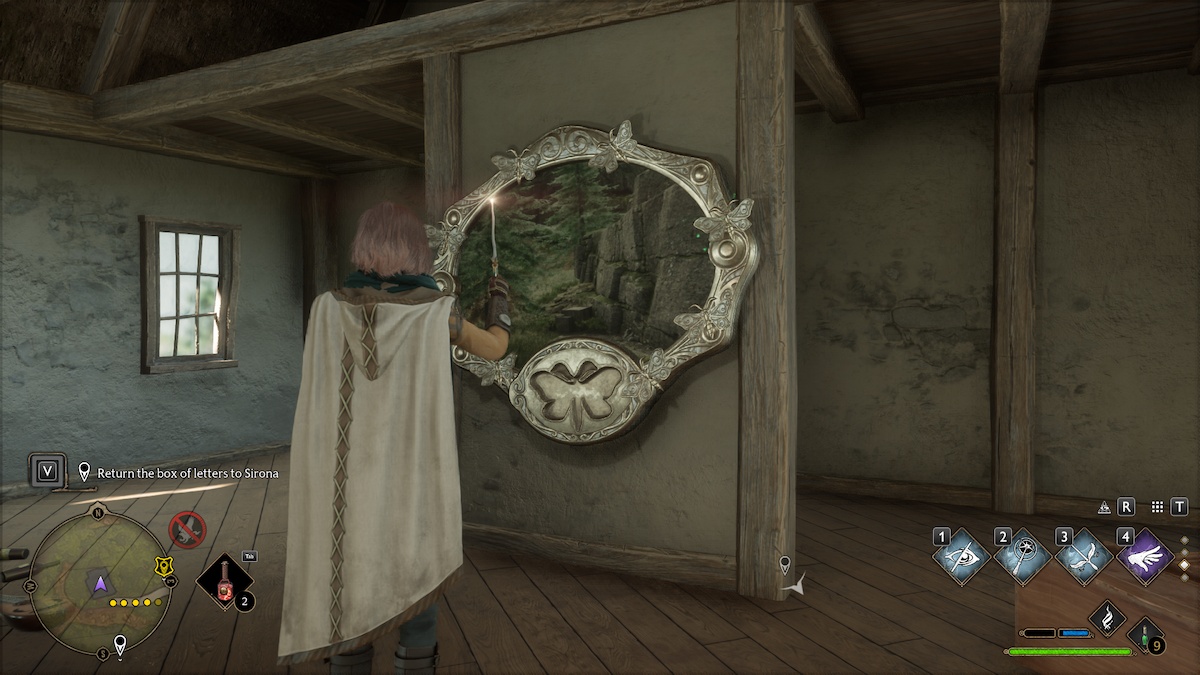
West Hogsmeade: Hog’s Head
#gallery-15 { margin: auto; } #gallery-15 .gallery-item { float: left; margin-top: 10px; text-align: center; width: 50%; } #gallery-15 img { border: 2px solid #cfcfcf; } #gallery-15 .gallery-caption { margin-left: 0; } /* see gallery_shortcode() in wp-includes/media.php */
-

- Screenshot by PC Invasion
-
- Screenshot by PC Invasion

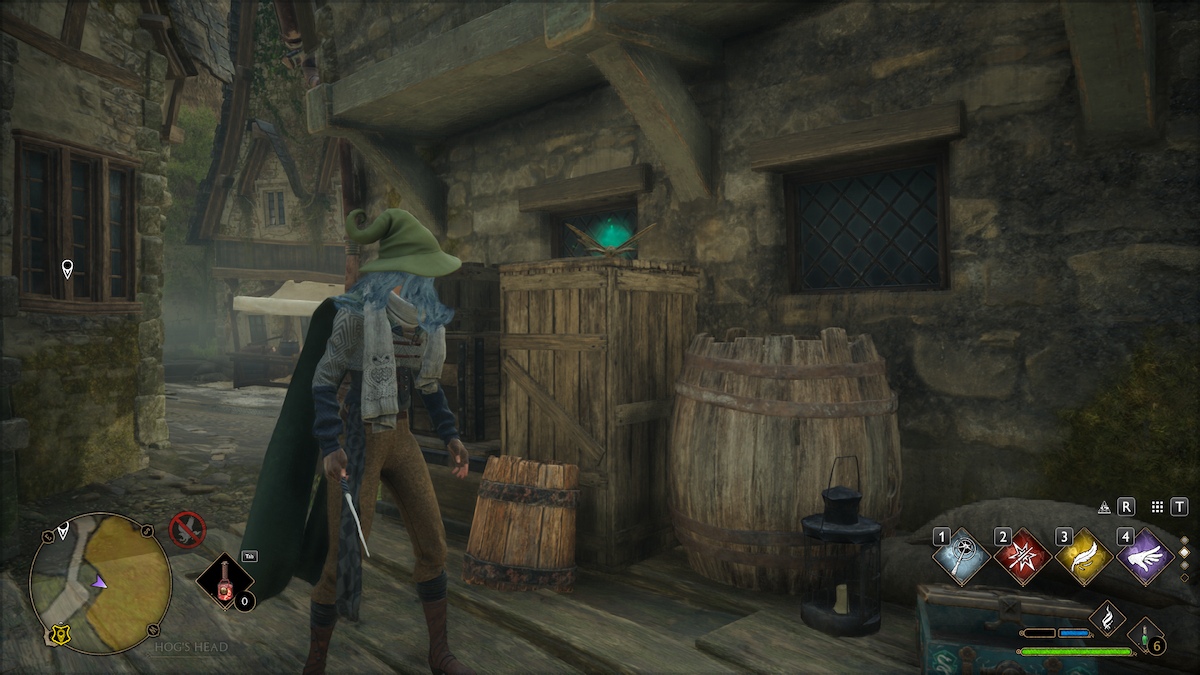
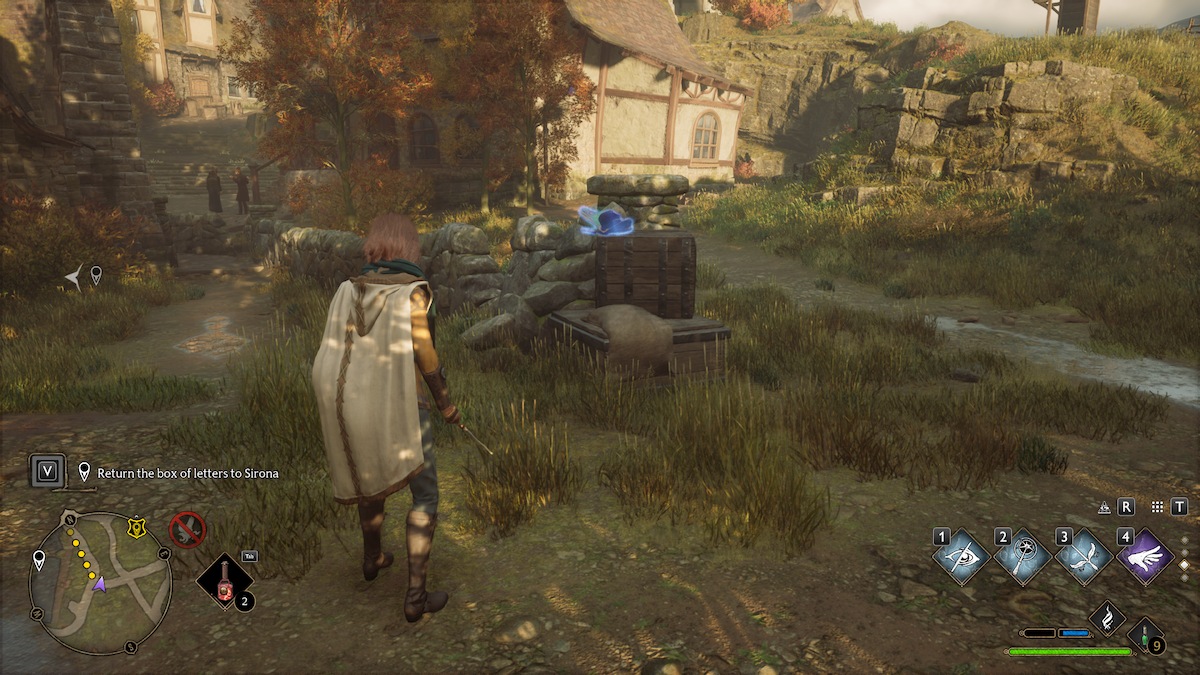
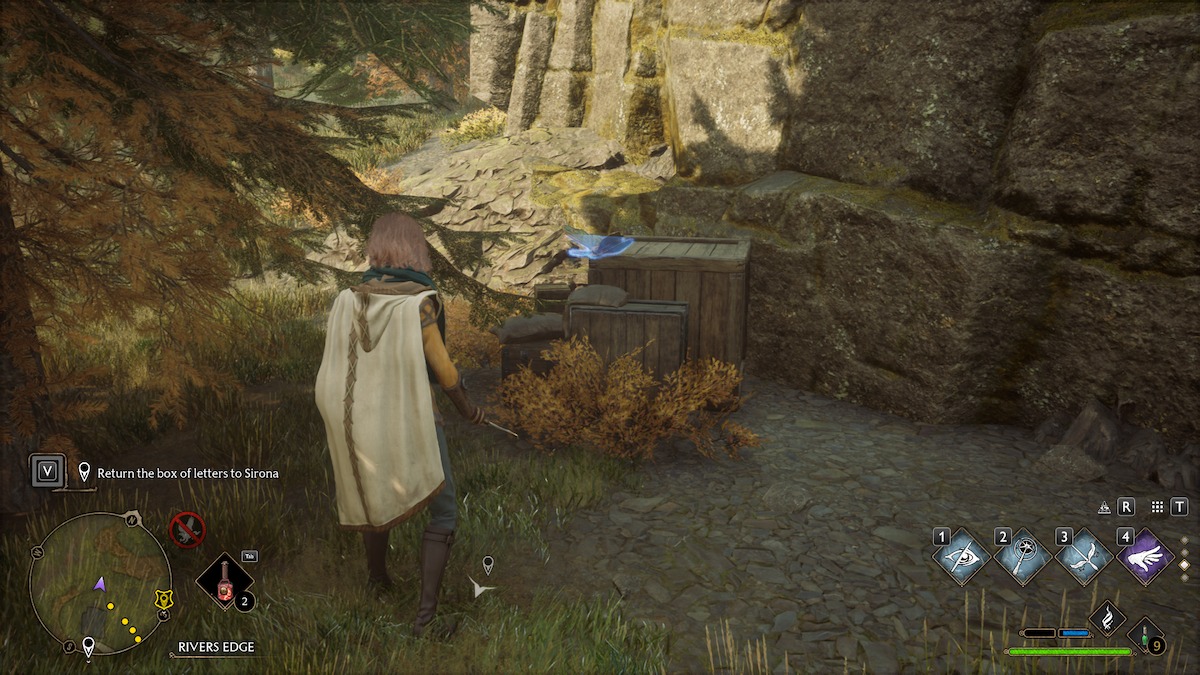
Travel to the West Hogsmeade Floo Flame and head towards the Hog’s Head. One of its neighboring buildings has an Eye Chest behind it. Beside this chest should be a Moth Mirror.
Walk back towards the Hog’s Head, and beside the building is a set of boxes. The moth will be sitting on top.
South Hogsmeade: Spintwitches Sporting Needs
#gallery-16 { margin: auto; } #gallery-16 .gallery-item { float: left; margin-top: 10px; text-align: center; width: 50%; } #gallery-16 img { border: 2px solid #cfcfcf; } #gallery-16 .gallery-caption { margin-left: 0; } /* see gallery_shortcode() in wp-includes/media.php */
-

- Screenshot by PC Invasion
-
- Screenshot by PC Invasion

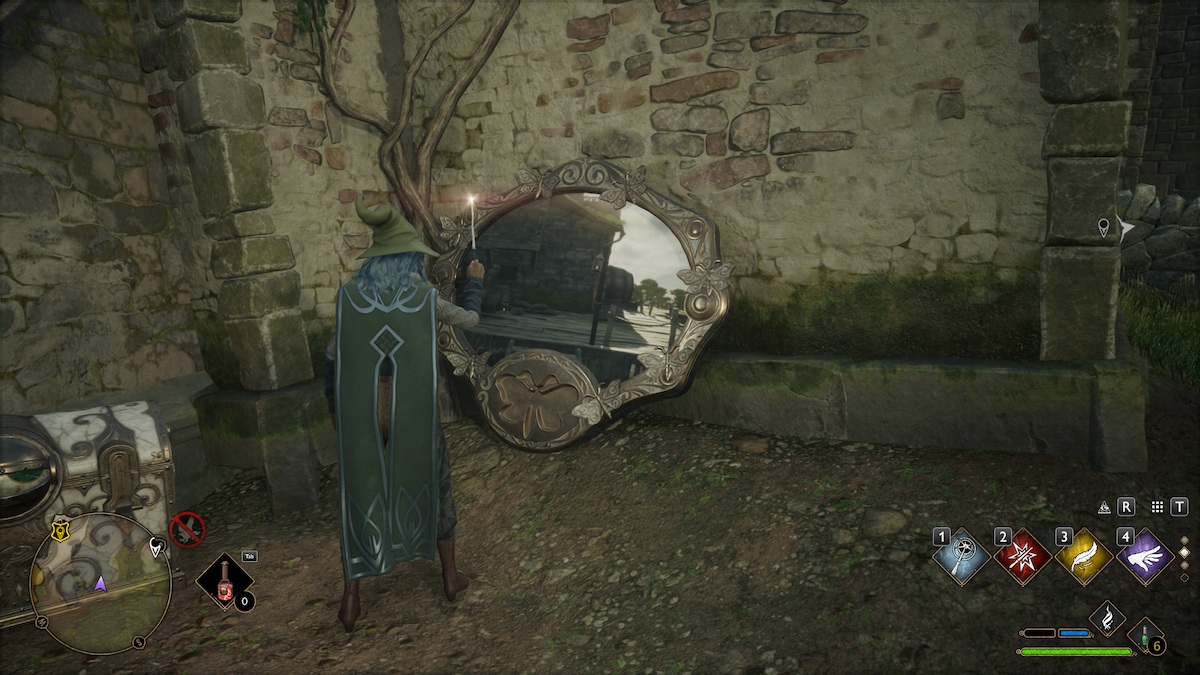
Once you teleport to this Floo Flame, walk to the right towards the building beside the Quidditch shop. Sitting against the wall beside a wheelbarrow is a Moth Mirror.
Run east between the two buildings ahead. You’ll see a stone fence, and near its end is a stack of boxes with the moth sitting on them.
North Hogsmeade: The Water Mill
#gallery-17 { margin: auto; } #gallery-17 .gallery-item { float: left; margin-top: 10px; text-align: center; width: 50%; } #gallery-17 img { border: 2px solid #cfcfcf; } #gallery-17 .gallery-caption { margin-left: 0; } /* see gallery_shortcode() in wp-includes/media.php */
-

- Screenshot by PC Invasion
-
- Screenshot by PC Invasion

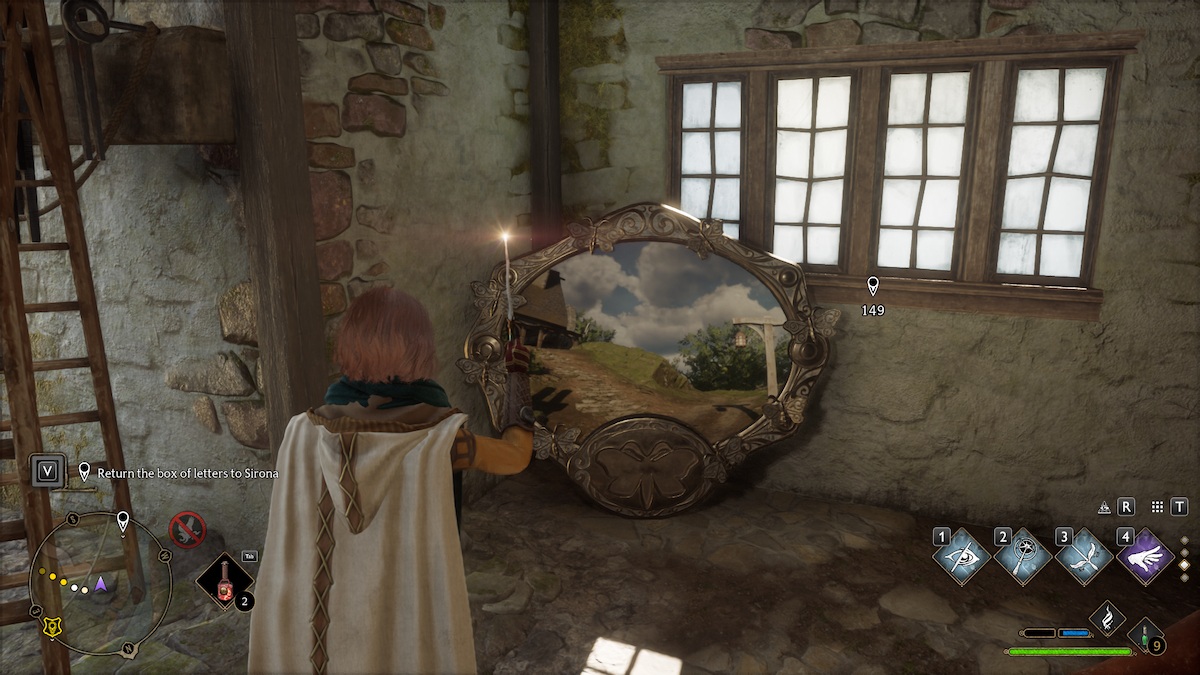
From this Floo Flame, run up the stone walkway towards the Water Mill. Inside the building beside a red chair is the mirror.
Run back out the mill towards the closest building, and you’ll see very close by a hanging lantern. On top of the wooden lamp post, you’ll find the moth.
North Hogsmeade: Dogweed and Deathcap
#gallery-18 { margin: auto; } #gallery-18 .gallery-item { float: left; margin-top: 10px; text-align: center; width: 50%; } #gallery-18 img { border: 2px solid #cfcfcf; } #gallery-18 .gallery-caption { margin-left: 0; } /* see gallery_shortcode() in wp-includes/media.php */
-

- Screenshot by PC Invasion
-

- Screenshot by PC Invasion
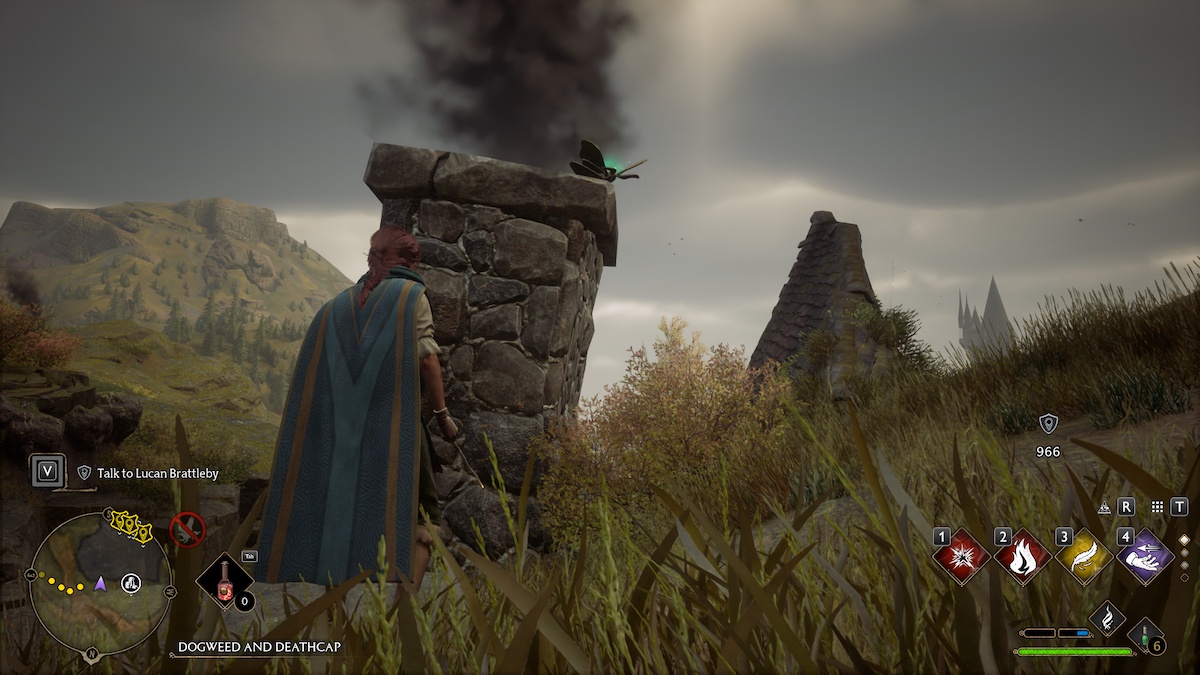
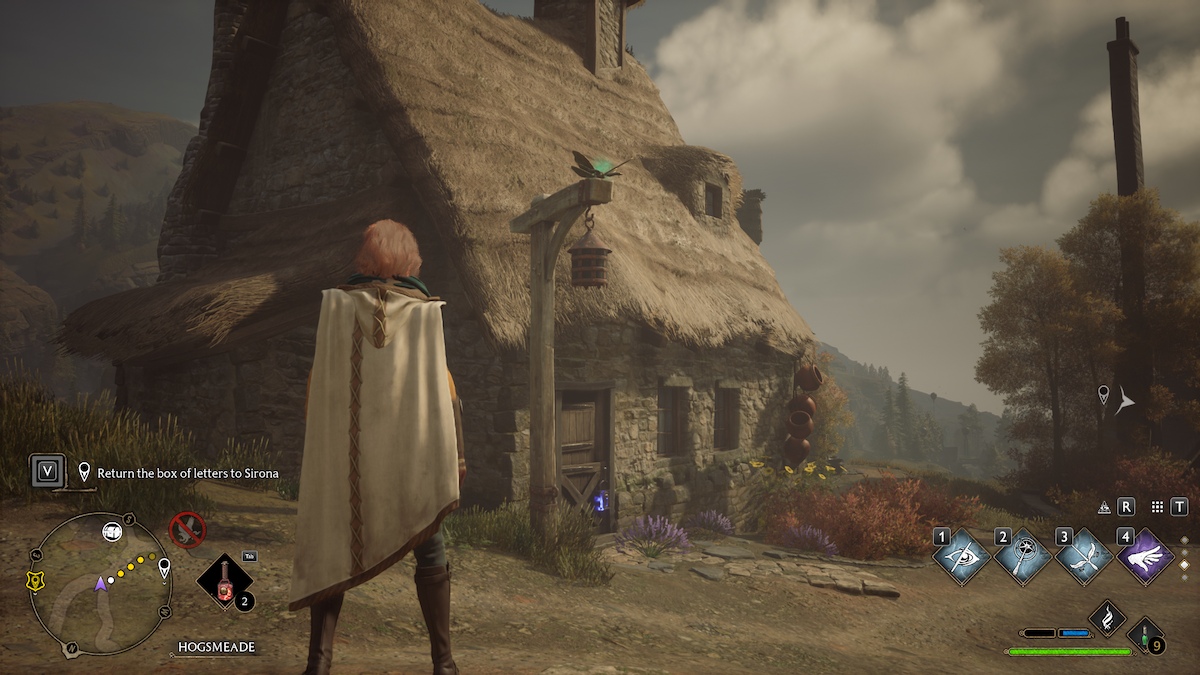
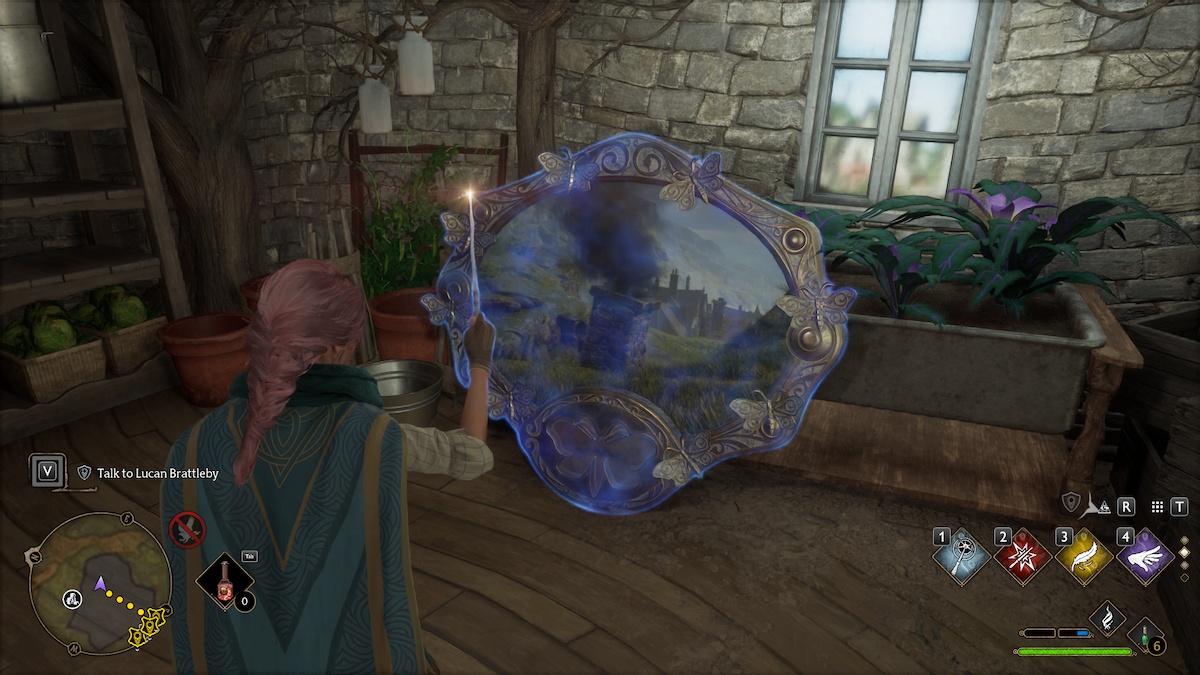
The northmost point of Hogsmeade has a plant shop called Dogweed and Deathcap. Once inside, to your immediate right sits a Moth Mirror.
Walk outside the shop and head to the left beside the building. Climb up the stone ledges to reach the chimney above the shop. On the chimney rests the moth.
The final Moth Mirror puzzle location in Hogwarts Legacy – North Hogsmeade: The Old Fool
#gallery-19 { margin: auto; } #gallery-19 .gallery-item { float: left; margin-top: 10px; text-align: center; width: 50%; } #gallery-19 img { border: 2px solid #cfcfcf; } #gallery-19 .gallery-caption { margin-left: 0; } /* see gallery_shortcode() in wp-includes/media.php */
-

- Screenshot by PC Invasion
-
- Screenshot by PC Invasion

To the west of Dogweed and Deathcap is an old, abandoned building. Once you walk inside, you’ll find the Moth Mirror hanging on the wall. Run back outside, and turn left to the side of the building. Against the large stone wall is a set of boxes with the moth on top.
Those are all the Moth Mirror puzzle locations throughout Hogwarts Legacy. It was quite the journey, but you made it.
Hogwarts Legacy is available via Steam.
- SEO Powered Content & PR Distribution. Get Amplified Today.
- Platoblockchain. Web3 Metaverse Intelligence. Knowledge Amplified. Access Here.
- Source: https://www.pcinvasion.com/moth-mirror-puzzle-locations-hogwarts-legacy/
- across
- Against
- ahead
- All
- Another
- AREA
- around
- Arts
- as
- astronomy
- attention
- auto
- available
- Beam
- beautiful
- behind
- Bell
- between
- Black
- border
- bottom
- bring
- Building
- button
- case
- Center
- complete
- continue
- covered
- Dark
- Defense
- discover
- down
- Dragon
- Early
- East
- Enter
- Entrance
- Exit
- eye
- FAST
- Features
- field
- Final
- First
- Forward
- front
- gallery
- game
- Glass
- going
- great
- Green
- guide
- Hall
- Hard
- head
- heading
- help
- here
- hidden
- history
- Hogwarts Legacy
- How
- How To
- HTTPS
- image
- IMMEDIATE
- information
- INSIDE
- IT
- journey
- landscape
- large
- legacy
- Library
- light
- Little
- location
- locations
- locked
- Long
- Magic
- make
- map
- margin
- mirror
- mirrors
- model
- more
- Near
- necessary
- need
- needs
- North
- Old
- One
- open
- opens
- opposite
- painting
- paintings
- Past
- PC
- PC Invasion
- picture
- Pillar
- plato
- plato data intelligence
- platodata
- platogaming
- podium
- Point
- post
- pretty
- push
- Puzzle
- quest
- quite
- reach
- Reading
- red
- requires
- REST
- reveal
- Rewards
- right
- room
- Run
- running
- School
- Secret
- set
- Shop
- Short
- Sit
- Sitting
- So
- solid
- SOLVE
- Solving
- Soon
- South
- Spawn
- sporting
- Spot
- start
- statue
- Stone
- storage
- Study
- Take
- The
- The Game
- Through
- Throughout
- top
- total
- towards
- Turquoise
- unlock
- up
- various
- via
- walk
- walking
- Water
- West
- windows
- Wing
- Wolf
- zephyrnet