When you approach a worn old building in House Flipper 2, it’s often clear there are problems that can only be fixed using drastic measures… like new wallpaper or tile! Here is our guide outlining the best Surface finish practices in House Flipper 2.
House Flipper 2 – best Surface finish practices
In House Flipper 2, you have several Surface finish varieties at your disposal. Throughout the campaign, you won’t have to guess which surface finishes to use, either. Clients let you know exactly which ones they want, and your job is simply to comply. You simply need to make sure you purchase the correct supplies, and that you place them exactly where the client desires.

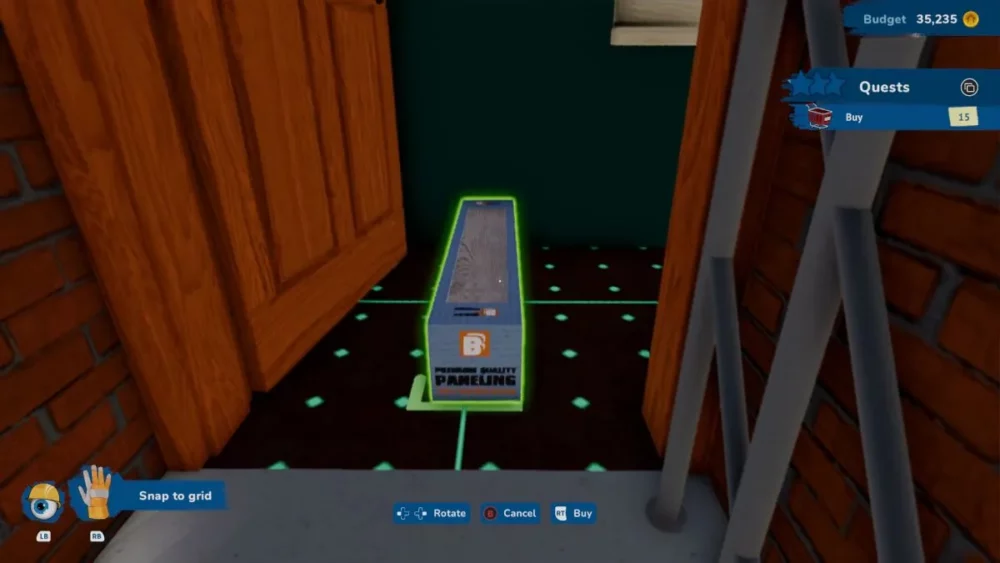
In a lot of houses, you’ll find bundles of tile or wallpaper already available. They’re on the floor, or resting on a shelf. Ignore those, I say. Or, better yet, sell them for money. When you first approach a room where some surfacing needs to occur, your priority should be to clear the space as much as possible. Throw out any garbage. Clean any stains. Flip any oversized furniture that might be in your way. Then, access the store while standing in the room where you need to work. Purchase the recommended tile or wallpaper. If you instead purchase some other pattern or tile type, it won’t count toward completion of a Quest. You can get creative in other modes, or while flipping a house you have purchased.
Related: Best Painting practices in House Flipper 2
After you purchase the desired materials, set them somewhere that’s out of your way. In some cases, that will be the floor. In other cases, you need to lay tile on that floor. I typically find the nearest doorway and place the bundle of supplies just barely in the next room. Then, I can return to it as needed without making a long trip.
By default, you can only carry so much tile or wallpaper at a time. You can also only place so much of it at a time, as well. You must refill from the box of supplies you purchased, and you may even need to purchase a second box for some jobs. Stand near the box and press the button or key indicated to grab additional material when necessary. Then place it where the yellow grid indicates. If you empty the supply box, access the Shop and buy more to continue the project. When you think you’ve finished, check to make sure the game agrees. If you haven’t completed the project, look around for nearby walls or floors you may also need to tile or paper.
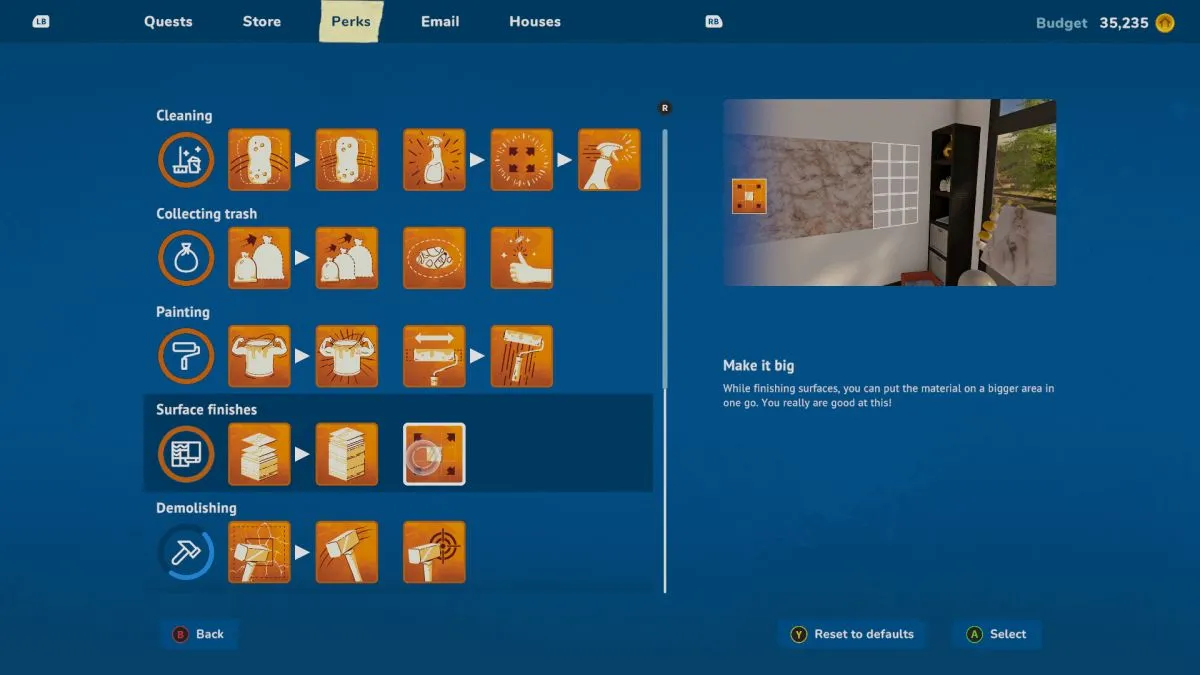
As you continue to lay tile and spread wallpaper, you gain experience to unlock perks. Mostly, these allow you to carry more supplies at once. However, the Make it big perk lets you choose a larger panel, so you can place more surface finish at once. You don’t have to worry about getting things perfect. There’s no down side that I’ve found to just always using the largest panel available every time. Time is money!
Our House Flipper 2 coverage has only just begun, so check out the game’s tag page here on PC Invasion for more guides and news.
- SEO Powered Content & PR Distribution. Get Amplified Today.
- PlatoData.Network Vertical Generative Ai. Empower Yourself. Access Here.
- PlatoAiStream. Web3 Intelligence. Knowledge Amplified. Access Here.
- PlatoESG. Carbon, CleanTech, Energy, Environment, Solar, Waste Management. Access Here.
- PlatoHealth. Biotech and Clinical Trials Intelligence. Access Here.
- Source: https://www.pcinvasion.com/best-surface-finish-practices-in-house-flipper-2/
- 1
- a
- About
- access
- Additional
- allow
- already
- also
- always
- and
- any
- approach
- ARE
- around
- as
- At
- available
- BE
- begun
- BEST
- Better
- BIG
- Box
- Building
- Bundle
- bundles
- button
- buy
- Campaign
- CAN
- carry
- cases
- Center
- check
- choose
- clean
- clear
- client
- clients
- completed
- comply
- continue
- correct
- coverage
- Creative
- desired
- disposal
- down
- either
- even
- Every
- exactly
- experience
- find
- finish
- First
- fixed
- flip
- floor
- floors
- For
- found
- from
- furniture
- gain
- game
- Get
- getting
- grab
- Grid
- guide
- Guides
- has
- Have
- here
- House
- House Flipper
- houses
- however
- HTTPS
- i
- if
- ignore
- in
- indicated
- indicates
- instead
- Is
- IT
- Job
- Jobs
- jpg
- just
- Key
- know
- larger
- largest
- lay
- let
- like
- Long
- Look
- lot
- make
- Making
- material
- materials
- May
- might
- modes
- money
- more
- mostly
- much
- must
- Near
- necessary
- need
- needed
- needs
- New
- news
- Next
- no
- of
- often
- Old
- on
- once
- ones
- only
- or
- Other
- our
- out
- outlining
- page
- painting
- panel
- Paper
- Pattern
- PC
- perfect
- perk
- perks
- place
- plato
- plato data intelligence
- platodata
- platogaming
- possible
- practices
- press
- priority
- problems
- project
- purchase
- purchased
- quest
- recommended
- resting
- return
- room
- say
- second
- sell
- set
- several
- should
- side
- Simply
- So
- some
- somewhere
- Space
- spread
- stand
- standing
- store
- supplies
- supply
- sure
- Surface
- tag
- that
- The
- The Game
- Them
- then
- there
- These
- they
- things
- think
- those
- Throughout
- time
- to
- toward
- trip
- true
- type
- typically
- unlock
- use
- using
- want
- way
- well
- when
- where
- while
- will
- without
- Work
- worry
- yet
- you
- your
- zephyrnet