The Nine present another challenge in Destiny 2 called the Dares of Eternity, filled with Xur’s witty lines and the cosmic whinnies and neighs of the newly introduced Starhorse. Dares of Eternity is a free six-player mode where you face a series of challenges chosen randomly by spinning the Wheel of Adversity.
Dares of Eternity goes through five encounters. The two challenges will have you compete against Hive, Taken, Fallen, Cabal, or Vex. There are two obstacle courses to run through after the first and second challenges. The final encounter is the boss fight and a possible Lightning Round.
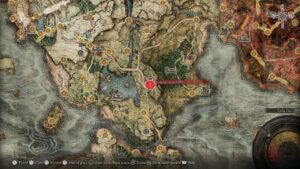
Head to Eternity on your Destination map to access the activity. The Fireteam will need to defeat enemies in the Valley and spin the Wheel of Adversity to begin the Dares challenge. Complete every challenge as fast as you can to earn more points, which is important for completing bounties.
Do your best because Starhorse is watching!
The Five Wheel Of Adversity Challenges
The Wheel of Adversity decides who you’ll face in the Valley and Vault sections in Dares of Eternity. These challenges are a compilation of familiar mechanics seen in other parts of the game. You’ll have to defeat the Paraversal Contenders and enemies to start the challenge mechanic.
Challenges In The Valley

Challenges in the Valley and the Vault arenas are the same except that the Valley doesn’t have a Paraversal Challenger boss fight.
Cabal: Commanders Defeated
The Cabal will spawn Bombtender enemies that have a glowing effect. These Bombtenders drop Dare Cores after they’re defeated. Dare Cores are Cabal bombs that you need to throw at the shielded Commanders. Dare Cores cause a flood of damage, and a direct hit is fatal.
Fallen: Mines Defused
You’ll need to defuse mines at zones A, B, C, and D. Each zone will have a Brig and Exploder Shanks. After diffusing the mines, all the mines spawn again in the center with a giant Paraversal Servitor. Defeat the Servitor and capture the zones to complete the round.
Vex: Minotaurs Defeated
To remove the shields from the Gatekeepers of Eternity, use the Void Cranium weapon that drops from defeated Headbearer Goblins. The Void Cranium has enough ammo to remove the shield of one Gatekeeper, but you can defeat another Headbearer if you need another one. The Void Cranium melts the Gatekeepers so if you find extras lying around, use them.
Taken: Blight Destroyed
A large Taken Minotaur called the Paraversal Contestant will drop tons of Paraversal Energy orbs once defeated. Grab the orbs and throw them at the large Blight floating in the center of the arena. It normally takes two rounds of Paraversal Energy throws to complete the challenge.
Hive: Crystals Shattered
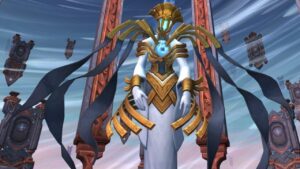
You’ll need to defeat Xur’s Wellkeeper Knights to take down the floating crystals around the map. Defeated Wellkeepers drop a glowy, green Hive Well of Ruinous Resonance, and the buff lasts for 10 seconds. Within those 10 seconds, take down as many crystals as you can. The large crystal requires a couple of shots to take down.
Paraversal Challengers In The Vault

The Vault is the second encounter after the Valley. The Vault area builds on the mechanics from the Valley with an additional phase where you need to fight a Paraversal Challenger in the front of the room.
Cabal: Paraversal Challenger
The Bombtenders you’ll need to kill enter the arena from the front–but don’t stand near there, because the Cabal drop a huge Goliath tank down and it will instantly kill you. You can defeat with Goliath Paraversal Challenger with weapons, abilities, and Dare Cores.
Fallen: Paraversal Challenger
After diffusing the mines, the boss fight will begin. Like the Cabal encounter, don’t stand in the front of the room where the boss spawns because the giant Brig will trample you. You won’t need to employ special mechanics here. Just use your weapons and the Scorch Canons to deal damage to the Brig Paraversal Challenger.
Vex: Paraversal Challenger
Void Cranium is a weapon that drops from the Headbearer Goblins and is used to take down the Hydra Paraversal Challenger’s shield. The Goblins enter the arena near the Challenger. The damage phase begins after you remove the shield.
Taken: Paraversal Challenger
Xur’s Blightmongers, which are Taken Minotaurs, drop Paraversal Energy orbs. This time, you need to throw the Paraversal Energy at the Taken Knight Paraversal Challenger to take down its shield. This starts the damage phase.
Hive: Paraversal Challenger
You’ll need to get Ruinous Resonance from the Wellkeepers in order to take down the Orge Paraversal Challenger’s shield. The Wellkeepers spawn near the Ogre and you have 10 seconds to remove the shield when standing in the Hive Well. It’s a simple objective, but the numerous enemies in the arena can make things hectic.
The Starhorse’s Treasurer named Kashh’n Pryzus (that’s really its name) is a Taken Ogre boss that drops loot like Treasure Keys and Strange Coins. This boss may appear randomly in the Vault.
The Starhorse’s Favor
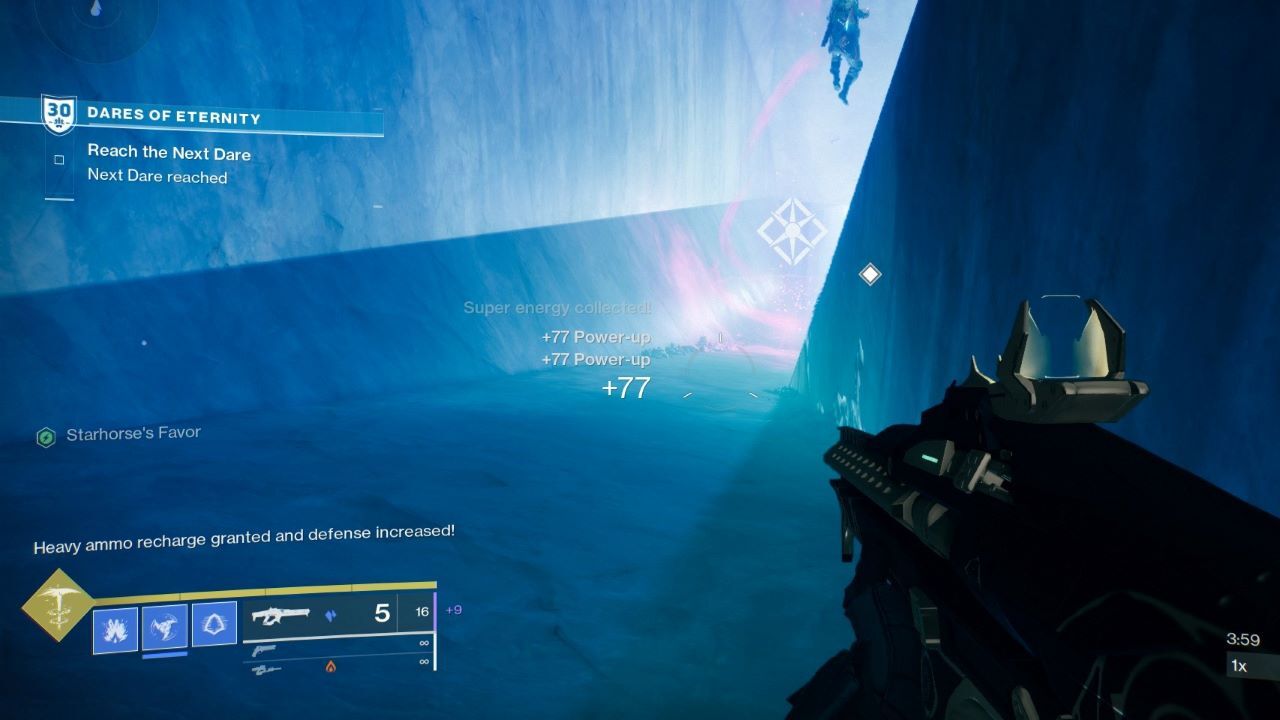
Starhorse’s Favor is a buff that lasts that entire encounter which gives you Heavy ammo regeneration and increased defense. If you have the buff, there will be a colorful aura above your head and text saying that you have the Starhorse’s Favor on the bottom left of your screen. This is great for farming Power weapon kills too.
After the Valley encounter, the first obstacle course begins after the catapult throws you onto the top platform. If you complete the obstacle from the top without falling, you get the Starhorse’s Favor. This buff is different from the power-ups in the arena.
While performing well in the first obstacle course determines whether you earn Starhorse’s Favor for the Vault, the second obstacle course isn’t what nabs it for you in the final encounter. Instead, choosing correctly at the “Picking a Door!’ guessing game is what nets you the buff.
Currently, if someone presses the buzzer to begin the encounter and you get the Joining Allies message, you lose your Starhorse’s Favor.
The Final Boss Fight
The “Pick A Door!” guessing game presents three doors with Hive, Cabal, and Vex symbols. Standing on the correct plate gives you a Starhorse’s Favor and starts the final dare encounter.
Hive Boss Crota

Crota, Son of Oryx was the final boss from Destiny 1’s Crota’s End raid. Crota is one of the three final bosses that you need to fight against in the Pit. As in the raid, you need to grab a sword Relic from the Swordbearer Knights to make Crota kneel and become susceptible to damage. After dealing enough damage, Crota reappears with two other Aspects of Crota. This triggers multiple portals around the map, which invites in more Swordbearers. You’ll once again need the Relic to do damage to all Crotas.
Cabal Boss Valus Ta’aurc

Whether you wanted it or not, Valus Ta’aurc left their grave on Mars and is now at Eternity’s Beach in Destiny 2. The encounter immediately starts with the damage phase. Next, you have to hunt down the 12 Siegebringers around the arena. Along with the bombarding enemies, a Thresher ship arrives in the sky. Destroying the Thresher drops a Dare Core, which is essential for taking down Valus Ta’aurc’s shield generator. Throw a core at each of the two big generators near where Ta’aurc spawns in–not at the boss itself–to knock his shield out.
Vex Boss Zydron

You’ll get warped into an arena called Spire, where you’ll fight Zydron, the Gate Lord from Destiny 1’s story. Firstly, avoid the big laser walls that move through the arena for two phases. If they hit you, you’ll be “detained,” or trapped in a glowing bubble that will leave you helpless. If you do get detained, you or your teammates can shoot the bubble to escape. Next, enemies will spawn along with two of Xur’s Keybearers that you need defeat in order to take down Zydron’s shield. Zydron can be defeated in one damage phase. If you need another damage phase, you’ll need to avoid four detainment walls and kill the Keybearers again to get a second chance to deal damage.
Strike The Lightning Round
Lighting Rounds are random! They’re an extra encounter after completing the final boss fight that gives more loot. Lightning Rounds have three waves of zone-capturing and defeating enemies. This surprise event can happen during the Hive, Cabal, or Vex final boss fights.
Lightning Round 1
You need to quickly defeat the Paraversal Contestants and capture Zones A and B in the first round. Taken enemies will continue spawning around you at every zone.
Lightning Round 2
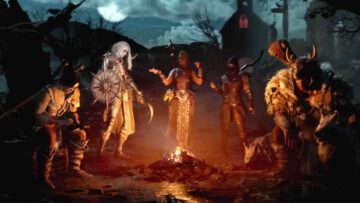
Capture Zones C, D, and E to get to the final round. The zones will have Taken Paraversal Contestants defending the area that you need to take down in order to capture the zone. Xur’s Chosen, Special Guest Star appears in this round. You need to defeat Xur’s Chosen multiple times to get the Special Guest Star Triumph for the 30th Anniversary Seal.
If you want to kill Xur’s Chosen to get credit for the Triumph, you may need to abandon your zone for a bit because this enemy can be defeated quickly.
Lightning Round 3
The final round is the same as the previous ones, but this time you’ll need to capture zones A, B, and F.
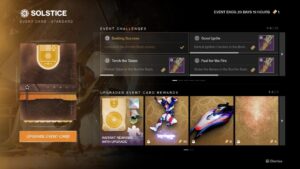
The Lighting Round rewards players with three additional chests for every round completed. The chest at the end of Dares of Eternity without the Lightning Round gives a Treasure Key, Strange Coin, and Legendary gear. You can use the Treasure Keys to get cosmetic items from Xur’s Treasure Hoard as you level up and collect more keys. Strange Coins can be exchanged for Treasure Keys, Paraversal Haul, or Starhorse Bounties. The Moments of Triumph 2021 and the 30th Anniversary Seal include triumphs from Dares of Eternity that give additional rewards.
- "
- access
- Additional
- All
- AREA
- around
- BEST
- Bit
- bubble
- Cause
- challenge
- Coin
- Coins
- Contenders
- continue
- Couple
- credit
- Crystal
- damage
- deal
- dealing
- Defense
- Drop
- e
- energy
- essential
- Event
- Face
- farming
- FAST
- fights
- First
- Free
- game
- Gear
- Generator
- grab
- great
- Green
- Guest
- guide
- head
- here
- Hive
- HTTPS
- huge
- important
- IT
- Key
- keys
- Kills
- large
- laser
- Level
- lightning
- map
- mars
- May
- Mechanics
- mines
- move
- Near
- order
- Other
- platform
- players
- power
- present
- raid
- RE
- requires
- Rewards
- rounds
- Run
- s
- Screen
- Series
- Simple
- So
- son
- Spin
- start
- surprise
- text
- The
- The Vault
- time
- tons
- top
- triggers
- Vault
- waves
- What
- Wheel
- WHO
- within