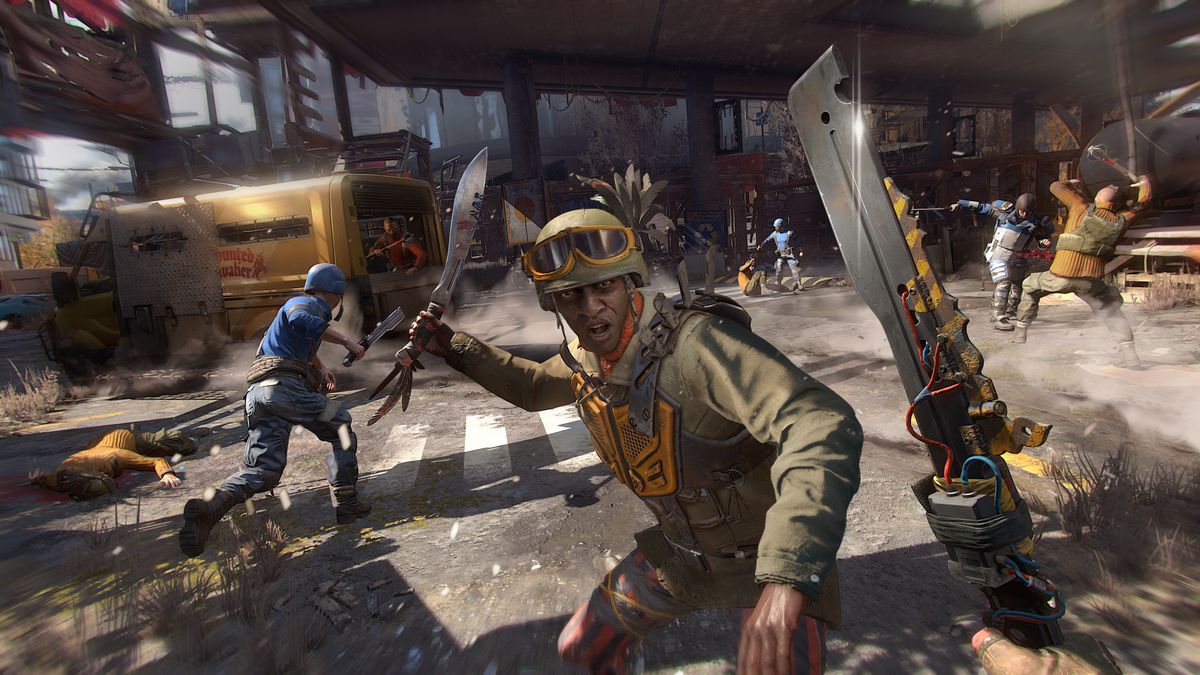
Dying Light 2 Stay Human is a very deep, very long-playing video game where choices have long-lasting, irrevocable consequences, and where the player is really encouraged to inhabit the character of Aiden, a pilgrim traveling in a post-apocalyptic Dark Ages, surviving on his wits and athletic skills.
Of course, that means Dying Light 2 is one of those open-world games that perfectionists may start and restart several times just to “play it the right way” — after discovering a few hours in that they’ve neglected some strategy, resource, or gameplay loop that delivers huge benefits and a hell of a lot of fun.
With this type of player in mind (and Lord knows, I am one), I’ve built a list of things I wish I’d known going into my first playthrough, which was mostly a rushed attempt in order to see all of the story in a very slowly progressing game. In no particular order, here are nine things you should know before setting off on your adventure inside Villedor.

Stamina is more important than health
In Dying Light 2, players find or are awarded “Inhibitors” which, in groups of three, will upgrade Aiden’s stamina or his health by one rank. I recommend upgrading your stamina over your health at a ratio of 3:1 – at least, 2:1. New players may think that, in a world with a never-ending infected horde (one that is immediately dangerous at night, no less), building up health for a tank-like run would be the order of the day. But when parkour and combat both draw from the same stamina pool, stamina becomes the prize attribute.
The best example comes in one of the first onboarding missions, “Getting Stronger.” On hard difficulty, Aiden simply runs out of energy in the first wave of virals if you’re not also dodging and, more importantly, kicking infected off of the rooftop. Earlier in this mission, we also see how limited his climbing is without boosted Stamina.
Stamina is vital because it gives you extra attacks when you’re surrounded, and it gives you greater means of escape to higher ground if you’re fleeing an infected horde at night. Better stamina also offers you certain parkour skills earlier on. Some perks you should take as soon as they are available: “Dart” (a speed burst on L3); “Dash” (sprint for as long as you have stamina, also using L3); and “Firm Grip,” which allows you to hang on to a ledge and make the final climb to the top, even if you’re out of stamina.
Lastly, don’t neglect to craft (and use) stamina and damage boosters. We’re all for a partnership for a drug-free Villedor, but these can make boss fights a lot shorter, and even get you out of some zombie chases the hard way: by killing everything.

Unlock hideouts, windmills, and fast travel locations whenever you find them
Unless you’re in the middle of a story mission (or you need to make it someplace by nightfall) you really should stop and take care of these open world objectives whenever they’re called out. In addition to being a nighttime travel convenience, they can really save your bacon if you’re doing a lot of nighttime scavenging and Howlers are calling in chases on you all the time. In a chase, breaking the infecteds’ line of sight is practically impossible. They’re quick, there’s a lot of them, and they climb even faster than you can. You’re better off having a route to UV lights (which the infected avoid at all costs) memorized — and the more of these resources and zones you unlock, the more UV safety areas you have.
If you’re in a chase without a UV safety area nearby, throw a decoy. These tools are available at vendors and are easily crafted (10 scraps and 1 cans, both very common resources). A UV light bar is also easily crafted (oxidizers aren’t available in great numbers but they are available from vendors, unlike batteries) but it’s more useful when you’re inside a Dark Area, or when you’re not being pursued and you’re low on immunity.
ABS: Always be survivor-sensing
Clicking R3 should be a second-nature habit. In the wilderness of the first onboarding chapter, you can use it to find enough honey and chamomile to craft six health patches before you get to Villedor’s tunnel entrance. You can also find at least three extra weapons, including a two-handed Savage Bludgeon. (It’s on the crumbling overpass, before you begin the climbing tutorial stretch in the nature preserve.) The Savage Bludgeon only deals 15 damage, but it breaks down an enemy’s stance faster, which sends them flying on the next hit. Using blunt weapons against a clot of infected is more effective than bladed weapons for the same reason.
Survivor sense is also good for alerting you, indirectly, that you’re about to step into a major battle. If you’re out in the open during the day, in a story mission, and your survivor sense picks up multiple spears, propane tanks, bottles or bricks, there’s a good chance a big throwdown is going to take place here.
Dodge and kick more than you block
At later levels and higher difficulties, enemies will vary their strikes and evasions — often transitioning to unblockable power attacks even if they aren’t heavy-type infected or Renegades carrying two handed-weapons. It can be tempting to hang back, block, and counterattack everything, especially since the window for perfect blocks is very generous.
But this still consumes stamina (a successful perfect block will take about half the stamina of a melee strike) and can leave you without much room for a counterattack if you’ve been parrying a large mob. Kicking enemies away (left trigger + X/A) is as useful as a block, especially if you’re on a rooftop. Get into the habit of kicking enemies off the roof. It’s super effective, even if you’re sacrificing the means of scavenging loot off their corpses — which are frequently empty.
Perfect blocks are best used when you’re staggering an enemy to set up a vault kick, which the game teaches you in your first fight against Renegades. Get in the habit of using that vault kick – it’s R1/right bumper + right trigger. If you need more time to set up your vault kick, take the “Perfect Parry” perk from the combat skills tree. It extends the slow-motion effect you get from a perfect block. “Perfect Dodge,” which is also available very early on, is another essential perk. It staggers enemies when you dodge them, meaning heavy enemies and those using power attacks can be set up for vault kicks, too.
Explosions do not equal decoys
This seems counterintuitive, but unless you are using a dedicated decoy (crafted, or bought from a vendor) you are not going to distract large numbers of infected by blowing up a propane tank. Similarly, bricks and golden coins are only useful as lures on human enemies. If you’re trying to lure, move, or delay Infected, use a device that was made specifically for that purpose: a decoy. Or, use a car trap, which you only find in areas that are controlled by the Peace Keepers (and PKs control those areas only if you assign a nearby resource structure to them). In any event, decoys are vital if you’re going to be scavenging at night. And you should be scavenging at night because, except for some story missions, that’s the only time when you find infected trophies on common biters and virals. Those trophies are the only way to upgrade crafted gear into bigger bombs, longer-lasting decoys, or deadlier weapon mods.
You can probably play this game on hard
There is no competitive bonus for selecting hard difficulty. But for those who want an immersive experience, it’s very satisfying, and the scarcity of certain materials and weapons means you’ll use more of the tools that are available to you out of necessity. Enemy attacks really only deal large amounts of damage when you’re swarmed, or if you’re out of stamina. One-on-one, Aiden is a rather powerful guy, even against huge enemies (so long as you’re dodging and paying attention to their attack pattern).
Also, regarding immersive experiences: consider turning off some of the call-outs in your HUD. Go to options in the main menu, then to the HUD tab, and try turning off the health bars for humans and infected, and the awakening bars for infected. You’re going to hit both of these enemies until they stop moving regardless, so having a running tally of their health isn’t really that useful. As for awakening infected, the early tutorials should show you that there’s usually a clear path through a group of sleeping zombies if you crouch and move slowly.
Likewise, after a few hours you will have an innate sense of the limits of your immunity and your stamina. At any rate, your Biomarker will chirp and Aiden will gasp when you’re inside two minutes of Immunity left, which is really the only time you need to be aware of it.
If the game is too hard for you on advanced difficulties, or with HUD features turned off, you can always turn them back on or lower the difficulty at any point.
You don’t (usually) lose progress when you die
This is partly why the game can be played on hard difficulty. Even in big set-piece fights inside story missions, when you respawn you’ll see that the enemy who killed you has not returned to full health. It can feel like cheating, but it’s reassuring to know that in a tremendously difficult boss fight, you can always sort of outlast the S.O.B. as a last resort. Note that this applies to missions taking place in confined areas. Out in the open world, you will spawn at the nearest fast travel location that you’ve unlocked. If you’re a long ways from one, you can forget about finishing whatever encounter killed you.
As it applies to nighttime activity, obviously if you die in the middle of looting a GRE Anomaly Zone, you’re going to miss out on whatever you might have gained there, particularly the nighttime bonus to your parkour and combat XP. But in the open world, if you’re killed during a chase, all you will lose is your nighttime XP. This makes crossing the city at night less of a worry than it would seem to be.
Don’t mod everything all at once
Because installing a mod will repair up to 50 durability points on a weapon, consider saving one (or two) mod slots for a time when you need to extend the weapon’s life. That said, eventually you will out-level your weapons — and therefore your enemies will, too. So even if you have a mod slot available on a unique-class weapon you earned early on, it may not be worth putting a new mod on it and partially repairing it.
Because you can’t craft weapons, you should routinely be checking vendors’ supplies, especially after you advance a level (which is going to come very slowly, so be warned). Weapons are, for the most part, affordable, and the lesser ones you scavenge in the real world can be used as a kind of currency. You’re given 24 slots to carry looted weapons, which almost moots any necessity for the stash locker Aiden keeps in every hideout. If you’re constantly selling looted weapons and buying better ones, the stash will rarely be necessary.

Over-level by hunting inhibitors early on
Old Villedor (the map covering the first half or so of Dying Light 2) has at least half a dozen reasonably accessible (and beatable) Quarantine Sites and GRE Anomalies where you can loot inhibitors (the things that boost your stamina or health). While you will be awarded plenty of inhibitors in story missions early on, finding extras can really open up Aiden’s capabilities earlier, and give him a bigger edge against enemies that are the same level or one rank lower.
The combat perk tree is governed by your health total; the parkour perk tree is gated by stamina. The better perks are available with higher stamina or health totals, and inhibitors will give you access to that much earlier. At any rate, it is much easier to go inhibitor hunting earlier in Aiden’s career rather than after reaching level 4 or 5.
- "
- About
- access
- advanced
- Adventure
- All
- Another
- AREA
- athletic
- attribute
- available
- bars
- Batteries
- Battle
- benefits
- BEST
- bonus
- Boosted
- boosters
- Building
- Buying
- capabilities
- car
- care
- Career
- carrying
- chase
- checking
- City
- Coins
- Common
- Competitive
- consequences
- Costs
- Currency
- damage
- day
- deal
- Deals
- delay
- Dodge
- down
- dozen
- During
- Early
- Edge
- Effective
- energy
- Entrance
- essential
- Event
- experience
- Experiences
- FAST
- Features
- fights
- First
- full
- fun
- game
- gameplay
- Games
- Gear
- generous
- good
- great
- Group
- having
- Health
- here
- honey
- How
- HTTPS
- huge
- human
- Humans
- i
- immersive
- important
- importantly
- Including
- IT
- large
- Level
- level 4
- levels
- light
- Limited
- Line
- List
- location
- Long
- Machete
- major
- map
- materials
- May
- Mission
- more
- move
- numbers
- Offers
- Onboarding
- open
- Options
- order
- parkour
- Partnership
- Patches
- Pattern
- play
- player
- players
- Plenty
- Polygon
- pool
- power
- powerful
- propane
- Protective
- quarantine
- R3
- real world
- repair
- resource
- Resources
- Route
- Run
- running
- s
- Safety
- Said
- saving
- sense
- set
- setting
- Sites
- SIX
- skills
- slot
- Slots
- So
- speed
- Sprint
- stamina
- start
- Stash
- stay
- Story
- Strategy
- Strikes
- successful
- sunrise
- Tally
- The
- Through
- time
- tools
- top
- transitioning
- travel
- tutorial
- tutorials
- unlock
- Vault
- vendors
- Video
- View
- Wave
- What
- WHO
- world
- worth


