
Here is everything you need to clear the FFXIV The Abyssal Fracture Trial.
The Abyssal Fracture is the final Trial of FFXIV‘s Endwalker Patch content and it has you facing off against Zeromus, the iconic final boss of FFIV. We’ll teach you everything you need to look out for in the Normal version of the trial.
FFXIV The Abyssal Fracture
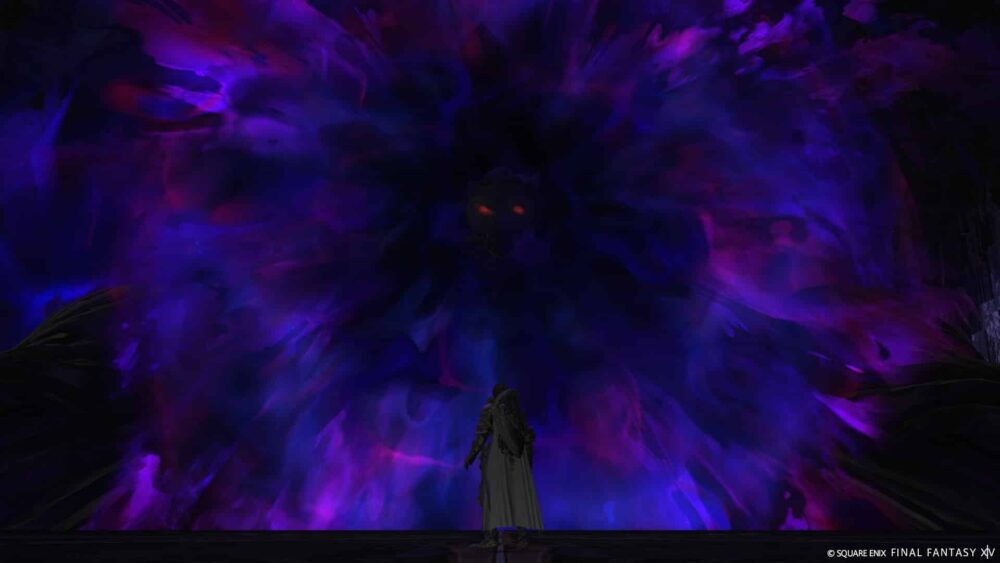
Zeromus
Abyssal Nox: Zeromus will start the encounter with Abyssal Nox which will hit the entire party, drop their health down to 1, and apply the Doom status effect. Healers must heal everyone up to 100% to dispel Doom.
In addition, the Abyssal Nox will split from the center of the arena and explode into AoEs at the end of each glowing line.
Sable Thread: A stack AoE marker will be indicated on a party member on which everyone has to stack up. Pop cooldowns to mitigate damage and healers need to keep healing through the damage. This attack will hit 5 times.
Visceral Whirl: This is a massive AoE marker in the shape of a T. There’ll always be a safe spot close to Zeromus and one away from it. Simply spot the safe corners and make your way over there.
Dark Matter: Dark Matter is a Tankbuster spell that’ll market the number 1 on the enmity list. Stay clear of whoever is targeted mitigate damage and heal them up as soon as the spell goes through.
Flare: Another AoE marker, only that it now appears as a tower that needs to be soaked. Everyone needs to gather in the circle and mitigate damage as best they can. Once it lands, lines will fan out which will cleave in the direction they’re pointing towards.
Additionally, two players will be targeted by two big AoEs which will follow their path with three hits each.
Void Bio: Zeromus will cast a line of poison bubbles which will slowly move towards the players. Navigate through them but be careful, Viceral Whirl will be cast right after.
Big Bang: A large number of small AoEs will be indicated all across the arena, with more of them spawning right after. All you have to do is find a safe spot before they go off. After that, a big roomwide AoE will go off damaging all party members.
Acceleration Bomb: Stop attacking Zeromus before the countdown finishes to avoid taking massive damage. Either stow away your weapon or untarget the boss.
The Dark Beckons: One player will be singled out with a stack marker, simply stack up and mitigate if you can.
The Dark Divides: This will mark every player with a single target AoE marker right after The Dark Beckons. Spread out to make sure you don’t hit any of your party members.
Meteor Impact: A meteor will target the center of the arena and tether each party member to it. Spread out and gain enough distance so the arrows turn into a thin line to avoid massive damage.
Black Hole: A medium-sized dark AoE will form in the back half of the arena. This will expand and cover almost the entire arena. The only safe spot is the far corner of the opposite side of the arena.
Fractured Eventide: This spell is cast together with Black Hole and is a laser that sweeps either left to right or right to left. To avoid it and being sucked into Black Hole you need to run into the spell before it goes off and stand behind the arrows. As it sweeps across the arena follow it to avoid the Black Hole, the closer you are to Zeromus, the better.
Void Meteor: Meteors will crash in each corner of the arena. Damage is best avoided by stacking in the middle of the arena. Meteor Impact will be cast right after, make sure that there is no meteor in your tether to avoid disaster. The Meteors will explode afterwards into AoEs.
Big Crunch: See Big Bang.
Rend the Rift: A massive partywide spell that will continuously deal damage and must be healed through. Afterwards, just like Big Bang a bunch of small AoEs will spawn all over the arena.
Nostalgia: Zeromus will continuously punch the arena, dealing damage to everyone. Mitigate the damage as best you can, the spell is done after Primal Roar goes through which will also deal massive damage to the party.
Flow of the Abyss: A rift will form on the side of the arena and cleave in a straight line. In addition to that, players will also be targeted with a small AoE they need to place away from the party. When it goes off it will deal continuous damage.
Chasmic Nails: Limit Cut by another name. Red slices of the arena will be indicated and cleaved in the same order as indicated. These go through rather fast so make sure you have enough time to move between each cleave.
That sums up everything you need to know about the normal Zeromus encounter. For more on FFXIV, check out our guide to The Lunar Subterrane and our summarization of the 6.5 Patch Notes.
- SEO Powered Content & PR Distribution. Get Amplified Today.
- PlatoData.Network Vertical Generative Ai. Empower Yourself. Access Here.
- PlatoAiStream. Web3 Intelligence. Knowledge Amplified. Access Here.
- PlatoESG. Carbon, CleanTech, Energy, Environment, Solar, Waste Management. Access Here.
- PlatoHealth. Biotech and Clinical Trials Intelligence. Access Here.
- Source: https://estnn.com/ffxiv-the-abyssal-fracture-guide/
- 1
- a
- About
- across
- ADDITION
- after
- afterwards
- Against
- All
- almost
- also
- always
- and
- Another
- any
- appears
- apply
- ARE
- Arena
- as
- At
- avoid
- away
- back
- BE
- beckons
- before
- behind
- being
- BEST
- Better
- between
- BIG
- Black
- bomb
- Bunch
- but
- by
- CAN
- Center
- check
- Circle
- clear
- close
- closer
- COM
- content
- continuous
- continuously
- corner
- corners
- countdown
- cover
- Crash
- crunch
- Cut
- damage
- damaging
- Dark
- deal
- dealing
- direction
- disaster
- distance
- divides
- do
- don
- done
- Doom
- down
- Drop
- each
- Effect
- either
- end
- enough
- entire
- Every
- everyone
- everything
- Expand
- facing
- fan
- far
- FAST
- FFXIV
- Final
- find
- follow
- For
- form
- from
- gain
- gather
- go
- goes
- guide
- half
- has
- Have
- healing
- Health
- HIT
- hits
- hole
- HTTPS
- iconic
- if
- Impact
- in
- indicated
- into
- Is
- IT
- jpg
- just
- keep
- know
- lands
- large
- laser
- left
- like
- LIMIT
- Line
- lines
- List
- ll
- Look
- Lunar
- make
- mark
- Market
- massive
- matter
- member
- Members
- Middle
- mitigate
- more
- move
- must
- name
- navigate
- need
- needs
- no
- normal
- now
- nox
- number
- of
- off
- on
- once
- One
- only
- opposite
- or
- order
- our
- out
- over
- Party
- Patch
- path
- place
- plato
- plato data intelligence
- platodata
- platogaming
- player
- players
- poison
- pop
- punch
- rather
- RE
- red
- rift
- right
- Run
- safe
- same
- see
- shape
- side
- Simply
- single
- small
- So
- Soon
- Spawn
- split
- Spot
- spread
- stack
- stand
- start
- Status
- stay
- stop
- straight
- sums
- sure
- taking
- Target
- targeted
- Tether
- that
- The
- their
- Them
- there
- These
- they
- this
- three
- Through
- time
- times
- to
- together
- towards
- trial
- turn
- two
- up
- version
- way
- we
- when
- whoever
- will
- with
- you
- your
- zephyrnet