There are dozens of bonds to pursue in Like a Dragon: Ishin!. From chatting with a shop owner to becoming a regular at a sushi joint or patching up a samurai wannabe citizen with health items, there’ss no shortage of friendships to build. Bonds serve as an extension of substories, but quite frankly, the number of available bonds in Like a Dragon: Ishin! can be quite overwhelming.
Considering how much there is in the game to do and discover, spending time with bonds might seem trivial at first. This guide dives into all the rewards you can get from bonds in Like a Dragon: Ishin!, so you can know what these friendships will offer you in the long run without having to spend the money or the time. We’ve also highlighted the bonds in Ishin that you shouldn’t miss.
How bonds work in Like a Dragon: Ishin!
Bonds, which are also labeled as friendships in Like a Dragon: Ishin!, allow you to get to know the locals a bit further. Some have extended storylines, others are related to systems such as Another Life, and so on. In essence, there are quite a few substories that might feel short at first, but once completed, they unlock a bond for you to complete afterward.
Bonds are completely optional. They can’t be missed during the main story either, so you can always tackle them during Premium Adventure after the credits have rolled. If you’re looking to gain some Virtue, however, they can be a good source for that. But all in all, unless there is a specific reward that might be worth the time investment, these friendships are more of a completionist checklist item than anything super deep.
The 8 Like a Dragon: Ishin! bonds you should complete
Amid the sheer variance of bonds, there are a few that you should complete as soon as possible. As a general rule, if you’re trying to speed up the process of increasing the friendship level of a bond, you can always exit the area that you’re in and come back again. If that doesn’t work, performing an activity — such as a battle dungeon, a karaoke song, or eating at a restaurant — might do the trick. But in any case, if you’re still doing the main story, progressing through your current main objective is always likely to reset an NPC so they’ll talk to you again.
In order to equip yourself with the best tools for the mid- to endgame grinds, here are the Like a Dragon: Ishin! bonds you shouldn’t miss. And for details about where to start these bonds and how to strengthen them (and, most importantly, what you get for doing so), scroll onto the next section:
- Ecchudo Apothecary
- Arms Dealer
- Patient Dog
- Injured Dog
- Barking Dog
- Hungry Cat
- Filthy Cat
- Lucky Cat
Like a Dragon: Ishin! bonds — all rewards and locations
Bonds are divided into two categories: Friendships and Friendships (Shops). The latter are far more common to encounter, as they generally just require you to purchase or dine at some place once. The rest tend to be related to substories. Keep in mind that the list below is in progress for the time being. We’ll update it in the coming days to include the remaining few bonds.
Below are all the Like a Dragon: Ishin! bond rewards and locations:
Friendships
Wood Cutter
- Location: Near the Fushimi Palanquin spot.
- Rewards: Ancient Amulet, Broken Compass, 1,500 Virtue
- Task: Complete the wood-cutting minigame a few times until you’ve reached the numbers the NPC asks for.
Palanquin Bearer
- Location: Any Palanquin spot.
- Rewards: 1,500 Virtue
- Task: Just do Palanquin trips until you trigger a combat sequence. Afterward, the friendship will be completed.
Servile Beggar
- Location: Talk to a Beggar on the first floor of Mukurogai, who’s sitting in the corner diagonally to the door that goes to Rakugai, northeast of the Arms Dealer.
- Rewards: Precise Machinery 1,500 Virtue
- Task: Fetch him food items. Once he stops appearing in the usual spot, find him on East Umekojicho in Rakugai.
Hungry Sumo Wrestler
- Location: In Rakunai, you’ll find a sumo in distress on South Teramachi street, which is southeast of Don Quijote. If you don’t see this yet, try progressing through the main story until after you’ve met Yamazaki.
- Rewards: 1,500 Virtue
- Task: Bring him food items.
Revolutionary Chef
- Location: Gion, in the first street where the Palanquin drops you off.
- Rewards: Revolutionary Croquettes recipe, 1,500 Virtue
- Task: Prepare meals in Another Life and then bring them to him — you can repeat them!
Love-Starved Husband
- Location: Heading down to the riverbank from East Shijo Street, right before the bridge, down to Teramachi. There’s a man looking at the river.
- Rewards: Manly Love Bento, 1,500 Virtue
- Task: Bring him meals prepped in Another Life.
Sword Nut
- Location: Heading down to the riverbank from East Shijo Street, right before the bridge, down to Teramachi. There’s a man looking at the river.
- Rewards: Tunasmith (katana), 1,500 Virtue
- Task: You have to have some weapons to show him — these are Ebony Sword, Yaksha Blade, Vulpecula, and King of Beasts. You can craft them at the blacksmith, but if King of Beasts is a bit tough, you can get one towards the end of the main story, you can leave this bond on the backburner until then.
Battered Defender
- Location: As you’re heading to Rakugai taking South Umekojicho from North Fushimi Ichibangai, you’ll see a guy standing on the corner.
- Rewards: 1,500 Virtue
- Task: You have to fetch him quite a few health items during subsequent visits.
Amnesiac
- Location: As you’re progressing through the main story in chapter four, you’ll be tasked to go to Kiyomizu Temple. On your way there as you’re trekking in that long path after the bridge, you’ll find a man on the ground.
- Rewards: 1,500 Virtue.
- Task: You have to fetch him a few health items during subsequent visits.
Oblivious Woman
- Location: As you’re walking down Karasuma Street in Rakunai, right before stumbling upon Teramachi Street, a woman will ask you if you’ve seen her purse.
- Rewards: Health items, 3 ryo, and 1,500 Virtue
- Task: You have to fetch her any vegetables during subsequent visits.
Veggie-Loving Boy
- Location: Towards the eastern corner of Mibu, heading to the exit.
- Rewards: 1,500 Virtue
- Task: You have to fetch him any vegetables during subsequent visits. Then, he’ll give you a prompt to prepare a recipe in Another Life, which only asks for a few vegetables, so it shouldn’t be too hard to cook.
Desperate Fisherman
- Location: Found in Shinmachi, southeastern corner of Fushimi, overlooking the river.
- Rewards: 1,500 Virtue
- Task: You have to fetch him any fishes (which can be store-bought) you have during subsequent visits.
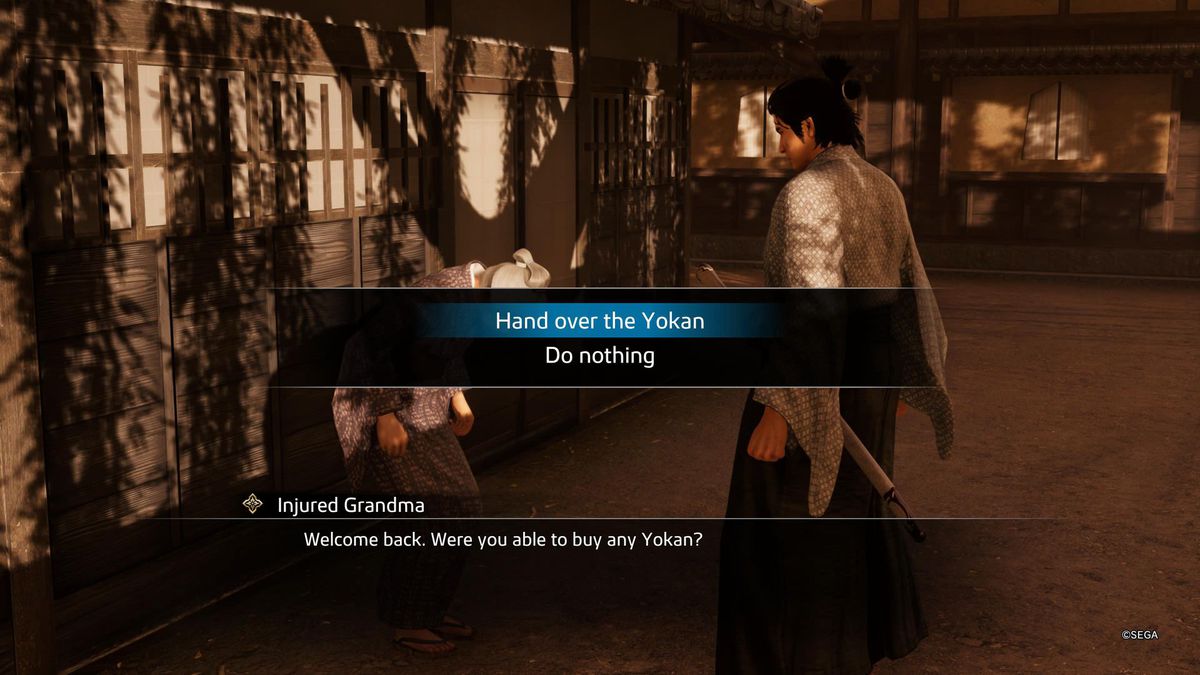
Injured Grandma
- Location: In Teramachi, Rakugai, there’s an injured old lady next to the riverbank. The easier way to get to her is to head over to the Sannocho bridge that leads to the eastern side of the map, and then head down to the riverbank facing north.
- Rewards: 1,500 Virtue
- Task: You have to fetch her medicine items, as well as some other items requested by her.
Mysterious Merchant
- Location: In Teramachi, Rakugai, there’s an injured old lady next to the riverbank. The easier way to get to her is to head over to the Sannocho bridge that leads to the eastern side of the map, and then head down to the riverbank facing north.
- Rewards: Access to his shop, a few ryo, 1,500 Virtue
- Task: You have to fetch him a few quite ordinary items. Ginseng is a rare one, but you can actually plant it on your farm if you’ve gotten the upgrade in the altar using Virtue.
Sexy Madam
- Location: Gion, in the southern plaza next to a tree.
- Rewards: Health items, Gold Plate, 1,500 Virtue
- Task: Fetch her the following vegetables: Cucumber, carrot, eggplant, daikon, and a pumpkin.
Junk Boy
- Location: Found in Kuramachi, in between the two large structures on the map that are right above the Teradaya inn.
- Rewards: 1,500 Virtue
- Task: Fetch him any items you have, as the boy will use them as toys. Oh to have that childlike wonder gain.
Trash Dealer
- Location: On the first floor of Mukurogai, head all the way north towards the closed door that leads to Rakugai to find a bald man on the left side.
- Rewards: 1,500 Virtue
- Task: Fetch him any items during subsequent visits.
Frequently Lost Courier
- Location: In the southeastern side of Fushimi, close to the ferry man that takes you to Mukurogai.
- Rewards: A couple ryo, 1,500 Virtue
- Task: You have to complete a few deliveries. These seem to be random, but as long as you pay attention to what the courier says to you, it’s fairly straightforward. Just head over to that district and look for any NPCs that are standing out, usually close to a corner or a backstreet, and have the dialogue prompt.
Patient Dog
- Location: In Yashikimachi, Fushimi, south of the dojo while looking at the map, as you’re heading toward the Sengoku Residence.
- Rewards: Pet for Another Life, which fetches items for you, as well as 1,500 Virtue
- Task: Throughout subsequent visits, you have to deliver some food items to the dog (ingredients count as per usual). Then, Ryoma will invite them to his home in Another Life, and you’ll get to name them.
Injured Dog
- Location: In the first floor of Mukurogai, you’ll see an injured dog on the top street, right at the center of the map and at the northern end of the path in the middle of the town, to the left of Paradise.
- Rewards: Pet for Another Life, which fetches items for you, as well as 1,500 Virtue
- Task: Throughout subsequent visits, you have to deliver some health items to the dog. Then, Ryoma will invite them to his home in Another Life, and you’ll get to name them.
Barking Dog
- Location: As you’re walking down Tearamachi in Rakunai, heading down from East Shijo Street, around the corner of Ebisu Pawn Rakunai, a cutscene will automatically play featuring a barking dog.
- Rewards: Pet for Another Life, which fetches items for you, as well as 1,500 Virtue
- Task: Throughout subsequent visits, you have to deliver bones to the dog. You can purchase bones in the Pawn Shop in Rakunai if you don’t have them. Then, Ryoma will invite them to his home in Another Life, and you’ll get to name them.
Hungry Cat
- Location: East Umekojicho, in the alleyway in the center of the district, northeast of Unyuan.
- Rewards: Pet for Another Life, which improves the loot you can get for completing Another Life orders, as well as 1,500 Virtue
- Task: Throughout subsequent visits, you have to deliver them some fish. Then, Ryoma will invite them to his home in Another Life, and you’ll get to name them.
Filthy Cat
- Location: In the southwestern side of Fushimi, sitting in one of the ports over the river.
- Rewards: Pet for Another Life, which improves the loot you can get for completing Another Life orders, as well as 1,500 Virtue
- Task: Throughout subsequent visits, you just need to check on the cat. Ryoma will take them with him to the bathhouse a few times.
Lucky Cat
- Location: In Karasuma Street, over at Rakunai, you’ll find a man bowing to a cat in the top corner, adjacent to the Ginryu Dojo.
- Rewards: Pet for Another Life, which improves the loot you can get for completing Another Life orders, as well as 5 ryo and 1,500 Virtue
- Task: Throughout subsequent visits, you’ll have to fetch the cat a few thousand mon. Don’t worry as you’ll gain back all of that money plus some nice additional change once you’re done with the bond.
Friendships (Shops)
Utamaruya Owner
- Location: In the southeastern side of Fushimi, close to the ferry man that takes you to Mukurogai.
- Rewards: A few ryo, 1,500 Virtue
- Task: You have to complete a few deliveries. These seem to be random, but as long as you pay attention to what the courier says to you, it’s fairly straightforward. Just head over to that district and look for any NPCs that are standing out, usually close to a corner or a backstreet, and have the dialogue prompt.
Umai Udon Owner
- Location: In the southeastern side of Fushimi, close to the ferryman who takes you to Mukurogai.
- Rewards: 1,500 Virtue
- Task: You have to complete a few deliveries. These seem to be random, but as long as you pay attention to what the courier says to you, it’s fairly straightforward. Just head over to that district and look for any NPCs that are standing out, usually close to a corner or a backstreet, and have the dialogue prompt.
Maijo-sensei
- Location: In the southeastern side of Fushimi, close to the ferry man that takes you to Mukurogai.
- Rewards: Solid Wood, 1,500 Virtue
- Task: You have to complete a few deliveries. These seem to be random, but as long as you pay attention to what the courier says to you, it’s fairly straightforward. Just head over to that district and look for any NPCs that are standing out, usually close to a corner or a backstreet, and have the dialogue prompt.
Shinto Priest
- Location: You have to purchase the “Shinto Priest’s Exchange, now open!” upgrade in an Altar with 500 Virtue.
- Rewards: 1,700 Virtue total
- Task: Purchase the cheapest item you can find several times.
Akari
- Location: Akari appears next to the Shinto Priest in Rakunai after you’ve made progress with the main story (around chapter four) and Another Life (I was rank 4 of Haruka’s Trust, as a reference).
- Rewards: Akari’s Omosubi, 1,500 Virtue total.
- Task: Visit her during subsequent visits.
Ecchudo Apothecary
- Location: Ecchudo in Rakunai
- Rewards: Unlocks the Longevity Pill, which is a health item that replenishes both health and heat significantly. It costs 8,000 mon a pop, but you get a freebie for maxing out the bond. You also get 1,500 Virtue.
- Task: This one is fairly straightforward, as you only need to visit the character a few times while being the subject of tests. They’re just cutscenes, but make sure to go in with full health.
Arms Dealer
- Location: Arms Dealer in Rakugai
- Rewards: Dragon Fang (a rare crafting item) as well as new items in the store and 1,500 Virtue
- Task: Purchase items repeatedly until the friendship is maxed out. I’d recommend going for the cheapest options, then donating them to the blacksmith to increase the shop’s level. This specific bond has two question prompts, too — I chose the third and the second option, respectively, but it may not make too much of a difference. As long as you get the Dragon Fang, you’ll be set.
Uji Tea Parlor Girl
- Location: Uji Tea Parlor
- Rewards: 1,500 Virtue
- Task: Dine several times until the bond is complete.
Don Quijote Employee
- Location: Don Quijote up north
- Rewards: Gold Plate, 1,500 Virtue
- Task: Purchase items until the bond is complete. As always, go for the cheapest, and purchase one each time.
Kasuga Okami
- Location: Kasuga Okami
- Rewards: Fine Silk Fabric, 1,500 Virtue
- Task: Dine several times until the bond is complete.
Kitchen Aoba Chef
- Location: Kitchen Aoba
- Rewards: 1,500 Virtue
- Task: Dine several times until the bond is complete.
Momokawa Brothers
- Location: Shippoku Momokawa
- Rewards: Broken Compass, 1,500 Virtue
- Task: Dine several times. Then, a competition will ensue, as well as a conversation prompt, but the answer doesn’t matter: The result is the same.
Sushi Zanmai Chef
- Location: Sushi Zanmai
- Rewards: 1,500 Virtue
- Task: Dine several times until the bond is complete.
Hanamaru Udon Employee
- Location: Hanamaru Udon
- Rewards: Beef Udon available to purchase, 1,500 Virtue
- Task: Dine several times until the bond is complete.
Pawnbroker
- Location: Ebisu Pawn.
- Rewards: Platinum Chunk, 1,500 Virtue
- Task: Purchase items until the bond is complete. Go for the cheapest.
Greengrocer
- Location: Greengrocer in Fushimi.
- Rewards: Sturdy Lumber, 1,500 Virtue
- Task: Purchase any vegetables throughout subsequent visits.
- SEO Powered Content & PR Distribution. Get Amplified Today.
- Platoblockchain. Web3 Metaverse Intelligence. Knowledge Amplified. Access Here.
- Source: https://www.polygon.com/guides/23608883/like-a-dragon-ishin-bonds-guide-locations-rewards-tasks
- 000
- About
- access
- activity
- Additional
- Adventure
- afterward
- All
- Another
- Anything
- AREA
- around
- as
- attention
- automatically
- available
- Battle
- becoming
- Beef
- before
- BEST
- between
- Bit
- Blacksmith
- Blade
- Bonds
- bones
- BRIDGE
- bring
- broken
- build
- Carrot
- case
- categories
- Center
- change
- Chatting
- chose
- citizen
- closed
- combat
- coming
- Common
- Compass
- competition
- complete
- Conversation
- corner
- Costs
- Couple
- crafting
- Credits
- Current
- dealer.
- deep
- deliver
- Deliveries
- details
- dialogue
- difference
- discover
- dog
- donating
- down
- dozens
- Dragon
- drops
- During
- easier
- East
- eastern
- essence
- Every
- exchange
- Exit
- extension
- fabric
- facing
- farm
- fine
- First
- fish
- Following
- food
- Friendship
- full
- further
- game
- Gaming
- General
- going
- Gold
- good
- Ground
- guide
- hands
- Hard
- having
- head
- heading
- Health
- here
- Highlighted
- Home
- How
- How To
- HTTPS
- i
- importantly
- Increase
- increasing
- investment
- IT
- joint
- Katana
- King
- large
- Level
- Life
- Like A Dragon
- Like a Dragon: Ishin!
- List
- locations
- Long
- longevity
- looking
- love
- machinery
- make
- man
- map
- matter
- May
- meals
- medicine
- Middle
- might
- money
- more
- Near
- need
- New
- Nice
- North
- NPC
- number
- numbers
- objective
- offer
- Old
- One
- Option
- Options
- order
- orders
- Other
- Others
- owner
- Paradise
- Patching
- Pay
- place
- plato
- plato data intelligence
- platodata
- platogaming
- play
- Plus
- Points
- Polygon
- pop
- ports
- possible
- precise
- Premium
- Process
- Progress
- progressing
- purchase
- purse
- question
- quite
- Rare
- recipe
- recommend
- regular
- RELATED
- Repeat
- requested
- REST
- restaurant
- result
- revolutionary
- Rewards
- right
- rolled
- Rule
- Run
- scroll
- section
- set
- several
- Shop
- shops
- Short
- significantly
- Sitting
- So
- solid
- Soon
- South
- Southern
- Southwestern
- specific
- speed
- spend
- Spending
- Spot
- standing
- start
- still
- stops
- store
- Story
- straightforward
- street
- strengthen
- sturdy
- subject
- subsequent
- such
- super
- sword
- Systems
- Take
- taking
- talk
- Tea
- tests
- The
- The Game
- third
- Through
- Throughout
- time
- times
- tools
- top
- towards
- trigger
- Trust
- unlock
- up
- Update
- usually
- via
- walking
- well
- What
- WHO
- woman
- Work
- worth
- yourself
- zephyrnet