After seeing Yoru being utilized on this map at Champions and LCQ, here are our key takeaways on how to dominate Bind with this misunderstood Agent
After winning their opening match at Champions 2023, DRX were faced with NAVI for a spot in the Playoffs, and Bind was selected as the first map. The South Koreans previously used a double-controller and double-initiator setup on the map, but this time, their flex player Goo “Rb” Sang-min shocked many with his Yoru pick.
Rb secured 23 kills on the map, having great impacts that helped the team win Bind on the biggest Valorant competition – and while it is one of the only few instances where professional teams picked Yoru, the agent has great potential on Bind due to its teleports and the overall structure of the map where there is no middle area.
In this guide, we will look at how professional players like Rb and Tyson “TenZ” Ngo use this underrated agent to make brilliant plays and how we can employ it in our own games.
Yoru’s Abilities
Before we get into the intriguing plays professionals like to do with this agent, let’s cover the basics first. Yoru is a duelist with a pair of flashes, a clone, and teleportation abilities – here are brief descriptions of his kit –
- Gatecrash (E): Yoru’s signature ability that you can use to teleport anywhere on the map. You are spawned with one Gatecrash and can buy another with 150 credits and replenish the ability with two kills. After equipping Gatecrash’s rift tether, you can left-click fire the ability to send it forward or right-click to keep it stationary on the spot.
- Fakeout (C): Fakeout sends out a clone of Yoru, which, when shot, flashes the direction of the bullet. After equipping this ability, you can left-click to send it forward or right-click to place an inactive clone echo on the ground that can be activated later. This ability costs 100 credits and can only be used once in a round.
- Blindside (Q): Yoru’s flash is called Blindside, and you can buy two of them in a round for 250 credits each. After equipping the flash, you can fire it on the ground or any wall or other surface – and after contacting the surface, the utility bounces and emits a blinding light. Unlike many other flashes, Yoru’s Blindside does not have an alternative fire.
- Dimensional Drift (X): Lastly, Yoru’s ultimate ability is a dimensional drift that costs 7 points and lasts for up to 12 seconds when you use it. To use this ability, equip the mask using X and fire to wear the mask that drifts you into Yoru’s dimension, making him invisible and invulnerable. Pressing the ultimate key again will allow him to exit the drift, or he will exit the drift after the ultimate timer runs out.
Tip #1: Use Gatecrash (E) for Quick Rotation on Defense
One of the best ways to use Yoru’s signature ability on Bind’s defense is to rotate from one site to another quickly. For example, if you start out the round on B but hear the opponents rushing toward A, instead of running all the way, you can use Gatecrash to instantly teleport, increasing the number of defenders on the site as well as your chance to stop the attackers from planting.
Gatecrash (E): B → A
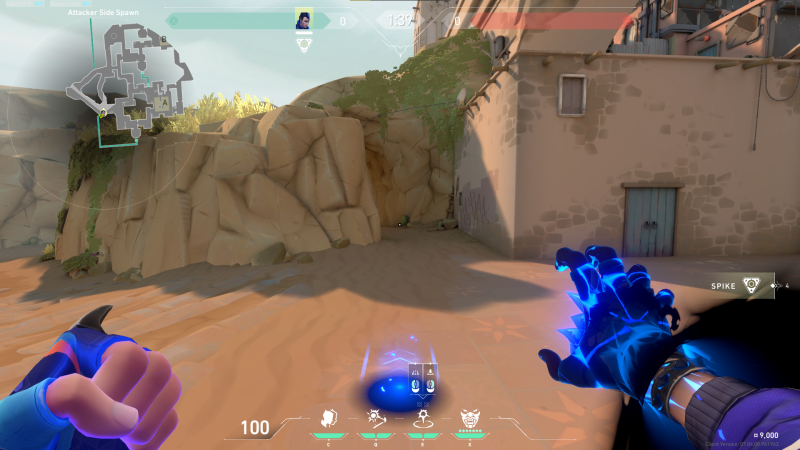
Before the timer starts, tuck yourself in this corner of the defender spawn.
Then send out your Gatecrash (E) in this direction using your left mouse button –
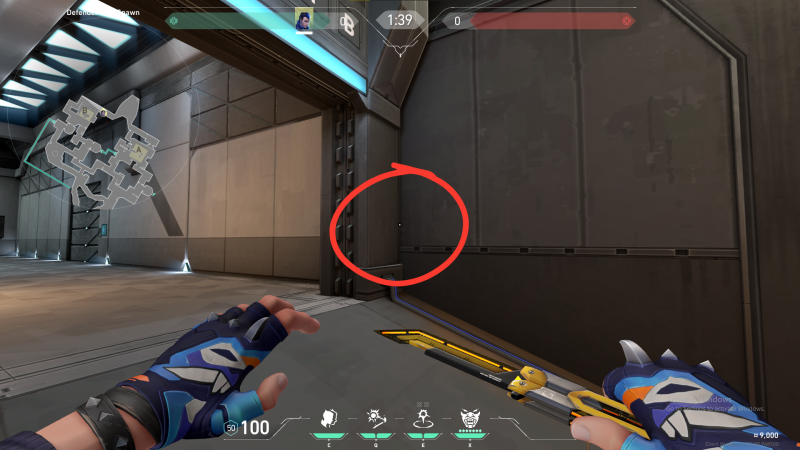
The Gatecrash will stop here on A Tower, where you can teleport in case the enemies are rushing the site while you are at B.
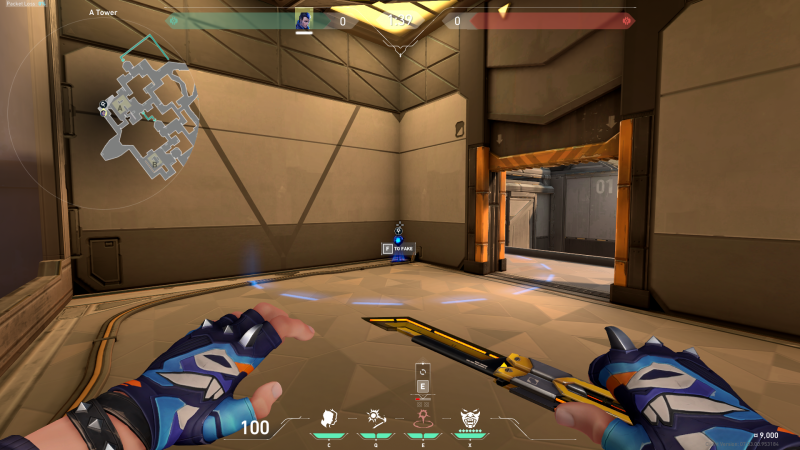
Make sure to send out your Gatecrash right before the game timer starts so that your ability lasts for longer.
Gatecrash (E): A → B
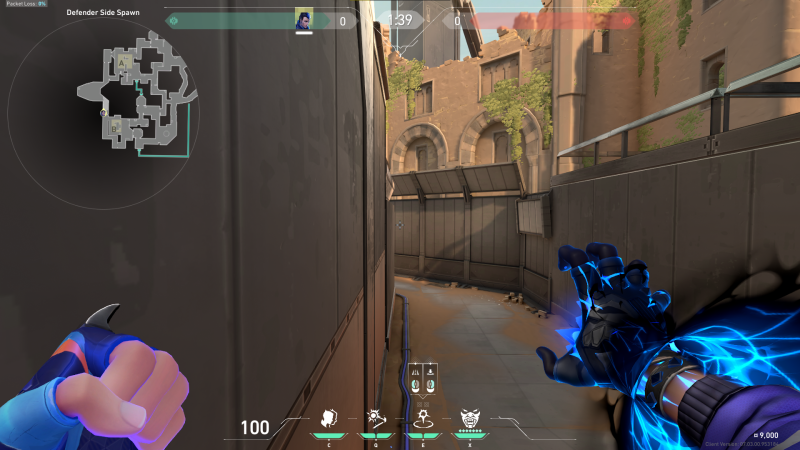
You can do a similar fakeout from the A to B site. First, tuck yourself in this corner –
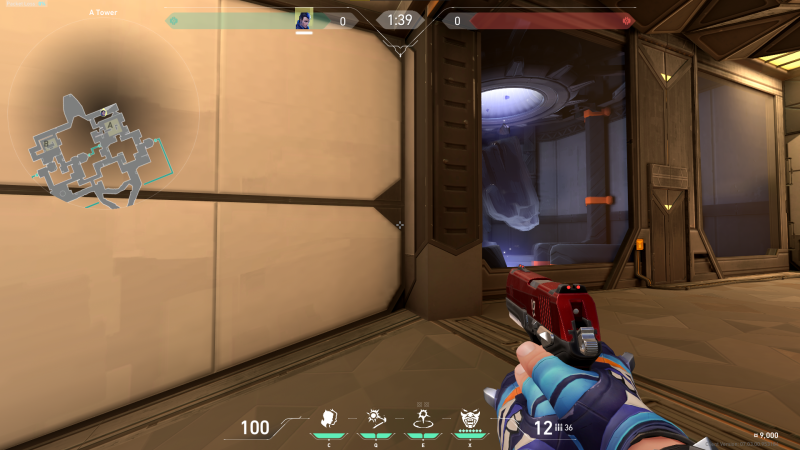
Then aim here and send out your Gatecrash (E) using the left mouse button –
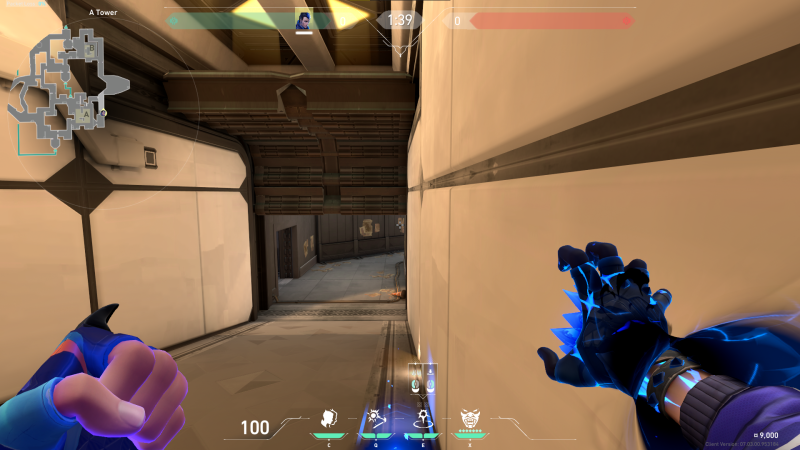
The Gatecrash will stop here at B Elbow.
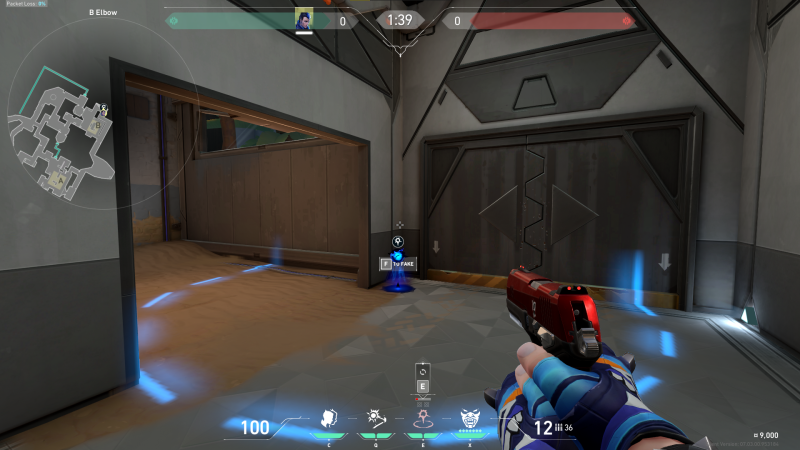
In both of these instances, you can fake out a Gatecrash to make your opponents second guess your position.
Tip #2: Take Map Control Using Yoru’s Kit on Attack
If you have watched the Sentinels vs 100 Thieves match on Bind, you have likely noticed how TenZ took control of A Shower on his own using Yoru’s abilities and, of course, his impeccable aim. We can learn from this strategy and apply it to our own games to make the defenders second-guess where the Spike will land.
Taking A Shower
Taking A shower was one of the primary duties of TenZ during the Bind match against 100T, and by looking at the following clip, you can get an idea of how he was using his Blindsight (Q) and Fakeout (C) to go inside Shower, and then use his Gatecrash (E) to return to his team outside B Long.
[embedded content]
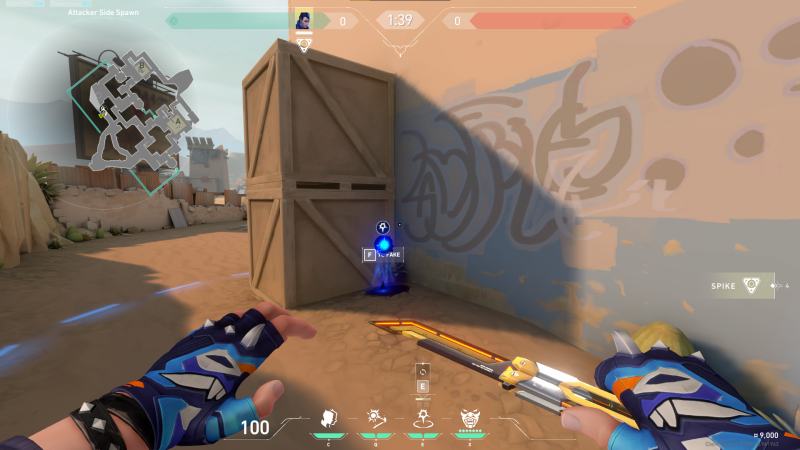
First, let’s look at how you can set up your Gatecrash (E) to teleport whenever you need to. Before the round begins, stand against this bicycle in spawn.

Aim here on the bottom left corner of the cactus and send your Gatecrash (E) away with the left mouse button.
The Gatecrash (E) will stop here, and you can easily teleport here to go to B Long or B Hookah after taking A Shower.
Now, let’s get back to A Shower. You can use Yoru’s Fakeout (C) outside A Shower and follow your clone inside. Moreover, you can also right-click your clone (C) on the ground outside the Shower, use a flash first and then send out the Fakeout to make the clone appear more believable.
Entering B Hookah
Similar to taking A Shower, you can set your Gatecrash (E) in any safe spot and then take B Hookah by fake cloning and using a flash first to make the enemies shoot the clone. This will also let you know if the opponents have any shotgun inside Hookah that you should be careful of.
#Tip 3: Enter or Retake Sites Using Dimensional Drift (X)

Credit: Riot Games
Professional players use Yoru’s ultimate ability, similar to a Sova drone, where the players help their teammates clear corners and even spam enemies through smoke while taking a site.
For example, when you are about to enter a site using the Dimensional Drift (X), make sure to have a Gatecrash (E) ready in a safe spot so that you can safely return. Then, ping the enemies if they are inside a smoke or behind a spammable wall so that your teammates can shoot them.
Moreover, you can use Yoru’s abilities while inside the ultimate, meaning you are able to flash enemies just before exiting your ult, getting an easy kill. Another way is to get behind a wall and use the Fakeout (C) ability right before leaving the ultimate. The enemies might think the Fakeout is you and shoot it, likely getting blinded.
While you are doing this play, your teammate can enter or retake a site with complete information about where the oppositions are.
There are many ways to use Yoru’s kit on Bind, especially with the teleporters on the map. Being creative with the Agent’s abilities is the key to not only winning but also having fun with Yoru.
- SEO Powered Content & PR Distribution. Get Amplified Today.
- PlatoData.Network Vertical Generative Ai. Empower Yourself. Access Here.
- PlatoAiStream. Web3 Intelligence. Knowledge Amplified. Access Here.
- PlatoESG. Automotive / EVs, Carbon, CleanTech, Energy, Environment, Solar, Waste Management. Access Here.
- PlatoHealth. Biotech and Clinical Trials Intelligence. Access Here.
- ChartPrime. Elevate your Trading Game with ChartPrime. Access Here.
- BlockOffsets. Modernizing Environmental Offset Ownership. Access Here.
- Source: https://estnn.com/how-to-play-yoru-on-bind/
- 100
- 100 Thieves
- 100T
- 12
- 150
- 2023
- 23
- 250
- 500
- 7
- a
- abilities
- ability
- able
- About
- after
- again
- Against
- aim
- All
- allow
- also
- alternative
- an
- and
- Another
- any
- apply
- ARE
- AREA
- as
- At
- away
- back
- Basics
- BE
- before
- behind
- being
- BEST
- Biggest
- bind
- both
- bottom
- brilliant
- but
- button
- buy
- by
- C
- called
- CAN
- case
- Champions
- chance
- clear
- competition
- complete
- content
- Control
- corner
- corners
- Costs
- course
- cover
- Creative
- Credits
- Defense
- Dimension
- direction
- do
- does
- doing
- dominate
- Drone
- DRX
- due
- During
- e
- each
- easily
- easy
- echo
- embedded
- Enter
- especially
- even
- Example
- Exit
- faced
- fake
- few
- Fire
- First
- Flash
- follow
- Following
- For
- Forward
- from
- fun
- game
- Games
- Get
- getting
- go
- great
- Ground
- guide
- has
- Have
- having
- he
- hear
- help
- helped
- here
- him
- his
- How
- How To
- HTTPS
- idea
- if
- Impacts
- in
- inactive
- increasing
- information
- INSIDE
- instantly
- instead
- into
- intriguing
- Is
- IT
- ITS
- just
- keep
- Key
- Kills
- kit
- know
- Land
- later
- LEARN
- leaving
- left
- light
- like
- likely
- Long
- longer
- Look
- looking
- make
- Making
- many
- map
- mask
- Match
- meaning
- Middle
- might
- more
- Moreover
- NAVI
- need
- no
- not
- number
- of
- on
- On The Spot
- once
- One
- only
- opening
- opponents
- or
- Other
- our
- out
- outside
- overall
- own
- pair
- pick
- Picked
- ping
- place
- plato
- plato data intelligence
- platodata
- platogaming
- play
- player
- players
- Playoffs
- plays
- Points
- position
- potential
- pressing
- previously
- primary
- professional
- professionals
- Pros
- quick
- quickly
- React
- Ready
- replenish
- return
- rift
- right
- Riot
- rotate
- round
- running
- runs
- rushing
- safe
- safely
- second
- secured
- seeing
- selected
- send
- sends
- Sentinels
- set
- shocked
- shot
- shotgun
- should
- similar
- site
- Sites
- So
- South
- spam
- Spawn
- spike
- Spot
- stand
- start
- stop
- Strategy
- structure
- sure
- Surface
- Take
- taking
- Team
- teams
- TenZ
- Tether
- that
- The
- The Basics
- The Game
- their
- Them
- then
- there
- These
- they
- think
- this
- Through
- time
- to
- took
- toward
- two
- ultimate
- unlike
- up
- use
- used
- using
- utility
- utilized
- VALORANT
- vct
- vs
- Wall
- was
- way
- ways
- we
- well
- were
- when
- whenever
- where
- while
- will
- win
- winning
- with
- X
- you
- your
- yourself
- youtube
- zephyrnet