Here are the best Killjoy setups on Bind to dominate your ranked Valorant games
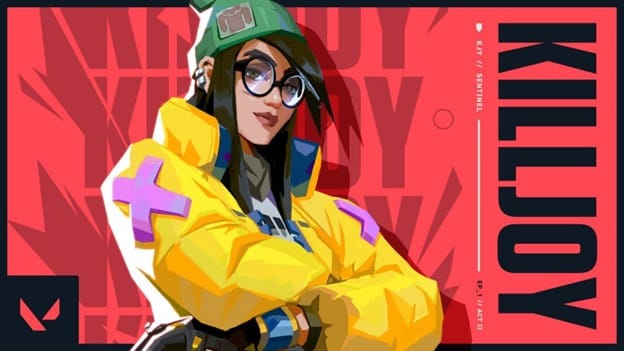
Even after three years since her release, Killjoy continues to stand out as the most proficient Sentinel agent in the world of Valorant. Sentinels are defensive experts entrusted with the critical tasks of locking down vital map areas and maintaining watchful eyes on potential flanks. None among the current agents does as good a job as the German in this regard.
Killjoy’s abilities include Nanoswarms, Alarm Bot, Turret, and Lockdown, each serving a distinct purpose in her defensive repertoire. Her swarm grenades are one of the most effective mollies in the game. The Alarm Bot and Turret are invaluable for info-gathering. However, her ultimate, the lockdown, solidifies her position as the best Sentinel in Valorant.
Despite the constant meta shifts, Killjoy remains the favorite pick of the pros to fill the sentinel role of the team. According to VLR.gg, in the ongoing Masters Tokyo event, Killjoy has a pick rate of 68%, the highest among all agents alongside Jett.
Killjoy’s popularity extends beyond professional matches. Even in the ranked games, she is one of the most favorite agents to play with. Her tool kit is such that she is a viable pick for every map. However, she is extra challenging to deal with on a defense-favored map like Bind. Keep up with us as we show you the best Killjoy setups on Bind.
Credit: Riot Games
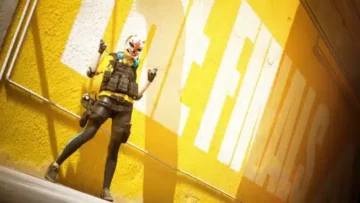
Killjoy Setups Bind- A Site
Swarm Grenade ©
Some of the best killjoy setups for the nanoswarms on Bind- A site are as such:
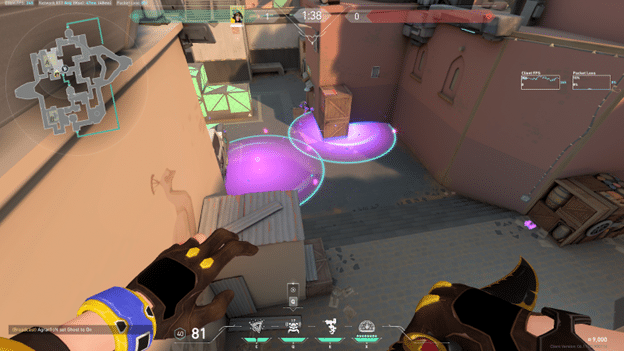
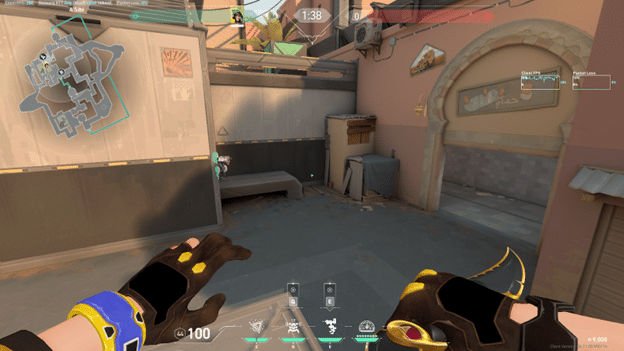
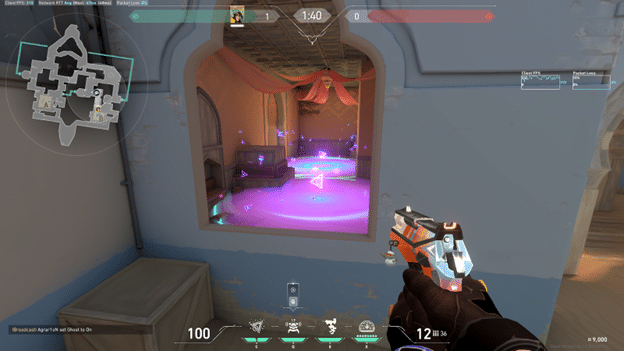
#1
This setup works best if you play from U-hall/Lamps. The two molly covers the entrance of both A-short and the Lamp area, making it impenetrable for the enemy team. They have to go towards the bomb site to avoid massive damage, and with you playing the angle like the image above, you can quickly kill one or two opponents while they try to move away from the mollies.
#2
This particular setup on Bind adopts a strategic approach centered around delaying the plant. By deploying a molly on the default plant location and another in the cubby area, the setup effectively hampers opponents attempting to plant the spike. Also, It is common for one of the attackers to position themselves in the cubby while executing the plant. With this setup, Killjoy gains a considerable advantage, enabling her to unleash devastating damage upon the planter and the player occupying the cubby. For this setup, you can play either U-halls or back-site.
#3

This is a heavy U-hall setup. The control of U-hall holds immense significance when it comes to executing successful site retakes. When facing opponents who consistently prioritize taking control of the lamp on their A-side approach, be it through Jett’s dashes or Raze’s double satchels, this setup proves invaluable in nullifying their aggressive plays.
Alarm Bot (Q)
Here are some common spots to place the alarm bot on Bind A-site:
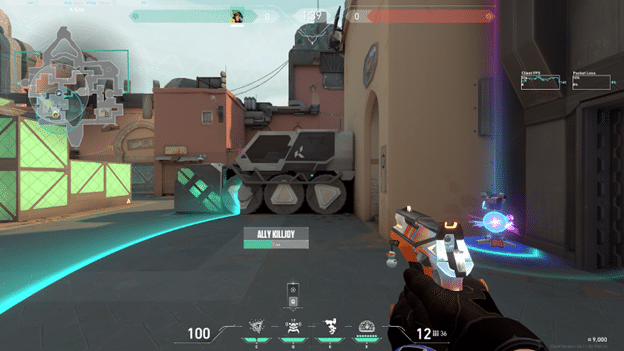
#1
This is the most common spot to deploy the alarm bot on A-site. Placing the alarm bot here yields helpful information on any enemy trying to get into the site from A-short. Activate your nano swarms as soon as the bot explodes to do a chunk of damage.
#2
It is a less common spot but can be very useful when contending with opponents who favor utilizing the shower area as their primary route for infiltrating the site.
Turret (E)
These are the best spots on Bind- A site to deploy the Killjoy turret:
#1
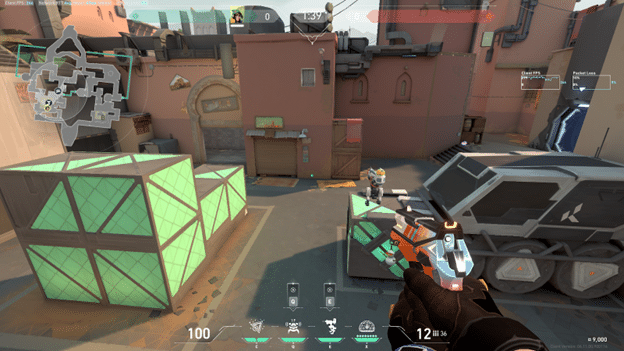
Place the turret on top of the radianite crate beside the generator. It will detect enemies coming in from both A-short and the shower area.
#2
This is another common spot for the turret. Positioning the turret here, you gain information on both fronts: any aggressive pushes through showers and any attempts to breach the site via short.
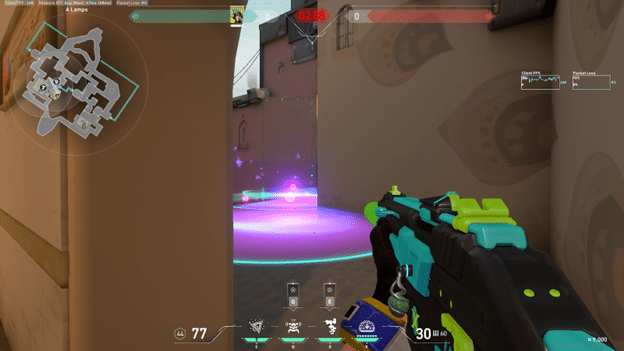
Ultimate (X)
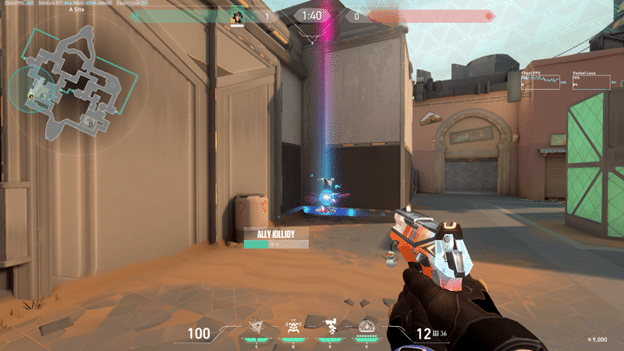
#1
Prioritizing the back-site control before deploying Killjoy’s ultimate ability is strongly recommended. When the spike has been planted for A-short, this becomes the prime opportunity to unleash Killjoy’s ultimate in this strategic location. Remarkably, this ult placement envelops the entirety of the site, forcing opponents to evacuate their positions. However, if your enemy does not have U-hall control, you can ult from there to cover even more range.
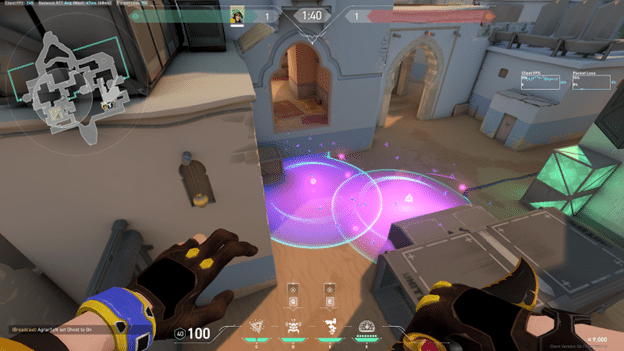
#2
If they have planted for showers, this is the spot to ult from as it will cover a large area in showers. However, you must be careful of enemies in the A-short area.
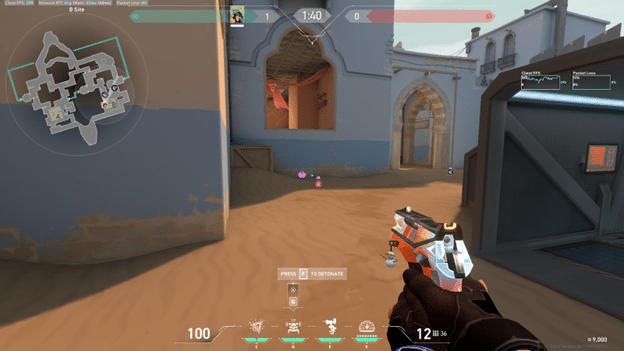
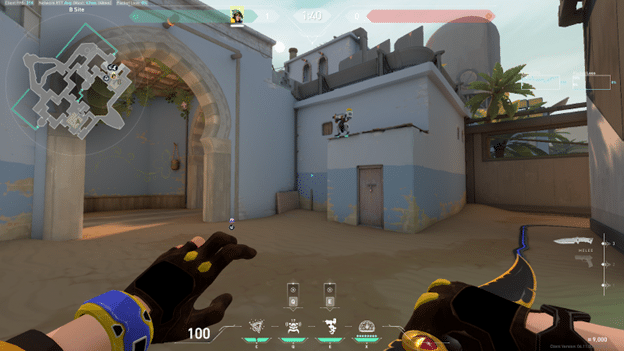
Killjoy Setups Bind- B Site
Swarm Grenade ©
To bolster B-site defense, the following Killjoy setups on Bind reigns supreme:
#1
This setup is the best to defend the site against rushes. Place one nano-swarm below the hookah and another near default, like in the image above. Whoever jumps down from hookah will instantly get damaged if you time the activation perfectly. Also, the other one will do damage to anyone trying to plant the bomb or get away from the under-hookah molly.
#2
This heavy hookah setup is best if the enemy team constantly exploits that area to get into B site. Both your mollies will almost completely cover the inside of the hookah. Position yourself just outside of it on the box for easy kills when they try to rush through your mollies.
#3

This one is a default setup valuable for stopping any split rushes. With a nanoswarm on both entrances, you can slow down the enemies on both fronts while your teammates rotate.
Alarm Bot (Q)
#1
You have to combine your alarm bot with the nano swarms on B-site for maximum efficiency. Place the bot under hookah so you can time swarm grenade activation perfectly.
#2

Similarly, you can use the bot in the hookah with your mollies for the heavy hookah setup or in the octagon to stop rushes from B-long.
Turret (E)
#1

When the objective is to amass as much information as possible during the early stages of a round, the recommended turret placement proves to be highly effective. By placing the turret atop the container, you gain early-round insights into enemy movements within hookah or just outside the octagon in the b-long area.
#2
This setup is more suitable to stop a rush. A potent distraction is created by positioning the turret in a manner that prevents the enemy from destroying it before breaching the site. This distraction serves as a crucial window of opportunity for you to swing and secure kills
Ultimate
#1
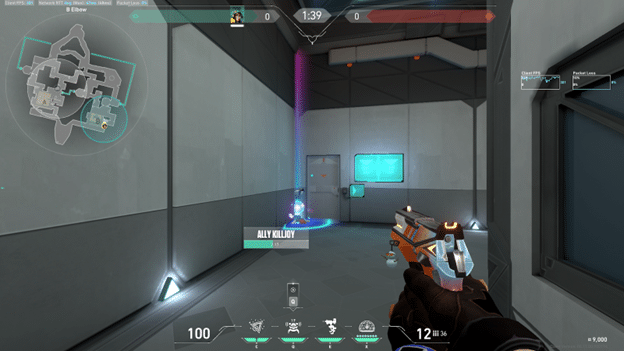
Irrespective of the plant location, this specific spot in Elbow is the best for deploying Killjoy’s ultimate as it offers a massive advantage for retaking the site. This ult placement compels them to vacate the site and relocate to either B-long or the deep hookah.
For more guides, news, previews, and other content on Valorant, visit us here on ESTNN.
- SEO Powered Content & PR Distribution. Get Amplified Today.
- EVM Finance. Unified Interface for Decentralized Finance. Access Here.
- Quantum Media Group. IR/PR Amplified. Access Here.
- PlatoAiStream. Web3 Data Intelligence. Knowledge Amplified. Access Here.
- Source: https://estnn.com/valorant-guide-best-killjoy-setups-on-bind-in-2023/
- 1
- 2023
- a
- abilities
- ability
- above
- according
- activation
- ADvantage
- after
- Against
- agents
- aggressive
- alarm
- All
- alongside
- also
- among
- and
- Another
- any
- anyone
- approach
- ARE
- AREA
- areas
- around
- as
- attempts
- avoid
- away
- BE
- becomes
- been
- before
- below
- BEST
- beyond
- bind
- bolster
- bomb
- Bot
- both
- Box
- breach
- but
- by
- CAN
- challenging
- COM
- combine
- comes
- coming
- Common
- completely
- considerable
- consistently
- constant
- constantly
- Container
- content
- continues
- Control
- cover
- covers
- created
- credit
- critical
- crucial
- Current
- damage
- deal
- deep
- Defense
- defensive
- deploy
- deploying
- despite
- distinct
- do
- does
- dominate
- double
- down
- During
- e
- each
- Early
- easy
- Effective
- effectively
- efficiency
- either
- enabling
- Entrance
- even
- Event
- Every
- executing
- experts
- exploits
- extends
- eyes
- facing
- favor
- favorite
- Following
- For
- from
- gain
- gains
- game
- Games
- Gaming
- Generator
- German
- Get
- GG
- go
- good
- guide
- Guides
- has
- Have
- heavy
- helpful
- her
- here
- highest
- highly
- however
- HTTPS
- if
- image
- immense
- in
- include
- information
- INSIDE
- insights
- instantly
- into
- invaluable
- irrespective
- Is
- IT
- Job
- jpg
- just
- keep
- Kills
- kit
- large
- less
- like
- location
- lockdown
- maintaining
- Making
- manner
- map
- massive
- matches
- maximum
- Meta
- more
- most
- move
- movements
- much
- must
- nano
- Near
- news
- not
- objective
- of
- Offers
- on
- One
- ongoing
- opponents
- Opportunity
- or
- Other
- out
- outside
- particular
- pick
- place
- plato
- plato data intelligence
- platodata
- platogaming
- play
- player
- Playing
- plays
- popularity
- position
- positioning
- possible
- potential
- prevents
- Previews
- primary
- prioritize
- prioritizing
- professional
- Pros
- proves
- purpose
- quickly
- range
- Ranked
- rate
- recommended
- regard
- release
- remains
- Riot
- Riot Games
- role
- rotate
- round
- Route
- rush
- s
- secure
- Sentinels
- serves
- serving
- she
- Shifts
- Short
- show
- significance
- since
- So
- solidifies
- some
- Soon
- specific
- spike
- split
- Spot
- stages
- stand
- stopping
- Strategic
- strategic approach
- strongly
- successful
- such
- suitable
- Supreme
- Swing
- taking
- Team
- that
- The
- The Game
- the world
- their
- Them
- themselves
- there
- These
- they
- this
- three
- Through
- time
- to
- tokyo
- tool
- top
- towards
- try
- two
- ultimate
- under
- unleash
- up
- upon
- us
- use
- utilizing
- VALORANT
- valorant games
- valorant guide
- valuable
- very
- via
- Visit
- vital
- we
- when
- while
- WHO
- whoever
- will
- with
- within
- works
- world
- X
- years
- yields
- you
- your
- yourself
- zephyrnet