Sea of Thieves Adventures are here. In this limited-time story-driven mode, you can join your crew and embark on new story quests in Rare’s pirate sandbox, uncovering new details in the ongoing resurrection of Captain Flameheart while also nabbing a few exclusive rewards for yourself. In this guide, we’ll walk you through the complete storyline for the first “Adventure,” (which is a bit confusingly found in Adventure mode even as they’re not the same thing). Here’s how to complete Shrouded Islands in Sea of Thieves.
Shrouded Islands walkthrough
The full Shrouded Islands Adventure will take you about 90 minutes regardless of team size, as enemy encounters scale to the size of your crew. If this debut Adventure is indicative of what we can expect from this new limited-time mode going forward, it seems Adventures may act like shorter Tall Tales meant to engage players in a short window of time rather than exist in the game permanently.
1. Speak to Larinna
Your journey to uncover the truth about why phantoms are appearing more all across Sea of Thieves begins at any outpost. Speak to Larinna outside of the tavern and choose the option to begin your adventure. She will point you toward Golden Sands Outpost.
2. Collect the Mysterious Compass at Golden Sands Outpost
Head to Golden Sands, which is now shrouded in a spooky green fog and made creepier thanks to the game’s dynamic music. Head into the ravaged tavern and grab the Mysterious Compass on the table by the entrance. It will be added to your radial menu for the rest of the Adventure, so you need not worry about misplacing it.
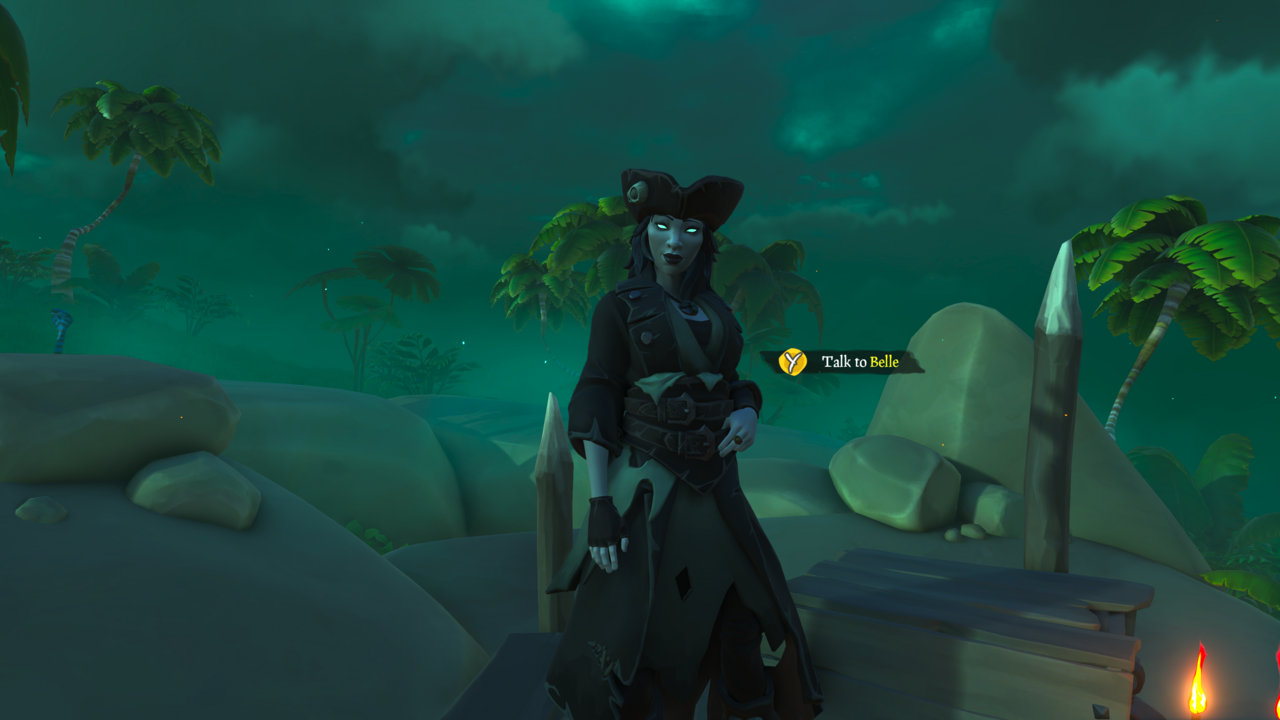
3. Follow the compass to find Belle
The compass will point you to Belle at all times, and though she has a few spawn points, it’s best to go find her just one island away at Crescent Isle. Dock carefully, as it too is covered in thick green fog emblematic of The Damned having risen, and continue following your special compass until it brings you face to face with Belle. In the dialogue options, elect to continue the adventure and she’ll point you toward Shipwreck Bay.
Most importantly, take the Flame of Souls from Belle’s brazier, transferring it to your personal lantern. Do not leave without doing this. Furthermore, you should swap out your ship’s lanterns with the Flame of Souls. If you die, you’ll lose the special flame color, but you can grab it again from your ship’s lanterns.
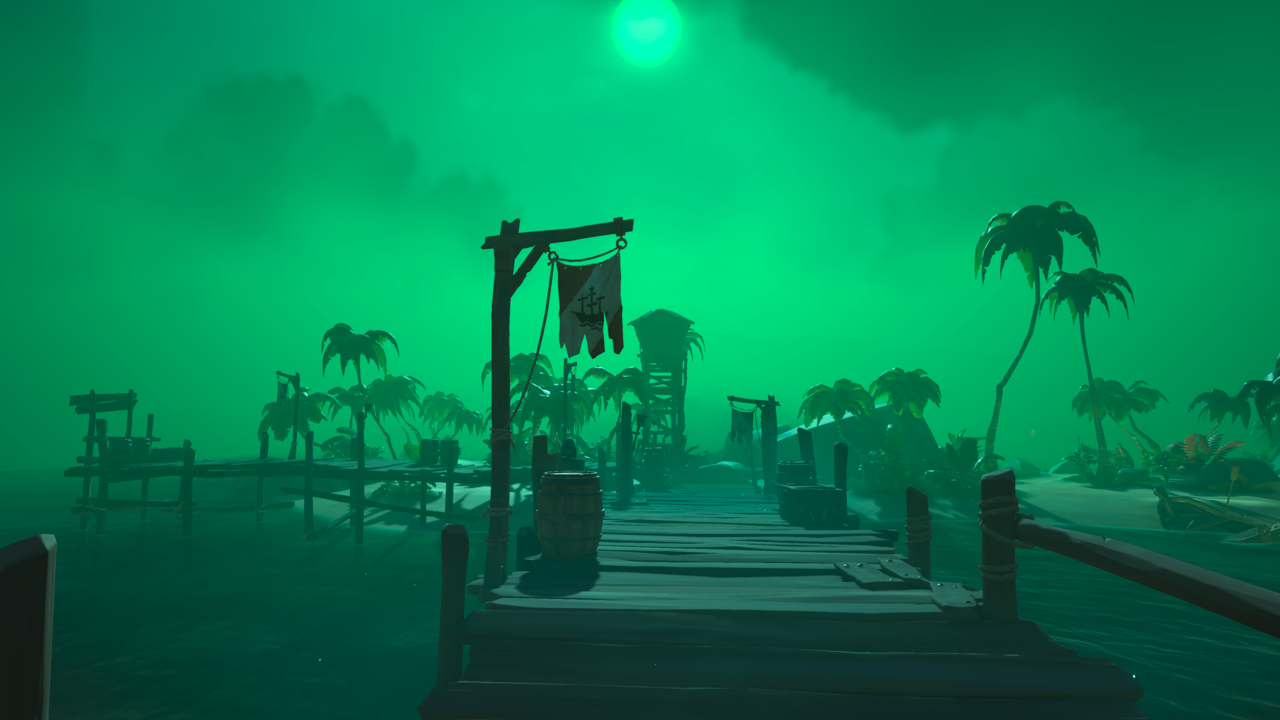
4. Light eight braziers at Shipwreck Bay
Once more, you’ll be notching some nautical miles on route to Shipwreck Bay. Like the others, it’s also enveloped in intimidating fog, so be very careful here–they don’t call it Shipwreck Bay for nothing. When you touch down on the shore, you’ll see apparitions pointing in different directions. They are leading you to the eight braziers you must light using the Flame of Souls. All eight of these braziers are on the outer perimeter of the island, so knowing that and using the ghosts’ guidance makes finding the braziers rather simple.


Each time you light a brazier, you’ll be attacked and taunted by Flameheart’s ghostly followers. Fight back and continue until you’ve lit all eight braziers around the island. When you’re done, head to the wreck of the Blackwytche, the can’t-miss shipwreck at the heart of the island. Look for the makeshift brazier spun out of a cage hanging near some cannons. Light this brazier after you’ve lit the other eight (you can’t do it any sooner anyway, so you’ll know when it’s time).
This will kick off a boss battle against the Soulflame Captain. He’s a rather tanky boss, but he’s best dealt with using firebombs and gunfire. Don’t let him get close, as his melee attack is quite devastating. He’ll bring more phantoms with him and you should use the same method for dealing with them. Firebombs make quick work of them, but watch out for their teleporting attack. Just keep moving and you’ll be okay.
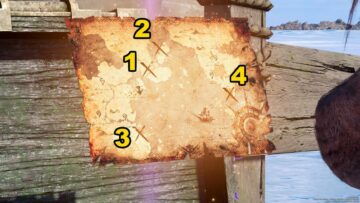
5. Follow the Buried Relic Map, then return the loot to Belle
Eventually you’ll have defeated the Soulflame Captain and his goons and in his place will drop the Buried Relic Map, an X-marks-the-spot quest taking you to a nearby island in the Wilds. For me it sent me to Marauder’s Arch, but this may be randomly generated so be mindful of where your map demands you go.
Head to the island needed, then dig up the special loot: the Hexing Skull. Take good care of it and get it back to Belle at Crescent Isle. If you found any special loot during your fight with the phantoms, such as Rune Tablets, you can sell those to Belle too. Turn it into her and select the finish adventure dialogue option. That’s it! You’ll have completed the first limited-time Adventure and earned yourself a new title–“Seeker of Shrouded Souls”– as well as the Shrouded Compass cosmetic.
Your exclusive rewards can help you stand out among the game’s more than 25 million players, including five million on Steam.
- Coinsmart. Europe’s Best Bitcoin and Crypto Exchange.
- Platoblockchain. Web3 Metaverse Intelligence. Knowledge Amplified. FREE ACCESS.
- CryptoHawk. Altcoin Radar. Free Trial.
- Source: https://www.gamespot.com/articles/sea-of-thieves-shrouded-islands-adventure-guide-hexing-skull-braziers-and-more/1100-6500834/?ftag=CAD-01-10abi2f
- "
- 11
- 7
- 9
- About
- across
- Adventure
- All
- among
- around
- Battle
- Bay
- BEST
- Bit
- call
- care
- Compass
- continue
- Crew
- dealing
- different
- down
- Drop
- During
- embark
- engage
- Entrance
- Exclusive
- Face
- First
- follow
- Forward
- full
- game
- good
- grab
- Green
- guide
- having
- head
- here
- How
- How To
- HTTPS
- image
- importantly
- Including
- IT
- join
- journey
- large
- lead
- leading
- light
- map
- May
- million
- more
- Music
- Near
- Okay
- Option
- Options
- Other
- players
- quest
- quests
- RE
- REST
- Rewards
- Route
- s
- sandbox
- Scale
- SEA
- sell
- Short
- Simple
- Size
- So
- Story
- storyline
- The
- Through
- time
- touch
- uncover
- Watch
- What
- Work
- yourself