Since Mirage isn’t going anywhere, we might as well help you win a few matches on it on T-side.
We’ve all played it a gazillion times, but there’s a difference between playing a map and knowing the strats. If you and your friends want to get that elusive next rank but keep losing on CSGO’s most-played, arguably most important map, we’re here to give you some much-needed plans that can change those Ls into Ws. Simple but effective, these priceless strategies can be picked up by you and your friends quickly or even executed with strangers with a bit of coordination.
We previously went into similar strats for Inferno, and we know it’s been a while, but here are 6 awesome Mirage T-side strats. Now, we’re not saying these are infallible or Major-winning strats, but they’re certainly good for your run-of-the-mill scrims and even small tournament matches. For the sake of convenience, we’ll be dividing the strats into two groups of three based on the site where the bomb is to be planted.
Mirage Strats: Bombsite A
What feels like a thousand different angles to check and entry points that feel like certain suicide without the use of utility, Mirage’s Bombsite A is a thing of beauty. The same angles that make it a nightmare to enter also make it difficult to retake — especially when the numbers have dwindled for both teams. This site is a cerebral one — it’s extremely difficult to crack it without excellent use of utility and/or teamwork if it’s being guarded by competent CTs. That, however, is where we come in.
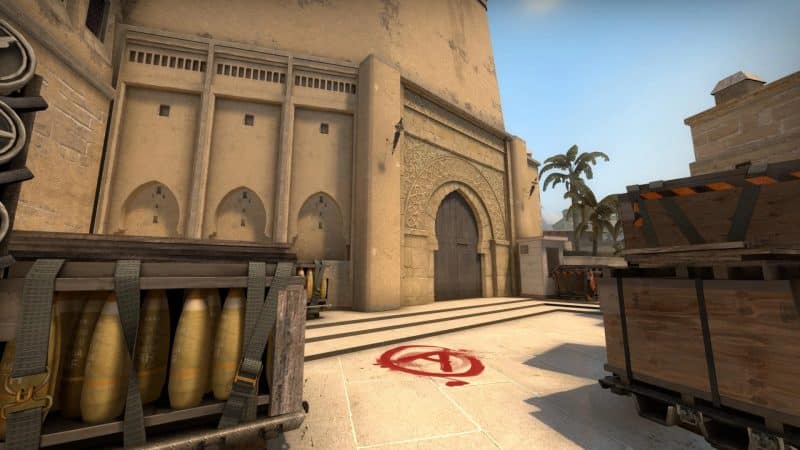
Copyright: Valve
The Fast Mid Split
With a Mid that’s as long as Dust 2’s and far more daunting to push forward on, Mirage’s mid is a tough, contested piece of land where every step is earned with blood. The best way to take control of Mid is to smoke off Nest and B Short. Have three people in Mid and two outside A, with the latter duo smoking Jungle and CT Spawn before pushing in through both Palace and A Main.
The other three will enter Connector and, with at least one watching out for a backstab from B Catwalk, push into Stairs and Jungle and combine with the other players to take A site. One player can remain in while the others take post-plant positions in and around the site. With a little luck and some good shots, the round should be won.
The Smokeoff
If you’ve ever seen a pro game on Mirage, it’s almost certain that in at least one or two rounds, the T-side tried this setup. This one requires a few simple line-ups, but can pay off in spades. Have three people stand outside A Main, ready to smoke (the person smoking Jungle should wait to take out the smoke, weapon in hand, until the last moment just in case CTs push), one stationed in Palace, and one either holding top of Mid or lurking up Underpass.
[embedded content]
The three smokers outside A must smoke CT Spawn (beside Ticket Booth), Jungle, and Stairs before firing a flash over the wall and pushing into A. At the same time, the person in Palace needs to throw a Molotov down into Shadows/Under Palace. Optionally, another Molly can be tossed into Default in case the Palace players fails to get the frag while pushing in. Barring any accidents, this should be a W.
Surprise, Counter-suckers!
When you’re very used to something, even a slight change can often catch you off guard. If someone has a spawn close to A Main, get them to rush in quickly either without Flash or with one tossed high behind him by a teammate. The CTs would normally be busy nading or pushing forward or Stairs / Connector, giving a golden chance for you to get a fast entry or two before they can react.
Those behind can provide backup and/or smoke out any Mollies before taking control of the site with plenty of utility to spare. It’s a sacrificial play as the first guy will almost always be traded immediately, but it can be effective from time to time. Just make sure the first player has a rifle, shoots well and isn’t carrying the bomb!
Mirage Strats: Bombsite B
Few bomb sites create as many nail-biting moments in CSGO as Mirage’s B. The site is famous for crazy spraydowns, endless rushes, and a certain winged AWP. Moreover, countless bombs have both been prevented from being planted and egged on to the point of explosion by how the four pillars lend themselves to 1v1 merry-go-rounds. It’s a site that’s very difficult to take, but that very fact creates a kind of complacency that pretty much creates chances of taking the site; the site’s notorious cracking difficulty is often the very reason it gets taken
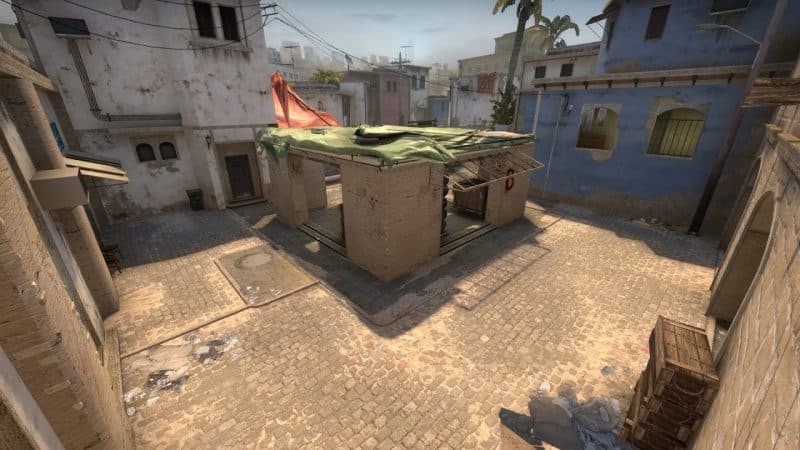
Copyright: Valve
The Fast Mid Split (2)
What would a CSGO map be without some rushes? Have one person smoke Nest as soon as possible while another smokes connector, and pop a flash over the top of Mid as two players push into the area and up Short. Meanwhile, another player rushes through B Apts to make sure there’s backup, throwing a Molotov into either Van or behind Bench as necessary. Alternatively, the player can opt to smoke off B Plat and jump out the window as his teammates push up Catwalk.
Meanwhile, the person smoking Nest should follow the B rusher, and throw a flash towards the right side from Side Halls to aid in the fighting. At the same time, the player smoking Connector should flank from the top of Mid, help B short, or push through Connector for a backstab. This obviously won’t work if the opponents are aware that you can do this, so either spread out similar attacks with many rounds in between, or just do it once during a crucial round.
Smokes.exe
Now, Mirage’s B isn’t the kind of site you can just smoke up and waltz into. No matter how many smokes you throw, you’ll still need either some excellent additional utility, some brilliant shooting, or a multi-faceted attack. Use the aforementioned Nest and Connector smokes to take control of Mid with 3 players, and push up short and into Ladder Room. Leave a player in there for flanking purposes, and with the other two, wait for the smokes from Apartments before you push in.
[embedded content]
As for apartments, you need two smokes: one for Market Window, and one for the left side of B Short, right under the arch. Next, Molly Van and Bench, and initiate a two-pronged attack from B Short and Apts. Make sure to check Boost Spot in the site as well as the corner of B Plat when pushing in, and don’t be too hasty to plant — secure the site first. Even if you’re up against 3 defenders, you should be able to make it — especially with a little help from the Ladder Room flanker.
The Confusion
Read carefully, because this one’s a doozy. Send a player into B Apartments and have them hold and make sure a CT doesn’t push into the place. At the same time, Keep a player at the top of Mid and have three people walk up Underpass. Smoke B Short, and smoke Nest towards the Jungle side. Have someone hold the Ladder Room window, and boost a player into Nest (don’t jump from Bench because silence is key). Once Nest is smoked, the player at the top of Mid can come and hold B Short for any pushes through the smoke.
Once this is done, re-smoke Nest (let your buddy wait in the dark) and have two players run back up underpass and all the way to T Spawn. After making sure the area’s clear, quickly throw two smokes and a flash into A to trigger a rotation, and rush back towards and into B with the Apts guy with some smokes and that famous Van Molly. The people from A should all be rotating in front of or near your friends in Nest and Mid, and if they can’t get kills initially, their mere presence should be troubling enough to make the CTs crumble.
That’s all for today, but be sure to check in on us for everything CSGO.
- amazon prime gaming
- axie infinity
- Casino Games
- coin genius
- CS:GO
- EA Sports
- esports
- Esports News Network
- Evil Geniuses
- Gaming
- gaming headset
- gaming pc
- madden nfl
- Nintendo
- Online casino games
- pc games
- plato
- plato ai
- plato data intelligence
- plato game
- plato gaming
- platodata
- platogaming
- playstation
- prime gaming
- Team SoloMid
- xbox