Maru win seventh Code S title; completes second three-peat
by Wax
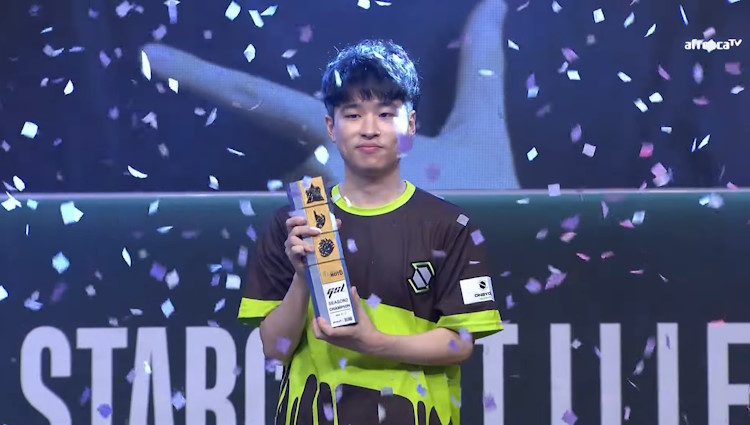
Headed into the Code S playoffs, AfreecaTV gave Maru the epithet of “All Time Legend.” By the time the matches were over, this title somehow felt inadequate. With his 4-2 victory over Dark in the Code S Season 2 Finals, Maru completed the second Code S three-peat of his career for a spectacular seven total championships.
While Maru’s sixth Code S championship in May had felt inevitable, a rash of poor results in the following months had brought his GSL dominance into question. And, after Maru went down 0-2 to Cure in the semifinals, it seemed as if he would be forced to cede the title to another player.
However, the brief crisis only served to let Maru show exactly why he had six championships to Cure’s one, as he capitalized on his opponent’s mistakes to complete a 3-2 reverse sweep.
After that brief scare in the semifinals, the finals went according to a more familiar Maru script. Dark had advanced to the finals after a brutal 3-0 against GuMiho, but Maru showed he was a completely different caliber of opponent. The finals began with Maru taking two straight games, punishing Dark’s Ling-Bane defense with frenetic drop play. Dark was able to take two maps off of Maru by switching to his signature Roach-Ravager style, but ultimately couldn’t overcome Maru’s supreme late-game prowess as he conceded a 2-4 defeat.
The GSL now goes into an extended hiatus, with Season 3 of Code S set to begin on October 3rd. The StarCraft II landscape is sure to have changed considerably by then, but one thing is for certain—Maru will be the favorite to win his eighth Code S championship.
Match Recaps
Semifinal #1: Dark [3 – 0]GuMiho (VOD)
Game One – Gresvan (Dark win): GuMiho attempted some cheese right off the bat, opening 2-Barracks Reaper with one of his Barracks proxied on Dark’s side of the map. However, a lucky Overlord scout caught the Barracks, and 3 Drones picked off the constructing SCV just 100 HP away from completion. With his initial gambit having failed, GuMiho tried to surprise Dark again by going Blue Flame Hellions off of two Factories. However, this plot was also thwarted by well-placed Queens and Zerglings.
Playing from a great position after having stopped both of GuMiho’s early attacks, Dark first looked to Mutalisks to try and pick his opponent apart. This didn’t achieve all too much, as GuMiho had pivoted into Thor-Tank mech. However, with a strong economy and plenty of production, Dark was able to quickly transition into Roach-Ravager based army. He didn’t even wait for Roach speed to complete to begin attacking, and forced the GG out of GuMiho after two waves of attacks.
Game Two – Royal Blood (Dark win): GuMiho went for the ‘surely he won’t expect the same cheese again?’ mind game, once again proxying a Barracks on Dark’s side of the map (this time just a 1-Barracks proxy). Dark’s Overlord scouted the Barracks again, but this time it wasn’t early enough for him to pull Drones and stop the Barracks from finishing.
Nonetheless, things worked out quite well for Dark. He defended GuMiho’s Reaper-Hellion harassment quite handily, and was even gifted some free units by an overaggressive GuMiho. A Battlecruiser rush was GuMiho’s next move, but Dark was adequately prepared with Queens and Spores at every base.
GuMiho tried to play out a regular bio game from there, but he was once again fighting uphill due to his failed early-game investments. He barely held off Dark’s first wave of Corruptor-Roach-Ravager, but had to GG out to the follow-up attack.
Game Three – Ancient Cistern (Dark win): GuMiho remained committed to SOME form of proxying, this time going for a rather staid 1-Barracks proxy Reaper on his own half of the map. However, this time he wasn’t looking to apply much pressure early, sending just a single Reaper before going for a 3-CC mech follow-up.
Unfortunately for GuMiho, Dark had decided it was his turn to get aggressive in the early game by going for a Roach-Ravager all-in off of 25 Drones. GuMiho’s production just didn’t come online fast enough after his greedy start, and he had no choice but to concede to Dark’s barrage.
Semifinal #2: Maru [3 – 2] Cure (VOD)
Game One – Ancient Cistern (Cure win): The proxy-fest carried over from the previous series, with Cure opening 2-Barracks proxy Reaper (1 proxy, 1 in main) against Maru’s Barracks-Factory start. Cure got the key pickoff on Maru’s first Reaper, which let him start the snowball of death with his own Reapers. While it didn’t lead to Maru’s immediate demise, it allowed Cure to chip away at Maru before sacrificing his Reapers for a worthwhile 9 SCV kills.
Maru tried to counterattack with his temporary army advantage, but Cure cleverly backdoored with two Reapers to cause even more economic devastation. That move left the game in a truly irrecoverable state for Maru, trailing with 15 SCV’s to Cure’s 29. From there, it was a fairly routine clean-up job for Cure, beating Maru in a Marine-Tank-Raven mirror with his superior numbers.
Game Two – NeoHumanity (Cure win): Maru took on the role of the aggressor in game two, going for 2-Barracks Reapers (both in main) against Cure’s 1-Barracks CC opener. A peculiar scenario played out here because of Cure’s decision not to SCV scout. Maru held off on attacking while he waited for a larger Reaper count, while the unaware Cure left his base wide open in order to attack first with his two Reapers (the multi-pathed nature of the map made it so the two Reaper groups never found each other). This led to an impromptu semi-basetrade, where Cure came out with 9 SCV kills to Maru’s 8 thanks to his first strike advantage.
Ultimately, this meant Cure got away with a greedier, faster-tech opener with more army left over, and he quickly set about consolidating that advantage. After using his faster Medivac to harass here and there, he set about launching a quick, pre-stim push centered around 2 Tanks 3 Vikings, and a Cyclone. Maru’s attempt to dislodge these forces with 3 Tanks and a handful of Marines was a total disaster, and he conceded in under seven minutes..
Game Three – Altitude (Maru win): Game three saw both players start with Rax-Factory expansion openers before making wildly different strategic choices. Cure went for a more conventional Medivac-Raven route, looking to play a typical bio game. On the other hand, Maru went for fast Cloaked Banshees followed by Banshee speed, setting up his mech play.
The situation seemed to break in Cure’s favor at first, as he did light damage with a drop and seemed to nullify Maru’s investment in Banshees with his Raven tech. However, things changed completely once the Hyperflight Rotors upgrade was completed, after which Maru put on a micro clinic to absolutely brutalize Cure’s ground forces—detection be damned. While Cure hit back with a drop in Maru’s main, this was a situation where the workers-for-army trade was well worth it.
Maru’s Banshee raid took a lot of power out of Cure’s planned Marine-Tank-Raven timing, and it didn’t even come close to piercing Maru’s Tank-Banshee defensive line. This allowed Maru to set up on four bases and get his production going, which he used to quickly assemble a powerful Tank-Thor-Viking force. Cure just couldn’t keep up in terms of army quality or size (losing an extra two Medivacs of infantry sure didn’t help), and had to GG out to Maru’s unstoppable Tank push.
Game Four – Royal Blood (Maru win): Reaper roulette resumed in game four, with Cure playing 3-Barracks Reapers (all buildings in main) against Maru’s Rax-Factory expansion. Cure’s strategy seemed to pay off at first, as he forced a cancel on Maru’s low-ground CC and eventually sacrificed his Reapers to pick off a decent number of SCV’s—all while he established an expansion of his own. Although Maru used his tech advantage to kill some SCV’s with a Cloaked Banshee, Cure was still ahead when you added up the losses on both sides.
However, Maru still had one tech advantage to exploit, which was that he had two Siege Tanks out when Cure had zero. A two-tank push with a handful of Marines proved to be quite powerful in the early-game, and Maru started to lay siege to Cure’s natural. Initially, it seemed like Cure could stall for long enough to complete stim, after which he could dislodge Maru’s pesky Tanks. However, he committed a huge unforced error, where he lost track of his natural Command Center’s health and allowed Maru to focus it down with Tanks and Banshees (a lift off and repair would have easily saved it). Maru had already reestablished his expansion at this point, and thus the game flipped back in his favor.
Already ahead, Maru went for a devious mind game by pretending to play three-base macro while actually powering up for a two-base attack. Cure was so focused on catching up in economy that he was caught off guard by the powerful Marine-Tank push, and he had no choice but to surrender to Maru’s superior army.
Game Five – Dragon Scales(Maru win): Both players started with Rax-Fact expansions once more, with Cure playing a defensive Cyclone-Raven follow-up while Maru looked to go on the offensive by opting for Tank-Medivac. Maru’s quick Tank-Medivac-Marine attack at Cure’s natural seemed like it might break through, but clutch repairing from Cure and the arrival of his Raven turned it into a complete disaster for Maru. Maru lost his entire attacking force, forcing him into an extreme defensive position for the next few minutes.
Cure went about consolidating his lead, deploying his army to prevent Maru from taking a third base while taking his own third back at home. As Cure’s three-to-two base lead started to snowball, Maru had to make a decisive move to turn the game around.
Seeing that virtually all of Cure’s army was positioned offensively, Maru decided to send his Vikings and sole Raven around for a backdoor attack into Cure’s main. This should have been a damaging but ultimately survivable attack, but Cure’s poor response turned it into a catastrophe. First, he A-moved his SCVs to fight the Vikings and auto Turrets, which only resulted in them getting utterly shredded by their +mechanical bonus attack. Combined with some other instances of poor SCV management, Cure ended up losing a whopping 41 workers.
On the other end of the map, Cure was indecisive about what to do with his forces. In hindsight, Cure should have just gone for a full-on counterattack, using his two full-energy Ravens to nullify Maru’s Tanks and end the game outright. Instead, Cure let his ground forces idle while he went for a meek Raven-Viking counterattack in Maru’s main. However, Maru had enough defenders in place to hold against this partial attack without losing too much in return. Eventually, Cure was forced to retreat his ground army to deal with Maru’s Vikings, but at that point they had already dealt fatal damage.
Maru didn’t even have to wait long to capitalize on his advantage, as a quick Tank push followed by a doom drop into Cure’s main ended the game.
Grand Finals: Maru [4 – 2] Dark
[embedded content]
Game One – Dragon Scales (Maru win): Maru started the series with a 2-Barracks Reaper opener, playing for a macro follow-up instead of any potential all-in. Dark played with a macro focus as well, getting fast double Evolution Chambers for melee and armor upgrades.
Maru gave his build a little flourish, weaving in a 4 Widow Mine drop into his bio build-up. This worked out great for Maru, as he killed a handful of Drones and kept Dark tied up with constant drop/pick-up micro. This segued smoothly into his Marine-Medivac pressure, which forced a distracted Dark to cancel his first attempt at a fourth base.
The Marine-Medivac pressure only grew more intense, and Dark was forced to cancel and relocate multiple bases in an attempt to establish a permanent fourth base. Dark kept trying to buy time for his Ultralisks and double-upgrades, but Maru was inching closer to ending the game outright with his Marine-Medivac attacks. However, a moment of inattentiveness and two massive Baneling hits spared Dark an early death, and he got his Ultralisks out on the field.
Despite their poor reputation, Dark’s Ultras were proved to be very useful in fighting back, allowing the impoverished Dark to finally stabilize on four bases. However, he was still fighting from behind, and Maru would soon have tech to counter the Ultralisks.
A period of fierce and close fighting ensued, with Dark desperately trying to cling on to his expansions while buying time to add more spellcasters to his composition. And for a moment, it seemed like Dark might have turned the tide, with Vipers and Infestors giving his ground-bound army a much needed boost. However, Maru was also getting stronger as his Ghost count steadily grew. EMP’s started to nullify spellcasters, while infantry could deal with whatever was left on the ground.
Dark fought on, and dealt a major blow with a series of opportune backdoor attacks. However, even with a damaged economy, Maru had too strong of a bio-force left over (and Dark had too many minerals and too few Larva to spend it on), and marched forward with one last push to collect the GG.
Game Two – Ancient Cistern (Maru win): Having enjoyed so much success with his opener in the previous game, Maru essentially did the same thing in game two by opening 2-Barracks Reaper into a 4-Mine drop. Once again, this move caught Dark slightly flat-footed, only this time blowing up a bunch of Zerglings instead of Drones. The drop also provided just enough distraction for Maru to land a follow-up drop of Marines into Dark’s main, which wreaked quite a bit of havoc against Baneling-less Dark.
Maru didn’t overstay his welcome, however, and soon retreated his airborne Marines to join up with his main Marine-Tank force. Dark—who had been haplessly trying to tech up to Mutas—was hopelessly outgunned by the Terran push and quickly GG’d out.
Game Three – NeoHumanity (Dark win): Presumably having gotten into Dark’s head in the first two games, Maru played a different variation of the 2-Barracks opener by going for a 4-Barracks mass-Marine follow-up. Maru committed to an all-in, bringing along SCVs with nearly 30 Marines for an attack at the five minute mark.
The attack very nearly brought Dark to his knees, but fortunately he had started Roach production just in time. Having Droned heavily, Dark had enough of a buffer to sacrifice some of them on defense, and ultimately came out hugely ahead on economy after surviving the attack.
It was effectively game over for Maru from there, as he had lost a critical number of SCVs and had also delayed his Medivac tech severely. Dark gathered a massive Roach-Ravager army and barged through Maru’s front door to take his first win of the series.
Game Four – Altitude (Maru win): Maru went for his most passive opener so far in the series, playing 2-Barracks into a plain Marine-Medivac strategy. Meanwhile, Dark went for Roach-Ravager play once more.
Quickly amassing a large army, Dark looked for a window to attack. However, Maru was very decisive, lifting off his third base and simply turtling inside his natural. While Dark made futile attempts to chip away at Maru’s ramp with biles, detachments of Marine-Medivac went out to gun down Hatcheries and keep Dark from commiting more units on offense. Eventually, Maru gathered enough Tanks to come down his ramp and take his third, and easily deflected Dark’s belated attack.
After reaching the critical mass of Marine-Tank needed to overwhelm Roach-Ravager, Maru moved out to see how Dark’s defenses would hold up. Maru succeeded at razing a key base, but the timely arrival of Infestors halted the attack and brought the game to near standstill.
As we’ve seen in many Maru games, he abruptly shifted gears to a full-on defensive approach, looking to split the map and wait Dark out. Dark initially played Maru well, taking some decent exchanges with Roach-Ravager-Infestor and even sneaking a big Nydus attack into Maru’s main (which Maru comedically tried to defend with a Nuke in his own main). However, none of this was enough to really destabilize Maru, who gradually gathered Ghosts and further solidified his defense.
Eventually, Maru achieved the exact scenario he wanted, where the map was split and all the fighting could be concentrated into a few key areas he controlled. In the end, Vespene Gas was the fatal bottleneck for Dark, and he GG’d out after it was clear he couldn’t sustain the war of attrition.
Game Five – Babylon (Dark win): Maru gave his 2-Barracks play a rest, going for a Barracks-CC start instead. Dark opted for Roach play again, this time applying some light pressure off of 40 or so Drones, but ultimately settling into another macro game.
Maru was quite a nuisance with his Marines and Medivacs, but couldn’t stall Dark’s big 1/1 Roach-Ravager attack to a significant degree. This time, Maru tried to hold it off at his third base, but this resulted in him taking some painful losses and being forced to retreat to his natural anyway. Still, Maru kept himself in the game with counter-drops, and eventually established his third base and built up a powerful Marine-Marauder-Tank army with 2/2 upgrades.
Dark had added Infestors to his Roach-Ravager swarm, but wasn’t eager to meet Maru in a head-on battle. Instead, he stalled and sent Zerglings on a backdoor attack, which netted the shocking result of actually killing Maru’s Command Center (Maru committing the same error as Cure by not lifting a clearly imperiled CC).
That put Maru on the clock, needing to end the game or deal significant damage with his main army. Dark played the scenario out patiently, engaging and disengaging the Terran force in a series of battles that whittled it down. Eventually, Dark massed a big enough army to wipe out Maru’s forces completely, forcing his surrender.
Game Six – Gresvan (Maru win): Maru went back to 2-Barracks play, which turned out to be the right move as he managed to get 4 Drone kills with his first 3 Reapers. Perhaps due to that nice start, or perhaps just because he was playing on Gresvan, Maru followed up with some very passive macro play, aiming to go for a map split turtle game from almost the very start.
Dark went Roach-Ravager again, and unfortunately for him, didn’t find any mid-game window to realistically threaten Maru. He tried one big Roach-Ravager-Bane attack when he maxed out, but it couldn’t get through all the layers of Maru’s defense before being stonewalled. Nydus attacks failed to achieve anything either, and Dark was forced to match Maru in a slow-paced late-game slog.
However, Dark’s choice of Brood Lords did not work out at all for him, as Maru abused their immobility to keep them on permanent defense duty. That gave Maru all the time he needed to assemble a Ghost-Thor army, a great counter to Brood Lords that don’t have near-perfect support. Alas, even a master spellcaster user like Dark couldn’t give his Brood Lords the appropriate cover, with his Infestors unable to find an angle to assist without getting obliterated by Thor fire. Dark had nothing left in the tank after losing the climactic battle, and surrendered the GG to give Maru his seventh Code S championship.
- SEO Powered Content & PR Distribution. Get Amplified Today.
- PlatoData.Network Vertical Generative Ai. Empower Yourself. Access Here.
- PlatoAiStream. Web3 Intelligence. Knowledge Amplified. Access Here.
- PlatoESG. Automotive / EVs, Carbon, CleanTech, Energy, Environment, Solar, Waste Management. Access Here.
- BlockOffsets. Modernizing Environmental Offset Ownership. Access Here.
- Source: https://tl.net/forum/starcraft-2/614723-maru-wins-code-s-season-2-claims-7th-code-title
- 1
- 100
- 15
- 25
- 30
- 3rd
- 40
- 500
- 8
- 9
- a
- able
- About
- absolutely
- according
- achieve
- achieved
- actually
- add
- added
- advanced
- ADvantage
- after
- again
- Against
- aggressive
- ahead
- Aiming
- All
- allowed
- Allowing
- along
- already
- also
- Although
- an
- ancient
- and
- Another
- any
- Anything
- apart
- apply
- applying
- approach
- appropriate
- areas
- Army
- around
- arrival
- as
- At
- attempts
- auto
- away
- back
- backdoor
- barrage
- base
- based
- BAT
- Battle
- battles
- BE
- because
- been
- before
- began
- begin
- behind
- being
- BIG
- Bit
- blood
- blow
- blowing
- Blue
- bonus
- Boost
- both
- break
- bringing
- brought
- buffer
- build
- built
- Bunch
- but
- buy
- Buying
- by
- came
- capitalize
- capitalized
- Career
- carried
- caught
- Cause
- Center
- Championship
- changed
- chip
- choice
- choices
- claims
- clear
- clearly
- clinic
- close
- closer
- code
- collect
- combined
- come
- committed
- committing
- complete
- completed
- completely
- completes
- constant
- constructing
- content
- controlled
- conventional
- could
- couldn
- counter
- CounterAttack
- cover
- crisis
- critical
- cure
- damage
- damaging
- Dark
- deal
- death
- decided
- decision
- decisive
- Defense
- defensive
- defensive line
- degree
- delayed
- deploying
- desperately
- devastation
- DID
- different
- disaster
- do
- dominance
- don
- Doom
- door
- double
- down
- Dragon
- Drone
- Drones
- Drop
- due
- each
- eager
- Early
- easily
- Economic
- economy
- effectively
- either
- embedded
- end
- engaging
- enjoyed
- enough
- entire
- Essentially
- establish
- established
- even
- eventually
- Every
- evolution
- exactly
- Exchanges
- expansion
- expect
- Exploit
- extreme
- Failed
- familiar
- far
- FAST
- faster
- favor
- favorite
- few
- field
- fight
- Fighting
- Finally
- find
- Fire
- First
- Focus
- focused
- Following
- For
- force
- forced
- forces
- form
- Fortunately
- Forward
- four
- Free
- from
- front
- further
- futile
- game
- Games
- Gaming
- GAS
- gathered
- gears
- Get
- getting
- GG
- Ghost
- give
- Giving
- go
- goes
- going
- gone
- great
- Ground
- guard
- gun
- had
- half
- hand
- harassment
- Have
- having
- he
- head
- Health
- heavily
- held
- help
- here
- him
- Hindsight
- his
- HIT
- hits
- hold
- Home
- How
- however
- HP
- HTTPS
- huge
- hugely
- Idle
- if
- ii
- IMMEDIATE
- in
- inevitable
- info
- initial
- initially
- INSIDE
- instead
- into
- investment
- Investments
- Is
- IT
- Job
- join
- jpg
- just
- keep
- kept
- Key
- Key Areas
- Kills
- Land
- landscape
- large
- larger
- last
- launching
- lay
- layers
- lead
- Led
- left
- light
- like
- Line
- Little
- Long
- looked
- looking
- Lords
- losing
- losses
- lost
- lot
- Macro
- made
- main
- major
- make
- Making
- managed
- management
- many
- map
- Maps
- mark
- mass
- massive
- master
- Match
- matches
- meant
- Meanwhile
- meet
- Melee
- might
- mind
- mine
- minerals
- minute
- minutes
- mirror
- mistakes
- moment
- months
- more
- most
- move
- moved
- much
- multiple
- Natural
- nature
- Near
- nearly
- needed
- never
- Next
- Nice
- no
- None
- not
- nothing
- now
- number
- numbers
- of
- off
- offense
- offensive
- on
- once
- One
- online
- only
- open
- opening
- or
- order
- Other
- out
- outright
- over
- overcome
- Overlord
- own
- Passive
- Pay
- perhaps
- period
- pick
- Picked
- place
- plain
- planned
- plato
- plato data intelligence
- platodata
- platogaming
- play
- played
- player
- players
- Playing
- Playoffs
- Plenty
- Point
- poor
- position
- positioned
- potential
- power
- powerful
- prepared
- pressure
- prevent
- previous
- Production
- proved
- provided
- prowess
- proxy
- push
- put
- quality
- queens
- question
- quick
- quickly
- quite
- raid
- Ramp
- rather
- Raven
- Ravens
- reaching
- really
- regular
- remained
- repair
- Reputation
- response
- REST
- result
- Results
- Retreat
- return
- reverse
- right
- role
- Roulette
- Route
- royal
- rush
- s
- same
- saw
- scales
- scenario
- season
- season 2
- second
- see
- seemed
- seen
- send
- sent
- Series
- set
- setting
- settling
- seven
- severely
- shifted
- should
- show
- showed
- side
- sides
- significant
- Simply
- single
- situation
- SIX
- Size
- smoothly
- So
- so Far
- some
- Soon
- speed
- spend
- split
- stabilize
- Starcraft
- Starcraft II
- start
- started
- State
- steadily
- still
- stop
- straight
- Strategic
- Strategy
- strike
- strong
- stronger
- style
- succeeded
- success
- superior
- support
- Supreme
- sure
- surprise
- Sweep
- Take
- Take Two
- taking
- tank
- tech
- temporary
- terms
- thanks
- that
- The
- The Game
- their
- Them
- then
- there
- These
- they
- thing
- things
- third
- this
- threaten
- three
- Through
- Thus
- Tide
- tied
- time
- timing
- Title
- to
- too
- took
- total
- track
- trade
- transition
- tried
- truly
- try
- turn
- turned
- two
- typical
- ultimately
- unable
- under
- unfortunately
- up
- upgrade
- upgrades
- used
- User
- using
- ve
- very
- victory
- Vikings
- wait
- wanted
- war
- was
- wasn
- Wave
- waves
- we
- welcome
- well
- went
- were
- What
- whatever
- when
- where
- while
- WHO
- why
- wide
- will
- win
- window
- Wins
- wipe
- with
- without
- Work
- work out
- worked
- workers
- worth
- worthwhile
- would
- you
- youtube
- zephyrnet
- zero