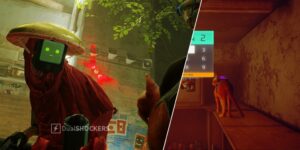
The cities of Dunwall and Karnaca are filled to the brim with hidden collectibles for Dishonored 2 players to discover. Many of these collectibles are locked within safes that are scattered throughout the game, requiring players to know their combinations in order to find the contents inside. While many games would allow players to easily get around these safes by simply Googling the combinations, Arkane Studios has made sure that players obtain the codes correctly.
There are ten safes for players to find in the game, and they all have randomized combinations. This means that players will have to find the codes hidden in their playthrough the intended way in order to get into these safes. Luckily, the respective codes can always be found in the exact same places.
Where To Find The Safe Codes In Dishonored 2
A Long Day In Dunwall


The first level, A Long Day In Dunwall, contains a single safe. After leaving Dunwall Tower, players will descend down to the streets and onto a large stone staircase. Head down and follow the street around to the left, heading into the leftmost open door. Once inside, take the first left into a small laboratory with a large painting up on the wall to the right. Grab the painting off the wall to reveal the three-digit code. The safe that this code opens can be found in this same room, to the left of the chalkboard.
Edge Of The World


The first of the two Edge Of The World safes is located on the third floor of the Overseer Outpost, in the Vice Overseer’s office. The safe is in the small room opposite the desk, while the code is in the adjacent room with the projector. To get the code, interact with the “Strictures to Keep You Safe” notes on the table, where three strictures will be listed. Memorize the first word of each stricture, then head into the room with the safe.
Interact with the book to the right of the safe titled The Seven Strictures, where seven strictures will be listed and numbered. To determine the code, take the three strictures that were listed in the notes and use their respective numbers as they’re listed in The Seven Strictures.
The second safe can be found a bit later in the level. Just before entering the station to reach the Carriage waypoint, head into the Winslow Safe Company Shop, located opposite the station. Inside, hug the left wall and continue to hug it until the main store area is reached. Blink forward to the front desk and interact with the cash register on the far right of the desk. Inside, the safe combination can be found. Backtrack just a few feet to the massive safe under the staircase. This is the safe that the three-digit code will open.
The Good Doctor


Like the previous level, The Good Doctor has two safes to be cracked. The first can be found upon entering the main lobby of the Addermire Institute of Infectious Disease, right at the beginning of the level. Once inside, take an immediate right and blink up to the balcony straight ahead. Take a right and head into the room, where the code can be found on the desk by the window. The safe that this code opens can be found in this exact same room. Simply head to the far end of the room, and the safe is front and center against the wall.
For the second safe, continue through the level until the objective is to speak with Alexandra Hypatia. After speaking to her, head into the operating room, then through the open green double doors into a lab. Head out the door in the back into another room where Vasco can be found on a stretcher. Speak with him and pay close attention, as he will say the code. Take the elevator down to Disease Treatment and take a left. Follow this hallway until the very end, going through the opening into an office. The safe can be found in the near right corner of the room.
The Clockwork Mansion


The only safe on Clockwork Mansion can be found after exiting sewers. Immediately after reaching the street level, take a left and cross the street, towards the stairs with the “Station” sign at the top. Follow the hallway to the left, and keep an eye on the upper left wall. Once the “For Rent” sign is reached, sneak under the wall and head up the stairs. Head through the first door and take a right. There will be a chalkboard on the right wall, with the first two digits of the code hidden behind a glass bottle.
Head into the door that is immediately opposite the chalkboard, into a small office, where the safe can be found in the back corner. Since only the first two digits are known, input those two into the safe and scroll the third dial until the correct digit is reached, and the safe will open automatically.
The Royal Conservatory


The code for The Royal Conservatory’s one and only safe must be purchased from the vendor for the black market. Upon reaching land, head up the stairs to find a signboard at the top. Head behind this board and take a left, going up a few steps, then down a flight of stairs to an open door. Head inside and through the door to the left to find the black market vendor. Here, the safe combination can be purchased.
The safe is located inside the bloodfly-infested building, which is across from the pub. It can be reached by jumping from the rooftop of the pub over to the balcony where bloodflies can be seen buzzing around, so head up to the rooftops and make the jump. Once inside, take an immediate left and follow this hallway into a small room, where the safe is in plain sight.
Crack In The Slab


Following The Dust District, the first level in the game to not feature a safe, Crack In The Slab has one for players to find in the manor. To get to it, head to the left of the entrance to the Great Hall (the area with the tree centerpiece) to find a few red lounge chairs. Left of these chairs is a back room with a partially opened door. Past that is a small room with a desk. Here’s where things get tricky.
Players need to crouch under the desk and use the transition device to transport to present day. Head out from under the desk and deal with the bloodflies. Transition again to the past and move the wolfhound corpse into the large incinerator, then press the red button. Transition back into the present day after incineration is complete and head back to where the infestation was. The safe door will be detached on the ground with its code visible. Transition once again and use this code to open the safe.
The Grand Palace


The Grand Palace is the final level in the game to feature safes, and it has two, with the first being quite early on. Before heading through the door to the Grand Palace, head through the open door to the left of it and go up two flights of stairs. Here, there will be a locked steel door with a small vent to the lower left. Shadow walk through it and traverse the vents until it exits into a small room. Head out of this room and take a right.
In this room, both the combination and the safe can be found. The combination is on the painting of the man in the small office corner. Inspect the painting and look over the man’s shoulder to see the code. This code opens the safe that is immediately opposite the office corner.
The final safe is located inside the Grand Palace, in the First Captain’s office, while the combination is found in the Duke’s office on the third floor. Head to the third floor using the elevator and take a right into the massive office. Walk up the steps and to the leftmost desk, where the First Captain’s Safe combination can be found on a note in plain sight. Return to the elevator and head to the bottom floor.
Take an immediate right, then right again through the doors between the two sculptures. Take yet another right and head up the staircase, then through the double doors. Head straight and towards the back right corner of this room, behind the desk, to locate the safe that the code opens.
- amazon prime gaming
- axie infinity
- Casino Games
- coingenius
- dishonored 2
- Dualshokers
- EA Sports
- Evil Geniuses
- Gaming
- gaming headset
- gaming pc
- Guides
- madden nfl
- Nintendo
- Online casino games
- pc games
- plato
- plato ai
- plato data intelligence
- plato game
- plato gaming
- platodata
- platogaming
- playstation
- prime gaming
- Team SoloMid
- xbox
- zephyrnet


